Are you looking to share your passion for food while boosting your income? Teaching online cooking classes is a wonderful way to do it!
Sharing your culinary expertise through online classes allows you to earn money flexibly and provides an incredible opportunity for keen learners to brush up on their cooking skills from home.
In this article, we’ll guide you through every step, laying out everything you need to know about running your own online cooking class, including the essentials of setting up an engaging curriculum, choosing the right platform for delivery, and practical strategies for marketing your online cooking classes. Let’s go!
How to teach an online cooking class: A step-by-step guide
You’re probably the friend everyone is asking for recipes and know-how around the kitchen. Well, now’s the time to share this knowledge and enthusiasm with the rest of the world!
This is a lengthy process, so grab a pen and a notebook, and let’s get started!
1. Establish your goals
Just as every delightful dish starts with a clear recipe, your journey to teach cooking classes online has to begin with clearly defined goals. For example:
- You want to quit your 9–5 and turn this into a full-time job.
- You love cooking and being around people.
- You want to explore and share the traditional dishes from your home country.
There’s no incorrect motivation, but what’s critical is outlining your course goals and setting these benchmarks at the outset. This provides a firm foundation for your course, guiding your decision-making at every step.
2. Find your niche
Your course could explore numerous themes: mastering advanced knife skills, crafting effortless meals for the time-crunched, diving deep into the intricate art of French pâtisserie, or unveiling the secrets of making fast-food favorites at home. For those who fancy a bold gastronomic adventure, you might consider ferreting out the world of fermented foods from Korea. The possibilities are endless!
While a certain level of experience can lend credibility to your class, remember, you need not bear a Michelin star chef’s apron to share your passion – Gino D’Campo is a great example. The charm and relatability of being an everyday home cook can often be the secret ingredient that makes your lessons resonate with learners.
Pinpoint an area of cookery that fuels your passion and where your unique insight can be of use. Honing in on a niche that aligns with your comfort and proficiency will create a smoother journey to find your audience and turn your culinary passion into a thriving online venture.
3. Define your target audience
Finding a niche you’re passionate about is crucial, but it’s not enough. There needs to be a demand for it, and you can find that out by completing thorough market research.
For instance, you could focus on Italian cooking and, through your market research, find considerable interest in veggie Italian recipes. This niche may have existing courses that provide unhelpful content, meaning you have a gap in the market to make your contribution.
Employ strategies like surveys, keyword research, and competitor analysis to better understand your audience’s needs and reveal the precise cooking skills your potential students want to learn.
Remember mapping out your target audience isn’t about modifying your passion to align with larger markets. Instead, it is about identifying the perfect harmony between your interests and what your students are eager to learn.
4. Plan your curriculum
Determine the topics you’ll delve into, what you’ll teach, and the recipes your students will master. This planning stage is of great importance, laying the firm foundation upon which you’ll build your course.
There is no need for technical details like the number of lessons or class duration to be clarified at this point. These varying elements can be finalized once your course platform is selected.
The main goal at this stage is to draft a comprehensive and flexible course outline. Additional resources could include teaching aids, reference materials, and guest speakers or demonstrators.
5. Choose a platform
Selecting the right platform to host your cooking courses is essential for your operational comfort and the quality of the student learning experience. Here’s a breakdown of some of the most effective options available:
- WordPress: WordPress, with its flexibility and customizability, holds a favorite spot among online tutors. You fully control your site design and content, allowing it to mirror your brand evolution. Use plugins like Sensei Pro or Learn Dash for content creation, WooCommerce for selling courses (unless your Learning Management System (LMS) plugin already has integrated payment gateways), and WP Recipe Maker to seamlessly design, curate, and share your course recipes.
Quick Tip: As your student base grows, consider creating downloadable lesson plans and pair them with your unique WP Recipe Maker-built recipes.
- ELearning platforms: Renowned as a no-code platform, Teachable facilitates straightforward course creation and selling. It’s an inviting alternative for those favoring ease of use, particularly beginners. However, the free version of the platform allows you to create only one course, while the rest of the tiers are paid.
- ELearning marketplaces: Virtual marketplaces like Udemy are popular destinations for a diverse learning community. With a pre-established structure, Udemy allows you to focus more on curating content and less on on-site maintenance. There are two transaction fees – 3% when a student purchases a course through an instructor’s coupon or referral link and 63% where no instructor coupon or course referral link was used.
- Membership platforms: Patreon offers an exciting proposition as a membership platform, offering courses on a subscription basis. While convenient, Patreon may also take a cut from subscriptions, typically around 5% to 12%.
- YouTube: Universal and freely accessible, YouTube makes for an excellent hosting platform for gratuitous or introductory cooking courses. Although monetization is possible through advertisements and sponsorships, direct course selling to students isn’t ideal through this platform.
- Zoom: Zoom might be your pick if interactive, real-time engagement is what you’re looking for. Besides hosting live cooking sessions, it can be used for lucrative workshops or one-to-one tutoring. Remember, you’ll still need a platform to promote and manage your courses – a website or a social media page could do the trick.
Teaching cooking courses through WordPress: A quick guide
WordPress is the perfect platform for people who like having complete control over their online business. It stands apart due to its abundant customization options and diverse plugins.
If you’re new to WordPress, here’s a quick guide to get you started:
- Register a unique domain name reflecting your brand. Ensure it efficiently describes the unique culinary journey students are about to undertake. You can use websites like Nameboy for inspiration.
- Select a sturdy web hosting provider offering WordPress hosting. A reliable host will ensure your website remains accessible, runs smoothly, offers excellent customer support, and provides regular backups.
- Install WordPress via your host. Most hosting providers offer simple one-click WordPress installations.
- Follow the prompts to set up your website. Integrate elements that improve user experience, such as easy navigation, clean design, and mobile responsiveness.
- Pick a responsive website theme. Opt for a WordPress theme with easy navigation and a clean design that will enrich the student experience.
- Install essential plugins. You can use WooCommerce to set up your online store and WP Recipe Maker to craft beautiful recipes.
- Configure your payment gateways and decide on course pricing. Determine your course’s value and ensure it covers the costs of running your online cooking classes.
- Create and upload your course content, including video lessons and written materials. Develop your unique cooking classes by filming your video tutorials, putting together course materials, and creating assignments.
- Add necessary interactive features, like quizzes or discussion forums. Pinpoint key aspects of your course that can boost engagement, making each student’s e-learning experience more rewarding.
A successful online cooking class is both educational and entertaining. It creates a community of loyal students who keep coming back for more
6. Setting your pricing
We mentioned that in our WordPress tutorial, but this step applies to every available platform. If you go for a website like Udemy or Teachable, consider the taxes and fees you’ll have to pay to be an instructor and sell on their platform. You need to make sure you’re making a profit and getting properly rewarded for your hard labor.
7. Building your website
Establish a website that does more than just host your courses. Prospective students should be able to learn more about what you offer, while current students should find it easy to sign up, pay for their classes, and access course materials. With page builders like Elementor (perfect for recipe websites), WordPress makes building such a website straightforward and efficient.
8. Gathering equipment and tools
Invest in high-quality equipment for your cooking demonstrations, filming, editing, and streaming. Consider platforms or tools such as Adobe Premiere Pro for editing videos or Twitch for streaming classes directly. To keep things in the same place, we recommend embedding your Twitch stream directly to your WordPress website or using a streaming WordPress plugin such as WPStream that allows you to put content behind a paywall. Also invest in a high-definition camera, good-quality microphone, and suitable lighting to enrich your students’ learning experience.
9. Creating your content
Besides filming the actual classes, spend some time creating engaging and informative written and video food content, focusing on crafting unique recipes and providing step-by-step instructions. Consider incorporating storytelling into your cooking lessons, adding a relatable element that would retain and engross students.
Many cooking masters also create digital cookbooks they promote on their websites and during classes. Besides following trends, it’s also a good idea to spend some time crafting evergreen content that will help SEO and keep your website relevant for the years to come.
Grow your cooking courses organically with WP Recipe Maker
WP Recipe Maker is more than just a tool for managing recipes – it takes online courses to the next level by providing a new dimension of engaging and interactive learning experiences. In the context of online cooking classes, recipes can function as practical assignments, motivating your students to apply their newly learned skills in their home kitchen.
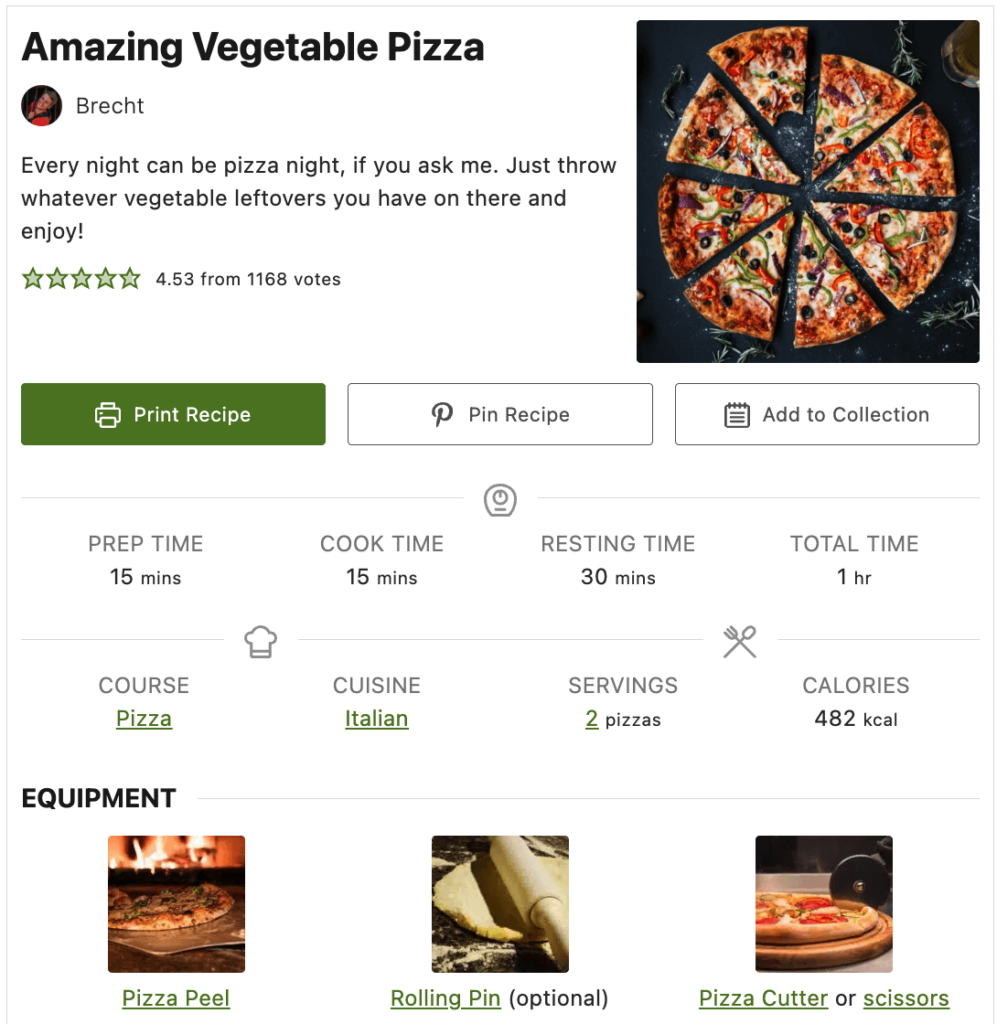
This is where WP Recipe Maker excels. It offers aesthetically appealing recipe templates that captivate your students, enhancing their learning experience and making them eager to return for more.
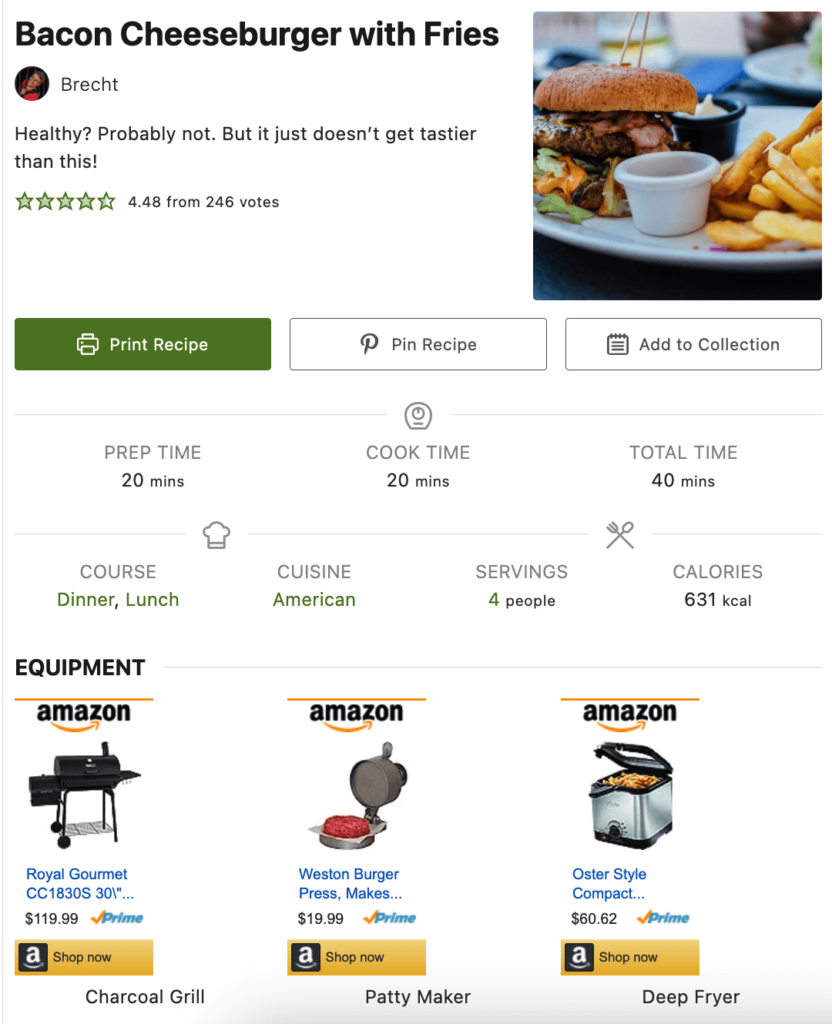
The recipe cards are also the perfect place to add more monetization opportunities, such as equipment affiliate links, and ads.
WP Recipe Maker also aids in enhancing your course’s visibility through its integrated SEO features, like automated recipe metadata.
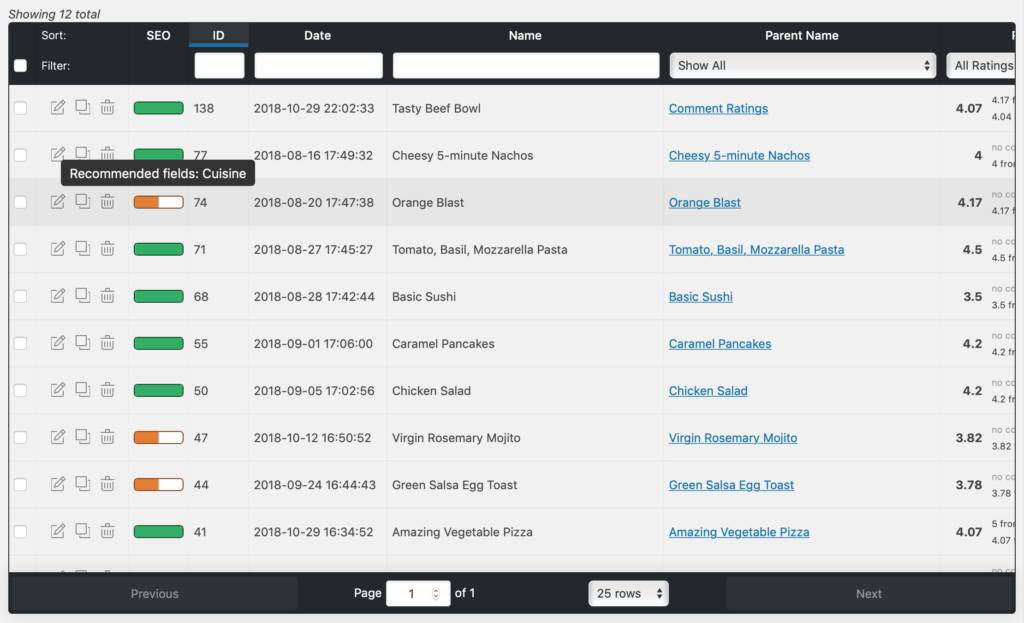
This function helps your cooking course rank higher on search engines, drawing in a wider audience. Potentially, this means more budding chefs enrolling in your online cooking school!
Step 10. Promote your course
Once your course and recipes are prepared and ready for instruction, it’s time to broaden your reach. You can opt for a range of popular methods like content and social media marketing through food blogging, including sharing your WP Recipe Maker recipes with broader website visitors. What many people do is offer a free introductory course that will entice students to sign up for the paid masterclass after completion.
Step 11. Engage with your students
Your task doesn’t end with teaching recipes and cooking techniques. Foster an interactive environment for your students through forums, Q&A sessions, and feedback surveys. Encouraging open conversations not only enriches your students’ learning experience but also cultivates a strong, loyal community. Over time, this community becomes a great source of word-of-mouth referrals, helping your online course reach a wider audience.
Step 12. Track your performance
The key to success lies in continuous improvement. Therefore, it’s crucial to evaluate your online cooking classes’ performance regularly. Carefully monitor key metrics such as student retention, feedback, and revenue to identify potential areas for improvement. Leverage this feedback and the insights from data analysis to refine your classes, advance their value, and expand your offerings to meet a wider range of culinary interests.
Expand your student base with WP Recipe Maker
Teaching cooking online is a very profitable and wholesome way to start earning extra money, but it also requires significant preparation and patience. The best thing about it is how it can be combined with other ventures like food blogging and sharing recipes in order to further increase your revenue.
Remember that the unique and engaging way in which you share your recipes is integral to the success of your online cooking courses. This is where the WP Recipe Maker plugin becomes an indispensable tool. WP Recipe Maker amplifies the learning experience for your students. Its user-friendly interface and appealing templates facilitate easy following and replication of recipes, bridging the gap between teaching and learning.
So don’t wait any longer and improve your online teaching experience with the WP Recipe Maker elite bundle today!

