Are you thinking of starting a cooking channel on YouTube?
You’re making a smart choice! YouTube offers an incredible platform for chefs, home cooks, and food enthusiasts to share recipes, build an audience, and even generate income.
Starting a cooking channel takes planning and effort, but with the right approach, you can stand out with a unique culinary perspective that connects with viewers and solves their real food-related headaches.
Ready to captivate and grow your audience? In this article, we show you how to build a thriving cooking channel, including:
- Defining your cooking channels’ USP.
- Creating binge-worthy video content.
- Developing multiple revenue streams along the way.
Dive into the proven strategies below to launch your YouTube food channel with momentum, authenticity, and everything you need to rise above the noise.
How to start a cooking channel on YouTube?
Step 1: Research and plan for success
Before you start creating videos, it’s essential to lay a solid foundation through research and planning. This preparation will help you create content that resonates with viewers and stands out in the crowded YouTube space.
Define your audience and choose a niche
Defining your target audience is critical for your YouTube cooking channel’s success. Consider demographics like age, gender, location, and dietary preferences.
💡Millennials watch around 30% more food content on YouTube than other age groups, making them an especially engaged audience that’s hungry for culinary inspiration, cooking tutorials, and food storytelling that aligns with their values of authenticity and practical skill-building.
Once you understand your audience, develop a unique selling point that differentiates your channel. Your niche should align with your cooking interests and skills. You might focus on specialized baking techniques, quick weeknight meals, or regional cuisines. Whatever you choose, this specialization should be reflected in your channel name, branding, and content to help you build a loyal audience.
Develop a presentation style and visual identity
With your audience and niche identified, develop a distinctive presentation approach and visual identity. Consider whether you’ll primarily use overhead cooking shots, face-to-camera segments, or creative angles that showcase your dishes. Your filming style could range from cinematic with careful lighting to authentic and casual, depending on your target audience.
Your on-camera persona is equally important – viewers connect with authenticity, whether that’s high-energy enthusiasm or calm, detailed instruction. The key is consistency in your editing pace, color grading, transitions, and even your kitchen backdrop. These elements create a recognizable brand that viewers will identify instantly, even before they see your channel name.
Analyze other successful YouTube channels
Study successful cooking channels to understand what works. Pay attention to their video formats, presentation styles, and audience engagement techniques. Look at how they film cooking processes, what camera angles they use, and how they explain techniques.

For inspiration, here are some popular cooking channels that succeed with distinct approaches:
- A Cook Named Matt: Combines professional chef expertise with an approachable style, blending cultural influences from his Mexican and Syrian heritage. His signature approach includes encouraging experimentation with flavors while providing practical cooking tips that work for home cooks.

- Jamie Oliver: Excels with his high-energy, simplified cooking style that makes professional techniques accessible to everyday cooks. His channel stands out through strategic collaborations with other chefs, focused 3-5 minute recipe tutorials, and themed content series that keep viewers returning for more.
Consider which elements from these successful formats might work for your own channel while keeping your content original. The goal isn’t to copy but to understand why viewers keep returning to these channels and apply those principles to your own videos.
Step 2: Set up for high-quality content
Once you’ve completed your research, it’s time to prepare for production. Setting up properly before you start filming will help ensure your videos are engaging, professional, and consistent.
Find and adapt recipes for video presentation
Start by building a collection of recipes that align with your channel’s niche. Begin with dishes you know well and can confidently prepare on camera. This familiarity will help you appear more natural in your first videos.
Look for inspiration in cookbooks, food blogs, Instagram food accounts, or family recipes, but always add your unique twist to make content original. If, like many food bloggers, you struggle with finding recipe inspiration, our article explaining how other food content creators find their ideas can help.
To adapt recipes for video, consider:
- Visual appeal – choose recipes with vibrant colors or interesting techniques.
- Time management – select dishes you can reasonably demonstrate within a 10-15 minute video.
- Complexity level – match recipe difficulty to your target audience’s cooking experience. If you’re talking to beginners, think more about one-pot pasta dishes than complex French pastries.
Remember to test recipes before filming to avoid surprises during recording and to ensure your instructions are clear and accurate.
Plan your first 5-10 videos for consistency
Consistency is key to building an audience on YouTube. Create a content calendar for your first 5-10 videos to ensure regular uploads and maintain momentum.
When planning your initial content:
- Start with a channel introduction video explaining what viewers can expect.
- Organize recipes into series (e.g., “30-Minute Meals,” “Weekend Baking”).
- Include a mix of complexity levels to appeal to different viewer needs.
- Schedule filming days to batch-create multiple videos efficiently.
- Plan uploads for optimal posting times (typically weekends or evenings).
Having this roadmap will help you avoid content droughts and establish a reliable posting schedule that viewers can count on.
Get the right equipment for cooking videos
You don’t need expensive gear to start, but certain essentials will improve your video quality significantly. For cooking videos, focus on these key items:
Basic cooking tools:
- Matching cookware and utensils for a cohesive visual look.
- Clean, simple cutting boards and prep bowls.
Filming equipment:
- Camera – a good smartphone can work for beginners, or invest in a basic DSLR for better quality.
- A tripod or stabilizer to prevent shaky footage.
- Simple lighting setup – natural light or affordable LED panels.
- Microphone for clear audio (crucial for cooking instructions).
As your channel grows, you can gradually upgrade your equipment. The most important factors are clear visuals, good lighting, and quality audio so viewers can easily follow your recipes.
Step 3: Shoot and edit your first cooking video
With preparation complete, it’s time to create your first cooking video. This is where planning meets execution – focus on quality while keeping things manageable.
Keep it simple and get started
The most important step is to actually begin filming. Many aspiring YouTubers get stuck in endless preparation, but the best way to improve is through practice. For your first video:
- Choose a straightforward recipe you’re comfortable with.
- Set realistic expectations – perfection isn’t required.
- Focus on clear instructions rather than complex production.
Even established cooking channels started with simpler content before refining their style. As Brian Lagerstrom, who now has 1.6 million subscribers, admits in its Insidehook interview, ‘It took me a long time to figure out how to make a video that wasn’t totally shitty.’ Everyone starts somewhere and improves with practice.
Filming techniques for engaging food videos
Creating appetizing cooking videos requires attention to several elements:
- Capture multiple angles: workspace shots, technique close-ups, and ingredient details.
- Include enticing food sounds like sizzling and chopping.
- Film in natural light when possible to showcase food colors accurately.
- Keep your background clean to maintain focus on the food.
For more detailed guidance on filming techniques and equipment setup, check out our step-by-step guide to making cooking videos at home.
Edit like a pro: Best tools & quick fixes
Good editing transforms raw footage into an engaging video. Here are some tools we recommend:
Beginner options: Smartphone apps (InShot, KineMaster) or basic computer software (iMovie, Clipchamp).
Advanced options: Adobe Premiere Pro or Final Cut Pro.
When editing, cut unnecessary pauses, add text overlays for ingredients, and consider adding background music. Pay attention to pacing – your video should maintain interest while still allowing viewers to follow instructions.
Step 4: Promote & stay consistent
Once your video is edited and ready to share, it’s time to publish and promote it effectively. Consistency and strategic promotion are key to growing your cooking channel.
Optimize titles, descriptions & tags for growth
YouTube is the world’s second-largest search engine, so optimization is crucial for discovery:
- Create compelling titles that include your main keyword (e.g., “Easy Homemade Pizza Dough for Beginners”).
- Write detailed descriptions that include relevant keywords, ingredients, and timestamps.
- Add tags that relate to your recipe, cooking style, and cuisine type.
- Design eye-catching thumbnails that show the finished dish clearly.
- Include relevant hashtags (limit to 3-5) to improve discoverability.
Remember that YouTube rewards videos that keep viewers watching, so focus on retention-boosting elements like teasing upcoming steps or promising valuable tips at the end.
Engage viewers & build a loyal audience
Building a community around your cooking channel helps create loyal subscribers:
- Respond to comments promptly and thoughtfully.
- Ask viewers questions in your videos to encourage engagement.
- Run polls in community posts to involve your audience in future content decisions.
- Feature viewer recipe attempts or recommendations in future videos.
- Create playlists that group similar recipes for easier navigation.
Engagement signals help YouTube’s algorithm promote your content to more viewers, creating a positive growth cycle for your channel.
Stick to a posting schedule that works for you
Consistency builds audience expectations and trust:
- Choose a realistic posting frequency based on your available time (weekly is often sustainable for beginners).
- Communicate your schedule to viewers so they know when to expect new content.
- Use YouTube’s scheduling feature to upload videos in advance.
- Batch filming and editing sessions to create multiple videos efficiently.
Quality matters more than quantity, especially when starting out. It’s better to maintain a consistent but manageable schedule than to burn out trying to post daily videos.
“Consistency builds trust and I can’t think of anything more valuable than the trust when it comes to building a community.” – Dani Spies, 2.26M subscribers with Clean and Delicious.
Monetizing your cooking channel: turning passion into profit
Once you’ve established your cooking channel and started building an audience, you can begin exploring monetization strategies. Many successful food content creators earn substantial incomes through multiple revenue streams.
YouTube Ads, sponsorships & affiliate marketing
The most direct way to monetize your YouTube cooking channel is through the YouTube Partner Program, which becomes available once you reach 500 subscribers and 3,000 watch hours. This program allows you to:
- Earn from ads that play before and during your videos.
- Receive Super Chat and Super Thanks payments from viewers.
- Access channel memberships for recurring revenue.
Beyond YouTube’s built-in monetization, you can pursue sponsored content partnerships with food brands and kitchen equipment manufacturers. These sponsorships can become more lucrative than ad revenue as your channel grows.
Affiliate marketing offers another powerful income stream. By recommending cooking tools and ingredients with your unique affiliate links, you earn commissions on resulting sales. Be authentic with your recommendations to maintain viewer trust.
Sell Digital Products: eBooks, Online Classes & Exclusive Recipes
Your expertise is valuable beyond free YouTube videos. Consider creating:
- Digital cookbooks featuring your most popular recipes.
- Online cooking classes with in-depth instruction.
- Meal planning resources tailored to your cooking style.
- Recipe cards and printables for your audience.
These digital products require initial effort but can generate passive income for years afterward with higher profit margins than physical products.
Merchandise & Brand Partnerships
As your channel grows, merchandise becomes viable and you will have access to YouTube Shopping to connect your own store or other brands to your channel. You could sell:
- Branded aprons, oven mitts, and kitchen towels.
- Custom spice blends or ingredient kits.
- Cooking tools designed to your specifications.
- Or even branded clothes like the famous food traveler Mark Wiens with more than 11M subscribers.
Building relationships with kitchen brands can also lead to collaborative product lines that provide royalty income.
Pro tips for growing & scaling your YouTube cooking channel
Building on the fundamentals, these strategies will help you expand your audience and establish yourself as an authority in the food content space.
1. Stay on top of food trends without losing your identity
While food trends can boost visibility, they should complement your channel’s core identity. Evaluate whether each trend aligns with your brand and audience expectations before incorporating it. The key is adding your unique perspective rather than simply copying viral formats. Use trending topics strategically to attract new viewers, then retain them with your signature content. Successful channels balance timely content with evergreen recipes that continue to drive traffic long after trends fade.
“People are following you for YOU, so be yourself and give them content that will help them in their everyday life!” – Alyssa Rimmer, 513K subscribers with Simply Quinoa.
2. Collaborate with other food creators & brands
Partnerships naturally expand your reach by introducing your content to established audiences. Look for collaborators with complementary cooking styles and similar-sized followings for mutually beneficial projects. Brand sponsorships can provide both income and exposure when they feel authentic to your existing format. Guest appearances on other channels offer excellent opportunities to showcase your personality and unique cooking approach to new potential subscribers.
Squarespace, a website-building platform that invests heavily in YouTube partnerships for promotion, regularly sponsors food content creators like Babish Culinary Universe (10.4M subscribers) and Adam Ragusea (2.55M subscribers). These partnerships work because creators authentically integrate the sponsor into their content while showcasing how they use Squarespace to build and host their recipe websites, generating millions of views while maintaining audience trust.
3. Analyze your data to improve & grow
YouTube Studio provides powerful analytics that can guide your cooking channel’s growth. Pay attention to these key metrics:
- Watch time: Helps identify which recipes keep viewers engaged longest, – whether it’s quick weeknight meals or complex baking tutorials
- Audience retention graphs: Show exactly where viewers drop off, helping you identify if intros are too long or certain techniques need better explanation
- Traffic sources: Reveal how viewers discover your videos – through YouTube search, suggested videos, or external websites
- Demographic information: Provides insights into your audience’s age, location, and viewing habits
Look for patterns in which recipe types perform best and whether seasonal content (like your famous pumpkin pie) shows predictable spikes in viewership.
While these analytics provide valuable data, don’t neglect the qualitative feedback in your comments section. Viewers often request specific recipes, ask questions about techniques, or share modifications they’ve made – all valuable insights for planning future content.

“Listen to your audience! Read your analytics to see what’s doing well and focus on doing more of that. Ask your audience for feedback and what they want to see more of and respond to that.” – Abbey Sharp, 732K subscribers with AbbeysKitchen.
4. Expanding beyond YouTube: Food blogs, social media & multi-channel influence
Diversifying across platforms creates multiple entry points for potential followers and reduces your dependence on a single platform. Data shows that multi-channel food influencers can earn significantly more – averaging $45,000-55,000 monthly compared to $5,000-15,000 for successful single-platform creators (with 100,000 subscribers).
A food blog serves as an excellent companion to your YouTube channel, providing detailed written recipes that complement your videos while giving you complete ownership of your content. Unlike YouTube, where algorithm changes can dramatically affect visibility, your blog remains under your control.
Popular other platforms to consider:
- Instagram: Perfect for sharing beautiful food photography and recipe previews.
- TikTok: Ideal for short, viral-friendly cooking techniques and recipe hacks.
- Pinterest: Drives significant traffic to food blogs through recipe pins.
Cross-promotion between platforms creates a cohesive brand experience while reaching different audience segments. Though managing multiple platforms demands more time, the added resilience and income potential make it worthwhile for those serious about becoming an influencer in the food and cooking space.
How to embed YouTube cooking videos into your recipes with WP Recipe Maker
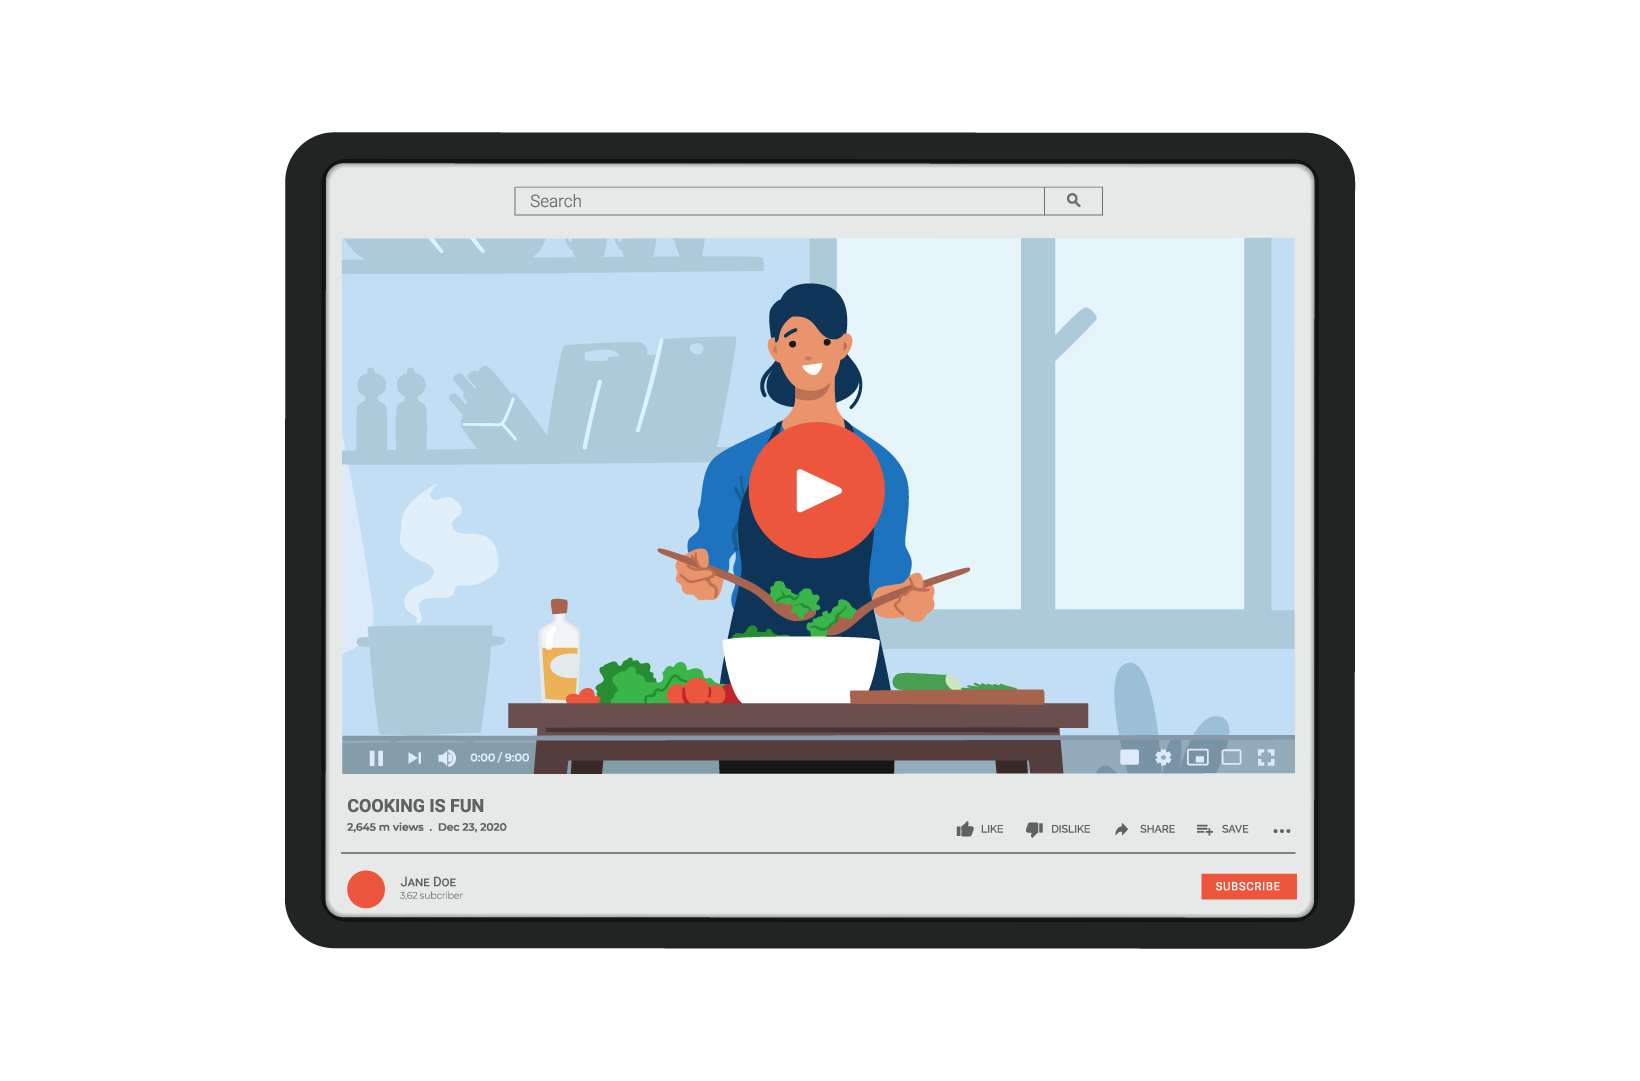
While building your cooking channel, you’ll want to maximize your content’s reach. WP Recipe Maker offers an elegant solution for food bloggers who want to showcase their YouTube videos on their blog alongside written recipes.
The plugin makes embedding your cooking videos simple – just paste your YouTube video link into the recipe editor, and WP Recipe Maker automatically adds it to your recipe card.
The video appears inside a professionally designed recipe box that includes ingredients, instructions, and nutritional information – everything your audience needs in one place. See below:


WPRM offers significant advantages beyond just displaying your videos:
- Cross-platform promotion: Helps viewers find your content in multiple formats, improving time spent on your blog (boosting SEO).
- Monetization opportunities: WP Recipe Maker’s affiliate integration automatically adds your affiliate links whenever specific ingredients or equipment are mentioned.
- Professional presentation: Recipe cards improve user experience, encouraging visitors to return to your site.
- Traffic growth: Creates a smooth path from YouTube to your website and vice versa, amplifying your reach across platforms.
As your YouTube channel grows, your website traffic will benefit too, creating a powerful synergetic system that amplifies your reach while opening additional revenue streams beyond YouTube’s native monetization options.
Ready to start your cooking channel on YouTube?
Starting and running a successful cooking channel on YouTube can be an exciting and rewarding journey. By following the steps outlined in this article, you’ll be well on your way to sharing your culinary passion with the world.
Remember that it’s important to incorporate other channels into your growth strategy, and a food blog is particularly useful. If you’re running a food blog on WordPress, the WP Recipe Maker plugin will be an invaluable tool in your arsenal, helping you embed your YouTube videos in stunning recipe cards on your website.
Get the most out of your YouTube videos by trying WP Recipe Maker today!


I would love to start a YouTube Cooking Channel.
I would love to start my cooking on you tube. As I am a very good cook. I would like to share my recipes with people.
j’aimerais cuisiner sur YouTube je suis une très bonne cuisinière j’aimerais partager mes recettes avec les gens