Are you an aspiring food YouTuber or a passionate cook? Have you struggled with getting the correct lighting setup for your videos, making your food look dull?
You’re definitely not alone! Most beginners rely on natural lighting for their videos because of the lack of resources but if you want to have more control and advance as a videographer, you need to master artificial lighting as well.
In this article, we’ll show you the different types of lighting and the equipment you’ll need for an artificial light setup. We’ll also give you some handy tips on how to make the most of your food videos and how to complement your vlog with a cooking blog.
Choosing the best lighting and equipment for food videography
Starting with the basics, let’s break down the different types of lighting and the right equipment to help you achieve the best possible results when filming for your food vlog.
Natural vs. artificial lighting: Which should you use?
Whether you’re starting as a photographer or videographer, the first question that pops out is whether you should go for natural or artificial lighting.
Let’s take a look at both.
☀️ Natural lighting
?Artificial lighting
✅ Is completely free and available.
✅ Offers complete control over intensity and color temperature.
✅ It makes food look natural and creates golden hues.
✅ LED panels and ring lights can mimic natural light – so you can shoot any time of day.
❌ Isn’t always reliable. Weather can change at any time, making taking photos harder.
❌ Initial investment is needed for lighting.
❌ Constant camera adjustments are needed.
Your choice depends mainly on your specific shooting environment, filming schedule, and the visual requirements of your project. In general, as a professional, you need to be able to adapt to different shooting environments, and the only way to do that is through a good artificial lighting setup.
Artificial lighting solutions: Softboxes, LED panels, and beyond
If you’ve decided to try artificial lighting, the next step is choosing the right equipment.
Softbox
A softbox is essential in cooking videos, transforming harsh light into a soft, natural glow that flatters food. Its size and shape matter; larger softboxes soften shadows and highlight details, making dishes look more appetizing, while specific shapes like rectangular or octagonal influence the light’s quality and direction.
Positioning is key: angled at 45 degrees to the food, it enhances textures and colors without overwhelming shadows. This setup, mimicking window light, is ideal for showcasing culinary creations in their best light. Proper use of a softbox, in combination with strategic placement relative to the food and camera, ensures professional-looking, appetizing results in food videography.
Look for a model like the Octagon Softbox 48” with a large area and even light dispersion.
Place it slightly off-center, across, and slightly higher than your cooking spot to illuminate your workspace without the light appearing heavily artificial.
For dishes cooked in a pot or slow cooker, a slightly higher light position effectively combats shadows that can form in deeper dishes.
LED panels
LED panels are crucial for cooking videos, offering adjustable color temperatures (typically ranging from warm 3200K to cool 5600K) to mimic natural light or create a mood. Their brightness and color settings can be fine-tuned, ensuring the food looks vibrant and true to color.
When used alongside diffusers or reflectors, LED panels can eliminate harsh shadows, adding depth without flat lighting. Positioning them at varying angles with other light sources creates dynamic, visually appealing scenes. This flexibility makes LED panels invaluable for achieving professional, appetizing culinary shots.
Ring lights are great for cooking videos, casting an even, flattering light that reduces shadows on the presenter’s face, ensuring clear, engaging visuals. Their circular design envelops the subject, offering consistent illumination ideal for both direct-to-camera pieces and top-down shots of food, where they highlight texture and color without harsh shadows.
By positioning a ring light directly above the food or in front of the presenter it enhances detail and vibrancy, making dishes look mouthwateringly delicious. Compact and versatile, ring lights like the Sensyne 10’’ ring light are perfect for creators looking to elevate their culinary presentations with professional, appetizing imagery.
Reflectors
Reflectors are an effective tool to manipulate light and shadow, enhancing the natural appeal of culinary creations. By bouncing light onto the subject, reflectors soften shadows, enrich colors, and bring out textures, making dishes look more vibrant and appetizing.
They are particularly useful for balancing light in scenes where one side of the food might be too brightly lit or overly shadowed, ensuring a harmonious, well-lit presentation.
You can buy a reflector, like the WELLMAKING 32-inch (80cm) model, or you can make one yourself by using a large piece of white cardboard.
Diffusers
Maybe you’re shooting near a window that occasionally sends in strong, uncontrolled light, or you have a bright light source that seems rather harsh. In that case, you need a light diffuser like the Photography Light Diffuser Panel.
Placed between a fierce light and your cooking scene, a diffuser gently scatters light, causing it to approach your food from different directions, softening shadows and lowering contrast. Although a softbox is great at diffusing light, a standalone diffuser proves handy for extra control in tackling various lighting conditions.
?Tip: Start with a basic kit containing LED lights and reflectors and gradually explore additional tools such as softboxes or ring lights to add depth and dimension to your lighting setup. As you grow more comfortable, feel free to adjust and experiment with light sources and directions to try casting interesting shadows and highlights on your food.
DIY lighting hacks for food vloggers on a budget
Besides the obvious choice of looking for second-hand equipment, here are some practical DIY lighting hacks that you can implement in your food video setup:
White sheet or paper as diffusers and reflectors: When positioned against your light source, a white sheet of paper can help soften the intensity, reducing unwanted shadows and providing a natural, flattering light on your subject.
Aluminum foil as a reflector: By tilting your aluminum foil at different angles, you can adjust how much light is reflected onto your food, thereby controlling the intensity and focusing on the highlights of your dish.
Baking parchment as a diffuser: Hold it against your primary light source to spread light evenly across the area you’re filming, bringing out the appetizing details of your dishes.
Floor/desk lamps as a light source: Just switch the standard bulb to one that mimics daylight and strategically place these lamps around your workspace for a bright and natural effect.
DIY Softbox: Constructing a homemade softbox using a cardboard box and white fabric can give you a diffuse, soft light source. Place your DIY softbox at a 45-degree angle to your setup for optimal lighting.
Essential lighting techniques for dynamic cooking videos
These techniques will help you improve your food videography by adding an extra zing to your food videos.
The importance of three-point lighting
Three-point lighting is an essential technique that uses three distinctive lights, each fulfilling a vital role.
Key light: Usually placed 45 degrees from the camera and directed 45 degrees down onto the subject. It’s the main light source and typically the most brilliant, illuminating the central subject meticulously.
Fill light: This is frequently a reflector bouncing the light back onto the plates, hence softening the shadows caused by the primary source.
Backlight: It’s placed behind the object, and it carves it from the backdrop, adding depth to your footage. Implementing this technique gives your objects a visually stimulating 3D appearance.
Using diffused lighting to heighten natural textures
Diffused lighting can accentuate the natural textures of food. It scatters light evenly, softening harsh shadows while preserving the necessary illumination. This creates a magical effect, highlighting natural textures and details and making your food stand out.
Utilizing accent lighting for highlighting
Accent lighting employs light onto the specific components of the dish, shedding a spotlight on them and creating a visually striking experience. Be it the luster of a glossy sauce or the crackled crust of a well-baked pie, accent lighting ensures no detail goes unnoticed by your audience.
With these lighting techniques, you can escalate the quality of your videos and add an appealing charm to your dishes without needing to invest in high-end equipment. At the end of the day, it’s not about the tools you hold but how you use them.
Managing reflections with polarizing filters
Polarizing filters, attached directly to your camera lens, operate in a similar way to sunglasses, effectively reducing glare in your footage. Such filters prove incredibly beneficial when filming shiny objects like pots, utensils, or the glossy surface of broths and sauces.
In the case of food videography, without a polarizing filter, your stainless-steel utensil may produce a bright flash of light, distracting the viewer. After applying the filter, the same utensil adds to your video’s aesthetic, reflecting light smoothly without any overbearing glare. Remember, the filter’s effect can change as its degree of rotation changes, so it’s essential to adjust it for each shot.
Understanding color temperature and white balance
Color temperature significantly impacts how your food appears on camera. Particularly when working with natural light, you must adapt to different hues cast at varying times of day.
When filming under artificial lighting, choose bulbs with a cooler, daylight color temperature, ideally between 5000-5300 Kelvin. These bulbs replicate natural daylight, enabling the most appetizing look for your food.
Turn off ambient lights
Ambient lights, like overhead lights or lamps, often cast an orange hue, disrupting your video’s color balance. So, if you’re relying on natural light or precisely calibrated artificial light sources, make sure all similar lights are turned off.
Choosing the right clothing
Surprisingly, the color of your attire can influence your cooking video’s overall look. White, black, or brown clothes minimize the risk of mismatched color reflections. Aprons or chef coats, resonating with the cooking theme, are pragmatic options that avoid color casts.
Next steps: Implementing your lighting knowledge
In food photography, shadows can add drama and contrast, but when it comes to videography, our goal shifts to maintaining clarity and detail in every frame, avoiding the loss of important visual information to unwarranted shadows.
Here are some essential tips:
Experimentation is crucial in determining what lighting works for you, but remember that the smallest adjustments can often make the most significant impact. For instance, slightly tilting a reflector can soften shadows without compromising the texture and color of your dishes.
Begin with the three-point lighting setup and then start experimenting to see what works best for you.
When planning overhead shots or unique angles, you might have to reposition lights to achieve the best lighting for each specific shot.
Watch out for glare from shiny kitchenware. If you encounter distracting reflections, try angling your utensils slightly away from direct light or drape a non-reflective cloth over reflective surfaces when not in use.
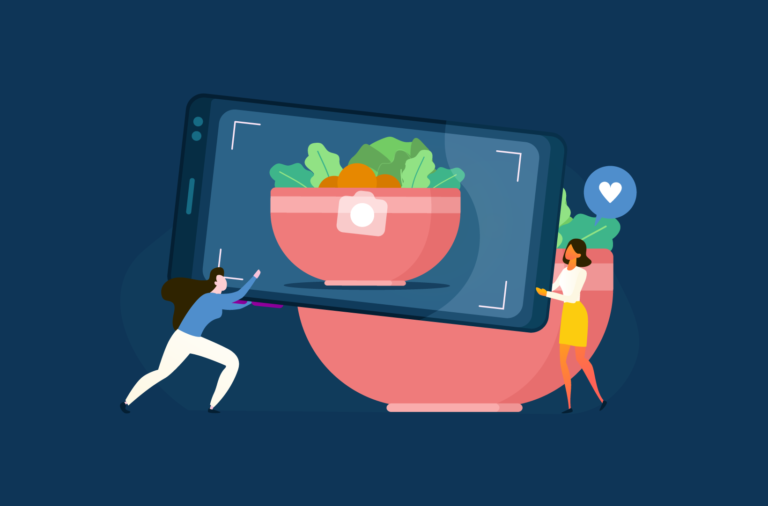
Maximizing viewer engagement and video success with a food blog
Enhancing your lighting setup can transform your cooking videos. But if you want to increase your engagement even more and reach out to other audiences, we recommend creating a food blog.
“Integrating high-quality video content into a food blog significantly amplifies key performance metrics. Videos enhance user engagement, prolonging on-page time as audiences immerse themselves in dynamic culinary experiences. Improved retention rates and increased social shares stem from the captivating nature of videos, leading to higher traffic and improved SEO rankings. Ultimately, this multimedia strategy drives stronger metrics in terms of user interaction, site traffic, and overall blog performance.”
A tool that can assist in streamlining this process is the multifaceted plugin WP Recipe Maker. This is a WordPress plugin that can be used to create eye-catching and interactive recipe cards.
SEO-friendly recipe metadata: Enhance your content’s visibility on search engines by including essential information, such as nutritional information, cook time, or serving size. This data will appear as rich search results, significantly increasing your content’s reach and clicks.
Adjustable servings feature: Allowing users to customize recipe sizes caters to varying user needs and results in a personalized culinary experience, fostering increased interactions and repeat visits.
Food photography is an essential part of any food blog or website. It helps you showcase your recipes in a visually appealing way, which can, in turn, help you increase traffic and sales. The right backdrop or surface can make a huge difference to your photos – it makes them look professional and attractive, which…
You found a recipe you loved, made it your own, and now you’re ready to publish it. But then you start wondering: should you credit the person who came up with the recipe, and if so, how should you phrase it? If you’ve searched this before, you’ve probably seen a mess of mixed advice. Some…
Want to make your food shine on Instagram? Food Reels are the way to go. If you do it right, Instagram Reels can help you show off your cooking skills and attract more followers. In this guide, we’ll show you step-by-step how to make great food reels. You’ll learn how to pick what to film,…
Ever had one of those food photography days where the sun just doesn’t want to cooperate? One minute, it’s casting harsh, unflattering shadows, and the next, it’s gone, leaving your dish looking dull. While natural light can be unpredictable, it’s also one of the best tools for creating vibrant, professional-quality food photos. Natural light brings…
Bakers, chefs, and casual home cooks are always searching for new recipes to try. As they browse through different sites, what often stands out first isn’t the recipe itself but how it’s formatted. A recipe’s layout can make or break the experience, determining whether it’s easy to follow and worth returning to. And it’s not…
The nutrition world has changed. You don’t need a physical practice or a full calendar of one-on-one clients to earn a solid income anymore. From recipe-focused blogging to selling digital meal plans, modern nutritionists and wellness experts are building online businesses that work around their lives, not the other way around. If you’ve got nutrition…