Flat lay food photography is a technique where food is arranged on a surface and photographed from directly above, offering a clear, organized view of the dish. It’s perfect for everything from social media content to blog posts, giving food bloggers and creators a way to display their dishes in an eye-catching, professional way.
Sure, what makes a great flat lay stand out is technical skill, but it’s also the story behind the shot. A well-arranged flat lay can tell someone a lot about the ingredients, cooking process, and even the mood of the dish. The bird’s-eye view captures the relationship between the food elements, while props and color schemes create an emotional connection with the viewer, drawing them into the experience. Achieving a perfect flat lay requires both tech know-how and a creative touch, from lighting to composition, and we want to help you with it!
Advanced tripod and camera setup for perfect overhead shots
To capture that perfect flat lay shot, having the right gear in place makes all the difference. Here’s how to set up your camera and tripod for crisp, professional-looking photos every time:
Tripod setup
Horizontal arm tripod
When shooting from above, you’ve got to be stable. A tripod with a horizontal arm is your best bet here, keeping the legs out of the frame and allowing you to capture everything from a clean overhead view. Manfrotto tripods are highly recommended for their sturdiness and smooth functionality. As Ania Elias, a food and lifestyle photographer, explains:
“The first time I tried the Manfrotto 055 carbon fibre 4-section tripod, I instantly knew it was a keeper. Not only is it stronger and more stable than its aluminium counterparts, but it’s also lighter, making it easier to transport within the studio and in the field. It’s also extremely rigid, and I love the Quick Power Lock levers for the leg sections – it makes assembly incredibly speedy!”
Boom arm or overhead rig
For more flexibility, try a boom arm or overhead rig. These allow you to position the camera directly above the food without the tripod legs obstructing the shot. Brands like Glide Gear and Proaim offer overhead rigs designed specifically for this type of work. If you’re on a budget, no worries – just place the food on the floor and make sure you’re shooting directly from above at a 90-degree angle.
Camera equipment
For food photography, a DSLR or mirrorless camera is your best bet. These offer high image quality and the flexibility to adjust settings manually for precise control over your shots. Nikon D850 or D750 are excellent choices, known for their sharpness and reliability, making them ideal for capturing the vibrant details in your flat lay compositions.
The right lens can also elevate your food photography by bringing out textures, sharp details, and beautiful depth. Here’s a quick guide on which lenses to use:
- Prime lenses (50mm, 85mm): These lenses are perfect for capturing crisp, clear images with that beautiful, blurred background (also known as bokeh). They’re great for making the food the focus of the shot, with minimal distractions.
- Macro lenses (100mm): Want to highlight the intricate textures and details in your ingredients? A macro lens is ideal for close-up shots, allowing you to capture the fine details.
- Wide-angle lenses (24mm, 35mm): When you need to capture a broader scene, especially in flat lay photography, a wide-angle lens helps you fit more into the frame without compromising image quality. Perfect for those large spreads or when you want to show a variety of props around the food.
| 🔖 Camera settings to bookmark Aperture: Set your aperture between f/5.6 to f/8 to keep everything in focus. ISO: Keep the ISO low (100-400) to minimize noise. Shutter speed: Use a shutter speed of at least 1/125 sec to avoid blur. Check out our detailed camera selection guide. It’s packed with insights to help you choose the perfect gear for capturing perfect shots! |
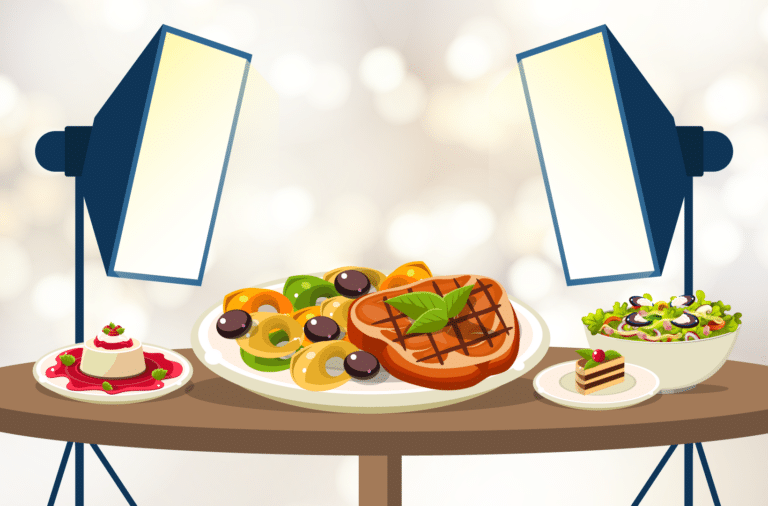
Master natural and artificial lighting for overhead shots
Lighting is everything when it comes to flat lay photography. It’s what makes the food look fresh, vibrant, and just downright appetizing. You have a couple of options:
Artificial lighting
- Softboxes & LED lights: These are perfect for creating soft, even lighting that mimics daylight. They won’t overwhelm your food, and they give your photos that clean, professional vibe. It’s like having a little studio set-up in your own space.
- Light positioning: To make your food look its best, place your light at a 45-degree angle. This gives depth to your shot and helps you avoid those flat, lifeless shadows. And if you really want to get fancy, use two lights – one as your main light to illuminate your food, and a second to fill in the shadows.
- Diffusers & reflectors: Don’t let harsh lighting ruin your shot. Use a diffuser to soften it. Just place it in front of the light source, and it’ll give your food that soft, flattering glow. Reflectors are great for bouncing light back onto your food, helping to lift those shadowy spots and making the whole scene look evenly lit.
- Warm vs. cool light: Depending on the mood you’re going for, you can use warm light (3000K-4000K) for a cozy feel, or cool light (5000K-6000K) for something fresher and more natural.
🔗 If you want more details on how to perfect your lighting, we’ve got a whole guide to help you fine-tune your setup.
Natural lighting
- Best time of day: Morning and late afternoon are the sweet spots for natural light. The sun is soft and warm, which is exactly what you want for flattering food shots. Avoid midday light, as it’s too harsh and can create strong, unflattering shadows.
- Positioning: Set up near a large window to take advantage of that soft, diffused light. If it’s too bright, use a sheer curtain to soften it – trust us, it works wonders.
- Diffusers & reflectors: Even with natural light, reflectors and diffusers can help you control how the light falls on your food. A reflector bounces light back onto your food, while a diffuser softens it. Both are key to keeping everything evenly lit.
It’s not always smooth sailing when it comes to lighting, though. There are a few challenges you might run into. But don’t worry, here’s how to handle them:
- Reflections on metal or glass: Shiny surfaces can be a bit of a nightmare with reflections and glare. If you’re seeing too much shine, try using a polarizer or simply shift your angle. A slight adjustment can make all the difference.
- Shadows from tall items: Tall items like glasses or stacked food can cast harsh shadows on the rest of your spread. If this happens, just move things around a bit – adjust the height or angle of those taller items, and you’ll find the shadows disappear.
- Lighting larger setups: When you’ve got a big spread, getting consistent lighting across the entire scene can be tricky. Use a larger diffuser or set up multiple light sources. This will help to make sure everything is lit evenly without any dark spots.
- Emphasizing texture: Foods that are similar in color (like pasta or bread) can look a little flat if you don’t give them the right lighting. Side lighting is great here – it’ll help bring out the texture, making those small details pop and your food look extra inviting.
It’s all about trial and error, but with a little patience and some tweaks, you’ll have those perfect shots in no time!
Choosing food props and backgrounds that tell your recipe’s story
The trick to creating a good flat lay photo isn’t just about the food, it’s about building a scene that brings your dish to life. The right props and background can completely transform your shot, adding depth, context, and personality. Here’s how to select the perfect elements for a story-worthy food photo:
Prep work
- Decide on the story: Start by thinking about the mood you want to convey. Are you aiming for something rustic, minimal, vibrant, or moody? Your theme sets the tone for the rest of your choices.
- Pick a color palette: Let the colors of your dish guide your prop selection. Earthy tones are great for cozy, rustic dishes, while bright, bold colors make fresh meals pop.
Choosing the background
- Match the background to your recipe’s vibe: The background should complement, not compete with, your dish.
- Marble slabs work well for a high-end, polished look.
- Wooden boards add a warm, rustic touch.
- Dark slate provides a dramatic contrast, making your food stand out.
- Textured linen or parchment paper creates a cozy, inviting atmosphere.

- Layering for depth: Combine different textures to create interest, like layering worn wood under parchment for added dimension.
- Get creative with materials: Think outside the box! Unexpected elements like vintage enamel signs or books can add character and make your shot feel unique.
Selecting the right props
- Match props to your theme: Every prop should reinforce your theme. For example, rustic recipes might pair well with vintage utensils, while modern dishes could benefit from sleek, minimalist props.
- Essential props: Keep a selection of staple items like cutting boards, bowls, and spoons that can easily adapt to any scene.
- Enhance your story with specific props: Props can bring your recipe’s narrative to life:
- Antique pasta makers for an authentic Italian touch.
- Modern kitchen tools for a trendy, innovative feel.
- Family heirlooms for recipes with a sentimental history.
- Raw ingredients as props: Fresh ingredients add movement and texture to your scene.
- Scattered herbs create a sense of action.
- Spice trails guide the viewer’s eye through the composition.
- Flour dustings or spoons with liquid suggest the dish is being prepared right before your eyes.

Get creative
- Incorporate human elements: A hand stirring a pot, steam rising from a dish, or utensils mid-use can add life to your flat lay and make it feel more authentic.

- Unconventional props: Don’t be afraid to get a little experimental. For example, shaving cream can make a great stand-in for whipped cream, and books or vintage signs can help tell a unique story.
| 🤫 Psst… some not-so-top-secret food styling hacks for your flat lay photos Avoid flat-looking dishes: Flat plates can be boring. Stack those pancakes, layer your cakes, or toss in some sprigs of herbs to add height and create interest! Use fresh ingredients: Freshness adds life to your photos. Ice cubes in drinks, vibrant herbs, or a drizzle of oil bring texture and color, making your food look irresistible. Control food placement: Want a more natural, balanced vibe? Arrange your food in odd numbers – it’s a simple trick that makes everything look just right. Keep it real: A few crumbs or a little sauce dripping adds that “ready to eat” feel, making your food look inviting and real. Avoid overly tall items: Tall drinks or multi-layered cakes might look impressive, but they don’t work well in flat lay shots. Keep things proportionate for a cleaner shot! For even more styling tricks to make your food photos pop, check out our food styling guide – it’s packed with everything you need to take your photos to the next level! |
Post-processing essentials: Edit your flat lay photos like a pro
Once you’ve captured your perfect flat lay, it’s time to make your photos even more stunning with some simple editing tweaks. Here’s how you can enhance your shots and take them to the next level.
Creating depth & balance

Managing shadows and highlights is key to giving your flat lay photos dimension. If shadows from overhead lighting are too harsh, use your editing software to lighten them up. Balancing food textures, like the smoothness of a sauce or the roughness of a crust, will ensure every detail pops. Adding depth can be done by subtly adjusting the exposure and using techniques like background blur or vignette effects to focus attention on the food.
Using presets for different food types
Presets are a great way to quickly enhance your photos. For baked goods and coffee, use warm presets to create a cozy, inviting vibe. Cool presets are perfect for frozen desserts, making them look fresh and vibrant. For indulgent treats like chocolate or sauces, go for rich presets that bring out their depth and texture.
Strategic cropping

Cropping is essential for framing your food in the best way possible. Make use of negative space to highlight the main subject, and arrange your food with odd numbers for a more balanced look. You can also strengthen the composition by using leading lines to guide the viewer’s eye toward key parts of the dish, and always be mindful of food scale to keep your proportions just right.
Challenges & solutions
Here’s a quick look at some common challenges in flat lay editing – and how to solve them:
| Challenge | Solution |
| Glare on ceramics/metal | Use highlight reduction tools to tone down reflections and glare. |
| Uneven table surfaces | Even out surfaces using editing software for a smooth, polished look. |
| Steam effects | Enhance steam to add a fresh, appetizing feel to your shot. |
| Reflective surfaces | Control reflections by adjusting exposure or using a polarizer tool. |
| Sharpening garnishes | Use selective sharpening to bring details into focus and highlight garnishes. |
Essential adjustments
After addressing the main challenges, some final adjustments can make a big difference. Color temperature is essential – make sure it’s consistent across all surfaces. Highlight details on metalware and recover shadow details where necessary to bring out textures in darker areas. And remember, maintaining natural food colors helps keep the dish looking true to life.
🔗 For more detailed tips on perfecting your overhead shots, check out our guide on overhead photography!
Display your flat lays with WP Recipe Maker’s visual tools
Now that you’ve perfected your flat lay photography, it’s time to display your beautiful images the right way. WP Recipe Maker is the best tool for displaying your food photography and recipes on your WordPress site in a sleek, structured, and SEO-friendly format. It does this with:
- Recipe cards: These provide a professional, easy-to-use platform for your food images, allowing you to display your flat lays alongside recipe details.

- Integration: High-quality images integrate effortlessly into your recipes, ensuring your food photos are featured prominently and beautifully.
- Smart optimization: WP Recipe Maker optimizes your images, preserving quality while ensuring your pages load quickly – important for both user experience and SEO.
- Responsive design: Your photos will look amazing on any device, whether it’s a desktop, tablet, or mobile phone.

- Structured formats: WP Recipe Maker organizes your content professionally, making it easier for visitors to browse your recipes and find exactly what they’re looking for.
By combining strong photography skills with an organized, visually appealing presentation, you’ll boost your content and keep your audience engaged. With the right techniques, equipment, and WP Recipe Maker, you can turn your simple overhead shots into eye-catching food photography that enhances your recipes and attracts more visitors. Check out WP Recipe Maker today!