
Food styling tips are more important than ever, as the internet is dominated by food photos and the trend just keeps growing. According to the 2023 Instagram Trend Report, 68% of Gen Z social media users learn about new cuisines through food photos they see online. That’s just one of the many audiences that are interested in seeing photos of food on the internet.
What this means is that if you want to share photos of your food online, you need to know how to make them stand out. This is true whether you run your own food blog, want to become a social media influencer, or work with food-related magazines and websites. Great food photography starts with great styling, and the good news is that a few simple techniques can make a big difference. That’s where food styling comes in. It’s the art of using props, backdrops, colours, garnishes, and other creative elements to elevate a dish before a photoshoot. In this guide, you’ll find both quick food styling wins and a few professional techniques you can experiment with as your skills grow.
In bigger companies, a food stylist won’t necessarily be the same person as the food photographer. If you’re running a food blog, you’re likely doing all the work yourself – but don’t worry, as the fundamentals of food styling are easier to learn than you might think. In this article, we’ll share 15 easy food styling tips that you can start using at home to improve your food photography.
⚡Quick Reference: 15 Food Styling Tips
- Try something new with every shoot.
2. Use smaller plates.
3. Go small with portion sizes.
4. Garnish your scene with ingredients.
5. Add height to your dishes.
6. Develop a consistent visual brand.
7. Take a bite to reveal texture and detail.
8. Play with contrasting textures.
9. Create negative space.
10. Use matte surfaces.
11. Don’t be afraid to make a little mess.
12. Shoot with fresh ingredients.
13. Use fake ice cubes for drinks.
14. Consider the color temperature of your photos.
15. Use cutlery as a styling prop.
What Tools Do I Need to Improve My Food Styling?
For the most part, you don’t need any fancy tools to style your food with gusto. However, as with anything else, if you really want to take food photography styling seriously then you should have a few tools handy to help you with the finer details. Some of these will be tools that you already have at home, especially if you’re regularly working in your kitchen. These are the most common food styling tools:
- Knives: Having a selection of knives will be handy as you can use them for different tasks. You’ll need a sharp knife to make clean and precise cuts. For example, if you’re cutting a cake, you want to ensure your knife doesn’t mess up the frosting as it cuts through. If you need to get into tiny spaces, you should also have a utility blade handy. Smaller knives are great for creating details, such as creating patterns in baking pastry.
- Brushes: A brush set is essential for keeping clean surfaces, especially when working with powdery ingredients. You can also use them to manipulate liquids and droplets for extra fine details or add a smooth glaze to the top of completed dishes.
- Scissors: Specifically, you’ll want a pair of small scissors that can accurately cut parchment paper to the correct size. You may want to buy a sharpener at the same time to ensure you always make clean cuts.
- Tweezers: If you need to arrange small, delicate objects in your scene that are close together, then a pair of tweezers will be helpful as you’ll be able to move them around without accidentally moving or knocking over other elements. There are obvious situations where tweezers will come in handy, such as if you’re creating a gingerbread house!
- Ruler: You’ll also want to invest in a ruler or measuring edge, as this will allow you to use the space you have intelligently, and map out the composition of your dish as you’re working. If you’re aiming for perfect symmetry, a ruler is a must!
- Offset spatula: Lastly, an offset spatula is perfect for when you want to smoothen out condiments, cream, or icing.
- Digital toolkit: Food styling doesn’t end when the photoshoot is over. A few editing apps can help you fine-tune your images and prepare them for your blog or social media channels.
- Lightroom Mobile: Adobe‘s mobile editing app gives you precise control over exposure, color, contrast, and white balance. It’s particularly useful for correcting lighting issues and making food colors look more natural without over-editing the image.
- Snapseed: Snapseed is a free photo editing app with powerful tools for quick adjustments. Its Selective tool is especially useful for brightening a dish or highlighting key ingredients without affecting the rest of the photo.
- Canva: Canva makes it easy to resize food photos and create graphics for Pinterest, Instagram, and other social platforms. You can also use it to add text overlays, branding elements, and recipe previews when promoting your content online.
Note that in addition to these tools, you may also want additional tips and props for your shoots, and we’ll cover a few of these in the next section. Popular food photography props could include plates, backdrops, boards, fabrics, and so on.
Our Top 15 Food Styling Tips For Bloggers
Ready to enhance your food photography? Check out our list of food styling ideas for the ultimate inspiration.
1. Use Smaller Plates

Big, bulky plates generally don’t look very good in food photos, so we recommend sticking to smaller plates. If you’re shooting food photos where the background is prominent, then smaller plates will allow for a cleaner, more spacious composition. They also create the illusion of abundance, helping even a single serving look generous in photos displayed on your WP Recipe Maker recipe cards.
2. Go Small With the Portion Size
Don’t worry if the featured dish is smaller than your standard portion size. Using less food makes it easier to create a nice sense of negative space on the plate, and it also makes every individual ingredient stand out more. For example, if your dish features potatoes, include just 3 potatoes that are differently sized so that they don’t simply blend into the dish.
3. Garnish Your Scene With Ingredients

You can also spice up your food photo by adding the raw ingredients you used in the dish to the scene. Place them on the dish itself, on the surrounding table, or on parchment paper close by. Readers who want to make the dish for themselves will find this appealing as well as helpful, as they can see what certain ingredients look like if they’ve never heard of them before.
Additionally, if the dish you’re highlighting might be a little indistinct (such as a curry, which is just one color), then you can use spices and herbs to show what went into it and give more context about what readers are looking at.
Fresh herbs that complement the recipe can work particularly well as garnishes, adding color and helping readers immediately identify key flavors. If you organize recipes into collections, consistent garnish styles can also help readers discover similar dishes at a glance when browsing your WP Recipe Maker recipe collections.
4. Height is Important

Not all dishes are three-layered cakes, but you ideally never want a picture to look flat. The best images offer volume.
There are some obvious reference points here you can see all over the internet. For example, if you’re shooting a photo of pancakes, you’ll want to style them into a stack. This approach lets you showcase them in all their glory. Overhead shots are trickier, but there are workarounds. For example, you can add blueberries on top of the pancakes to give the impression of stacking.
5. Your Brand Matters
When it comes to food styling, it’s not just about what looks good; it’s about your brand and the story you’re trying to tell. For example, if you’re a professional baker, you might want to feature consistent elements like flour and rolling pins. On the other hand, if your website colors are mustard and black, you might want to use plates and food photography-friendly backgrounds with those same colors for brand consistency.
Your styling choices become recognizable across platforms – from your blog’s recipe cards to TikTok and Instagram Reels. Consistent food styling is what makes followers stop scrolling and helps create a visual identity that people immediately associate with your content.
6. Take A Bite!
Munching on food in your photos isn’t always the right choice, but it can work in specific situations. For example, if you’re cooking something homely, like a plate of cookies, or something with a gooey center, like chicken kievs, then taking a bite is a great way to show the cross-section and give the impression that the food is delicious.
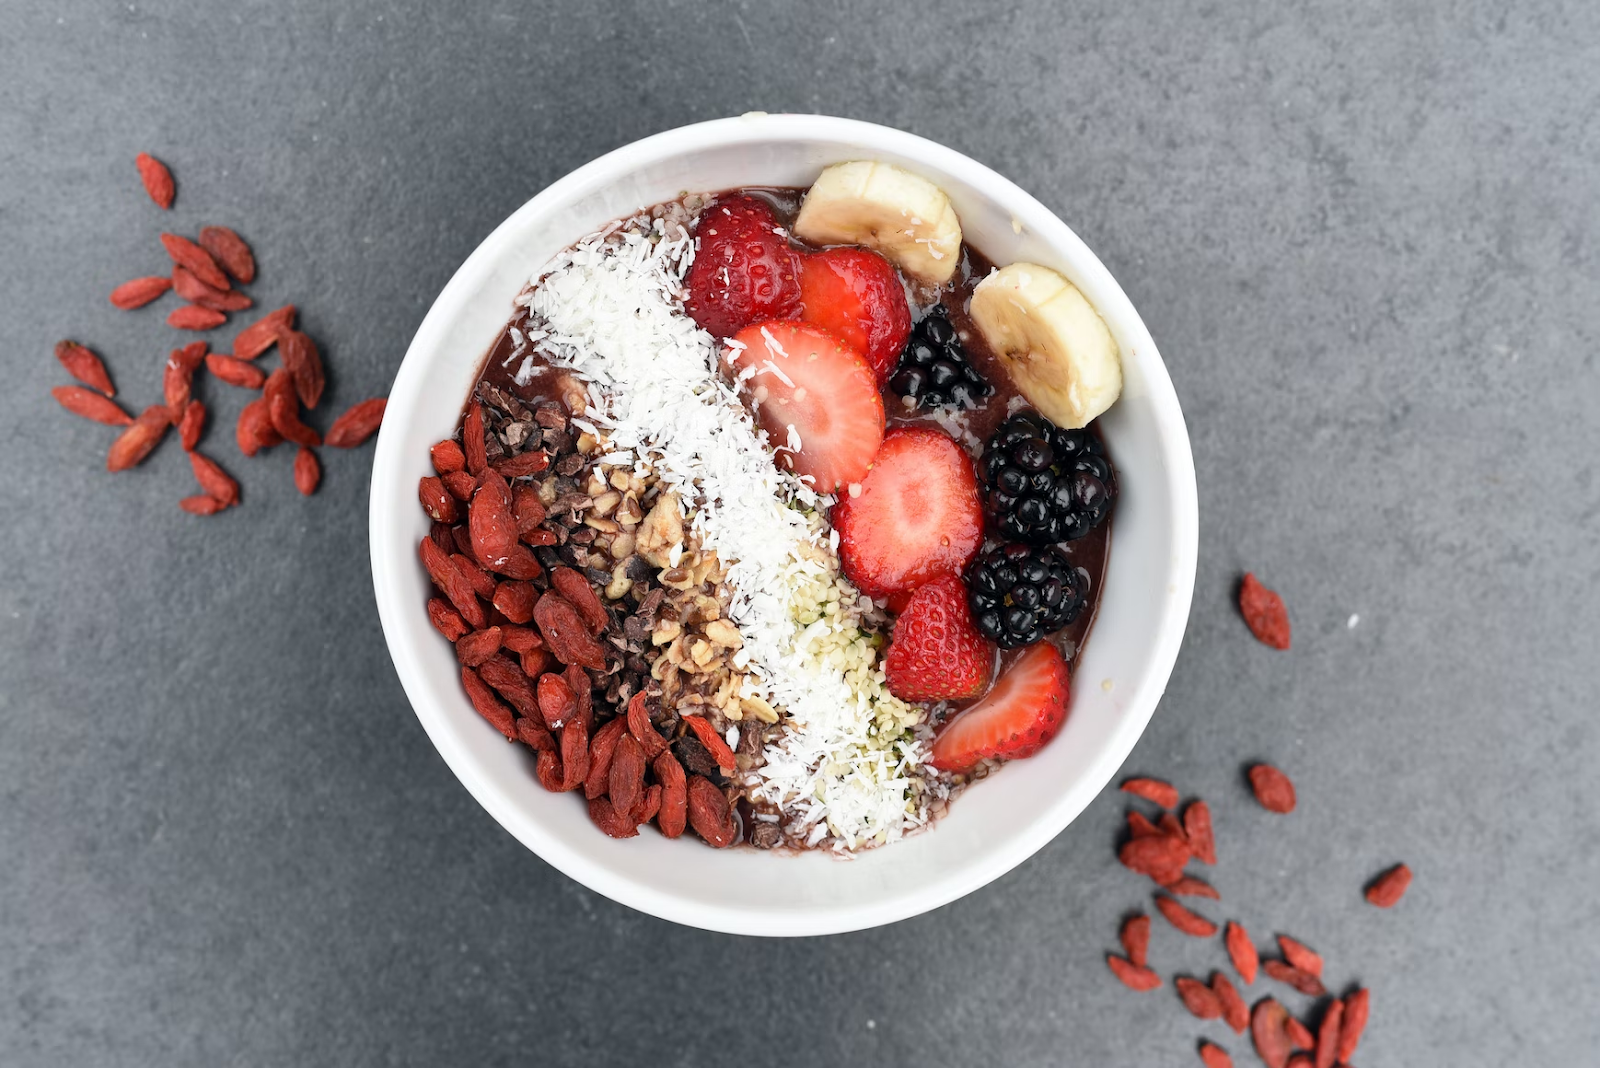
7. Play with Textures
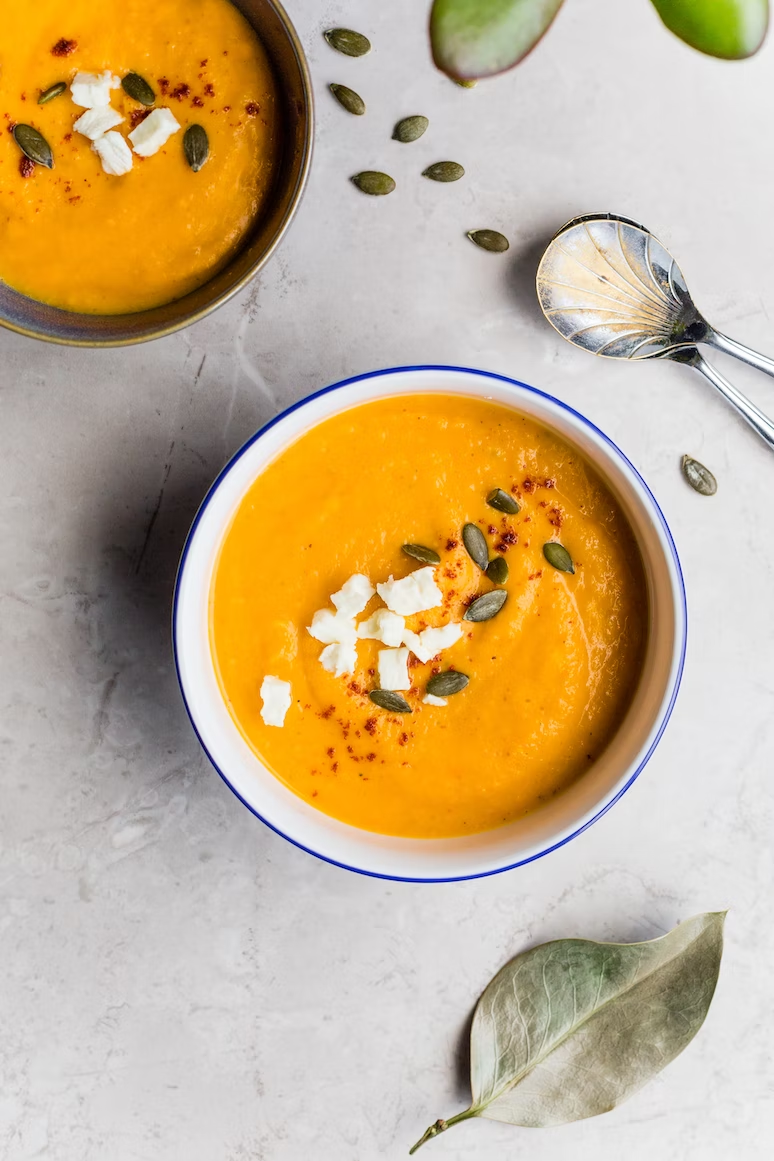
Subtle contrasts in texture will make a food photo much more interesting to look at. For example, if you’re playing with a very smooth white plate, consider adding textured napkins as another element. Another tip is to add solids to liquids. For instance, top soups with croutons, add sprinkles to ice cream, or finish fresh juice with a lemon garnish.
8. Create Negative Space
Food photos with too much clutter are unappealing. Therefore, concentrate on creating “negative space” – or void areas – around your creations.
Try positioning your food in the center of the plate, and leave some space around the edge. This way, you can make the food the focal point. Alternatively, position the food on one side of the plate and minimally decorate the other side with dots or a smear.
You can also put a full plate on a relatively empty surface. Placing a small bowl of tacos on a white table adorned with a few decorative chilies also creates negative space.
9. Use Matte Surfaces
Glossy surfaces will reflect light, which is never ideal. So when experimenting with plates and backdrops, keep this in mind and opt for matte plates and dishes. Alternatively, if you already have glossy surfaces in your kitchen then it’s a great opportunity to experiment with fabrics and wooden or slate boards to cover them.
10. Make A Mess
Ultimately, food is for eating, so it should look realistic. If your cupcake’s ganache is spilling over or your burger’s juices are running, that’s perfectly fine! It makes the food look moreish and DIY. Just remember the golden rule: don’t make the photo cluttered.
11. Shoot with Fresh Ingredients
If you’re shooting with ingredients like herbs and vegetables, you’ll want to make sure they’re fresh as any browning or wilting can show in the photo. In some cases, especially with fruits like bananas and avocados, you’ll want to choose ingredients that are underripe. Fresh herbs and just-picked produce almost always photograph better than artificial substitutes, thanks to their natural color, texture, and vibrancy.
12. Get Fake Ice Cubes
This prop makes it so much easier to shoot beverages! As ice cubes melt, they look less enticing and can also affect the color of the drink. You’ll use fake ice cubes over and over, so they’re worth investing in.
13. Think About the Color Temperature of Your Photos

Depending on the time of day, light can be bluer or more yellow. Keep this in mind when styling your photos.
Blue lighting will be a good choice if you want your dish to look fresh, while yellow lighting will make your dish look more comforting. Summer dishes work best in natural light, while autumn and winter recipes look great with a red or orange glow in the background.
To calibrate lighting more accurately, you may wish to use a lightroom. These let you customize the level of lighting dishes receive.
14. Use Cutlery
You can also use cutlery as a prop for your food photos, either in the background or near a plate. Cutlery helps to make images look more theatrical. It also provides extra height when placed on top of a dish.
The type of cutlery you choose changes how photos come out. Therefore, you’ll want to choose knives, forks, and spoons that complement your brand. For instance, pink plates and matching cutlery will give your dishes a modern look, while going for silver is more traditional.
15. Experiment!

The most important tip we can give you is this: don’t be afraid to play around and try different things. Though we’ve given you a list of food styling tips that are sure to work, you might want to try being more unconventional! Rules are there to be broken, so don’t feel like you just need to stick to our tips above. They’re an excellent foundation for your food styling journey, but the more you experiment, the more you’ll find your own unique approach to food styling.
Share your favorite experiments on social media and show readers the creative process behind your recipes. You might even inspire new followers to visit your food blog and try your dishes for themselves.
Want to Take Your Food Styling Further?
Many professional food stylists use advanced techniques to make dishes look their best on camera. These can include glycerin to create realistic dewdrops, cotton balls for fake steam, oil sprays for extra shine, and even food substitutes such as mashed potatoes in place of ice cream or shaving cream instead of whipped cream. If you’d like to explore these techniques in more detail, check out our guide to food photography tricks for a closer look at the tools and methods professionals use behind the scenes.
How to Make Your Stylized Photos Stand Out on Your Food Blog
Food content makes up a massive part of the internet, so if this is an avenue you’re interested in, great photography can help your recipes attract more readers and keep them engaged. Now that you’ve learned how to style food more effectively, it’s worth making sure your recipe pages showcase that work in the best possible way.
That’s where WP Recipe Maker can help! With customizable recipe cards, you can highlight your finished dish and give readers a clear, attractive way to follow your recipe. Strong visuals help recipes stand out, and a well-designed recipe card makes it easier for visitors to stay on the page and recreate what you’ve made.
WP Recipe Maker can also help you grow and monetize your food blog. Add affiliate links to the tools, props, and ingredients you recommend, and organize your content into recipe collections so readers can easily browse similar dishes. Whether you’re sharing weeknight dinners, seasonal baking, or healthy recipes, collections make it easier for visitors to discover more of your content.
Get WP Recipe Maker and start turning great food photography into a better experience for your readers.
Hey Brecht my name is Karyn Albrecht I have learnt a lot of tips and tricks on how to make good content. I am just starting on my food blogging journey and I find your blogs very helpful and I really appreciate all the very helpful info. Just wanted you to know all your hard work is getting noticed!! I wanted to ask you your opinion on something, I have been unsure which one would be better in terms of what kind of content to blog about. I have been working as a cat rescue and have a ton of knowledge on all things kittens, but I also been going on a weight loss journey and have a lot of really great knowledge on weight loss. But Im wondering if I should do blogs on weight loss recipes and stuff or on kitten ? in terms of monetization which one would be the better choice to blog about and why? Have a good one you can text me your response im not sure how smart giving my number is on here but anyone else that reads this can feel free to also give me their opinions as well aslong as its relevant and not mean. my number is xxxxxxxxx
I’m not an expert on that, I’m afraid, so I’m not sure if I can help out with that. Personally I would start with the topic you’re most passionate about. Look into doing SEO keyword research to find specifics to write about.
I don’t see an immediate problem with combining both topics in some kind of personal blog. It’s your journey and you can write about all aspects of your life.