A recipe is a set of instructions that explains how to prepare a specific dish using measured ingredients and defined steps.
Recipe writing requires clarity, precision, and structure so anyone can reliably recreate the same result.
Effective recipes build trust by helping readers achieve consistent outcomes every time they cook.
Writing good recipes takes a lot of time, effort, and practice. You need to think creatively and accurately, making your instructions easy to follow.
We’ll show you how to write recipes that always work – from testing and formatting to presentation!If you use WordPress, you’ll also learn how WP Recipe Maker can effortlessly help you format, publish, and organize professional recipes.
Quick reference summary
| 🧾 5 Essential recipe components 1. Title: Describes the dish clearly with key ingredients or cooking method. 2. Ingredient list: Provides exact quantities and preparation details for every component. 3. Instructions: Lists numbered steps in the order they’re performed for consistent results. 4. Timing and yield: Shows prep time, cook time, and servings to set reader expectations. 5. Additional details: Includes tips, notes, or nutrition facts that improve clarity and trust. WP Recipe Maker automatically organizes these components into a professional, structured format. Learn more about recipe components → |
Recipe development starts with testing your dish until the measurements and results are reliable.
After testing confirms consistency, organize your recipe into a clear, standard format.
Finally, review every detail for accuracy before publishing.
Essential recipe writing steps
1. Test your recipe before writing
Testing ensures your recipe is accurate, reliable, and easy for others to follow.
Test each recipe at least twice to verify that ingredient quantities and timing produce consistent results.
Multiple rounds of testing help you catch measurement errors, unclear steps, or missing details before you publish.
For example, if a blogger published a chocolate cake recipe without properly testing the baking time, they might state 35 minutes in the oven. But when readers try it, they could report the cake being undercooked. This issue happened because the blogger didn’t account for the oven temperature discrepancy. After revising the recipe and testing it thoroughly, the results were consistent, and the cake baked perfectly every time. Testing like this helps you avoid frustrating your readers and builds trust in your recipes.
Checklist for reliable testing:
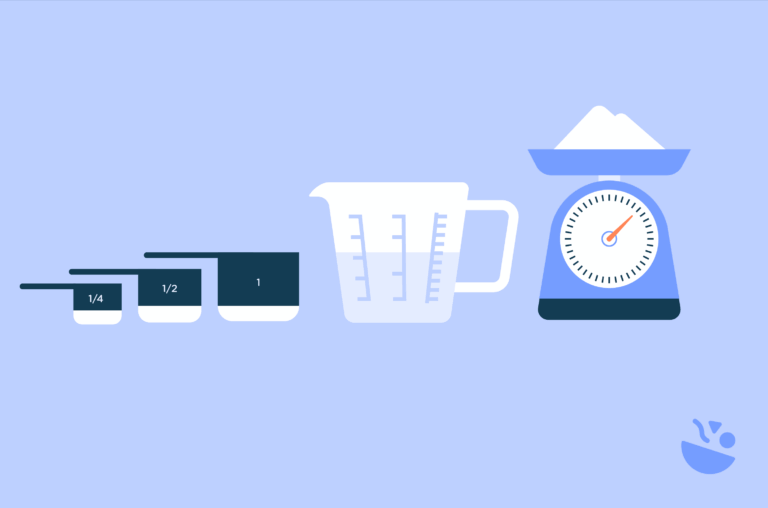
- Measure ingredients precisely – never estimate from memory; use accurate cups, spoons, or scales.
- Record actual cooking times and temperatures used so your readers can reproduce the results exactly.
- Note visual cues like colour changes, texture shifts, or doneness indicators to describe how the dish should look.
- Write down unexpected issues or adjustments to refine future recipe versions.
- Test substitutions separately if you plan to recommend them for allergies or dietary needs.
- Have someone else follow your instructions to identify confusing wording or missing steps.
Testing like this means every recipe you publish works the same way in every kitchen.
2. Choose a consistent format for your recipes
A standard recipe format arranges information into consistent sections, making recipes easier to read and follow.
For example, when you follow a recipe, you probably expect to see the title, ingredients, instructions, and timing in a predictable order. Having a consistent layout helps your readers quickly scan and follow along, making their cooking experience smoother.
Each recipe should include the same parts (title, ingredients, instructions, and timing), presented in the same order every time. Think of it like a routine. When readers know exactly where to find the information they need, they’re more likely to trust your recipes and keep coming back for more.
Ingredient lists should appear in chronological order, matching the sequence they’re used in the instructions. This helps avoid confusion – no one wants to be halfway through a recipe and realize they forgot an ingredient because it wasn’t listed in the right place.
Here’s a tip: Always use uniform units of measurement throughout your recipes. Whether you’re using cups, grams, or teaspoons, keeping the units consistent will prevent scaling errors and make your recipes easier to follow.
Organizing your recipes in a consistent structure makes it easier for readers to find what they’re looking for. If a reader enjoys one of your pasta dishes, they’ll appreciate knowing they can easily find other pasta recipes using the same format. Plus, a clear structure helps them navigate your site and discover more dishes.
Manually maintaining this structure can be time-consuming, but there’s an easier way. Recipe plugins like WP Recipe Maker can automate it for you, placing all your recipe details into a clear, accessible layout, so you can focus on creating and testing new recipes instead of worrying about formatting.

The plugin integrates smoothly with popular WordPress page builders – Gutenberg, Elementor, Divi, and the Classic Editor – allowing you to format recipes directly within your site’s design. You can still organise recipes by cuisine, course, or dietary preference, but focus on consistency first to improve user experience.
However, the easiest way to achieve this consistency with an extensive database of recipes is by using the WP Recipe Maker’s recipe cards.
These recipe cards can automatically arrange the information into a standardized layout, which ensures uniformity across your recipe website and improves site accessibility.
There is a range of pre-built templates for your recipe website, tailored to your desired look. However, you can create a more bespoke recipe template with the Template Editor.
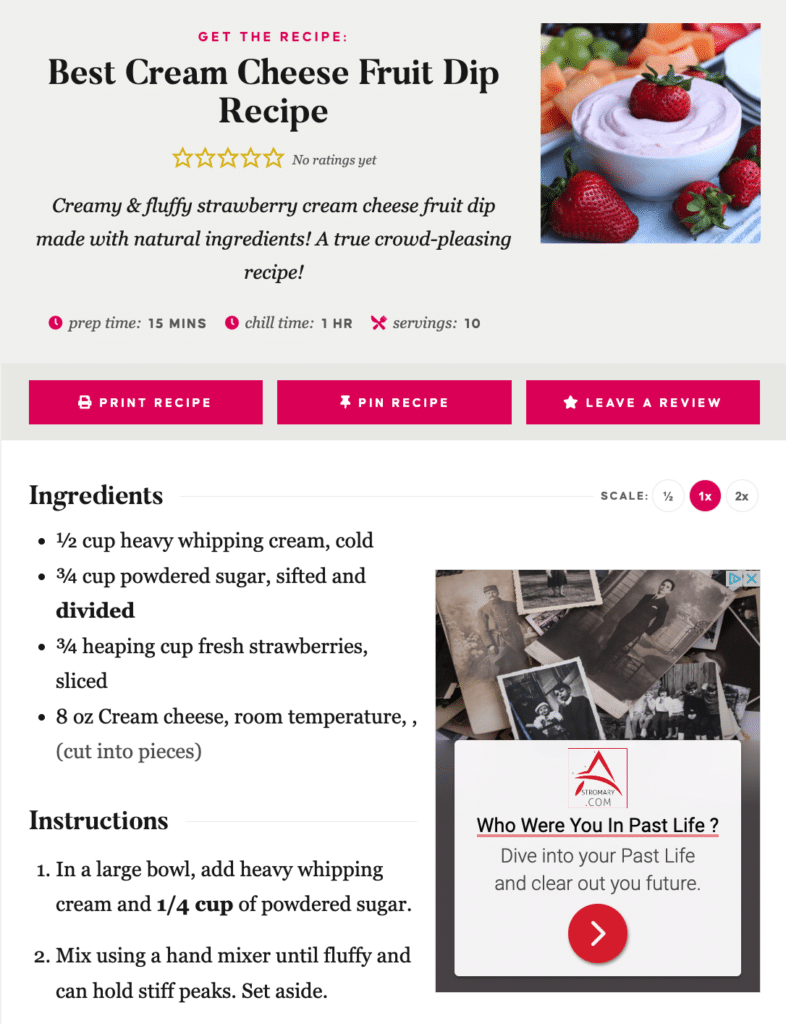
For example, the DivasCanCook blog has included useful options such as adjusting the scale of the recipe, print and pin buttons, and a “jump to recipe” button. The colour scheme is consistent with the rest of their website, and since it’s a dessert, it also has chill time included in the info section of the recipe.
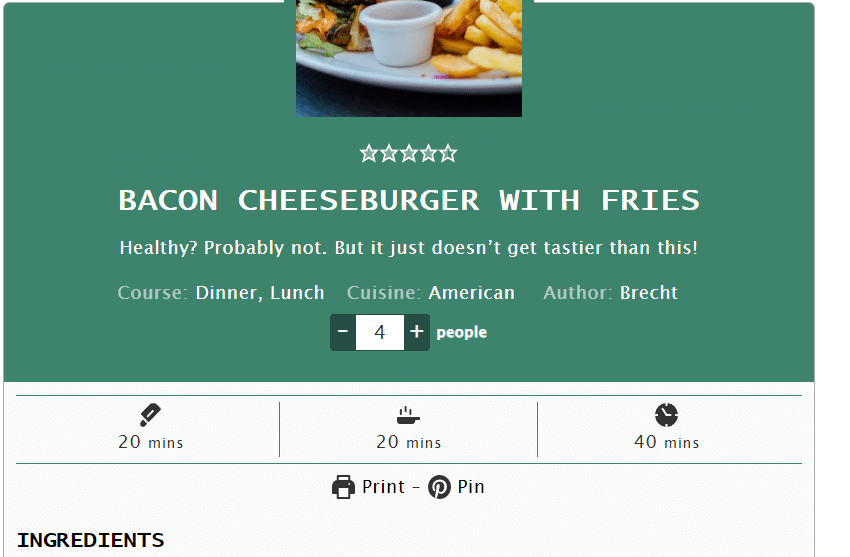
While the DefinedDish uses a similar format, they’ve also added an ingredients checklist to help users keep track of what they need and create a shopping list.

The great thing about these templates is that they can be integrated with your website’s design, even if you use a page builder like Elementor.
3. Write for your target audience
As with any form of content curation, you must thoroughly understand your target audience before writing. After all, your readership influences your content in various ways, whether it alters your tone of voice or the complexity of the dishes you create.
For example, if you were writing a recipe blog aimed at first-time cooks or bakers, you’d likely include simple yet detailed instructions. In contrast, blogs for more experienced cooks will contain more complex ingredients and methodologies and can afford to be more straight to the point.
Your blog’s audience may be based upon factors such as:
- Cuisine
- Recipe complexity
- Dietary preferences (Vegetarian, vegan, gluten-free)
- Cultural considerations
Ideally, the more specific your target audience, the better, as this allows you to cater to a particular niche instead of getting your recipes lost among the crowd. However, there are some things you should always take into consideration when writing.
For example, you should always offer ingredient substitutions for common allergens and dietary requirements, as this will make your content more accessible. If you’re cooking recipes from different cultures, you should treat this task with the respect and sensitivity it deserves. This involves respecting traditional cooking methods, using the correct names (and spellings) for dishes and ingredients, and acknowledging the cultural origins of the recipe.
4. Write a descriptive recipe title
Recipe titles should be descriptive and specific, clearly explaining what the dish is and how it’s prepared.
Effective titles include key ingredients or cooking methods so readers instantly know what to expect. For example, “Fudgy Dark Chocolate Brownies” gives far more information than “My Favorite Brownies.”
Descriptive titles build trust and improve SEO because they match the search terms people actually use. They also make your content more shareable – a reader knows exactly what they’re clicking on.
The DivasCanCook blog shows how a strong title can set expectations. The use of “BEST Million Dollar Pound Cake Recipe” instantly signals quality and authority. It promises a tested recipe that delivers great results.

Another great example comes from Holy Cow Vegan, where the author uses personality and context to add curiosity: “Spiced Potatoes and ‘Eggs’. Freddie Mercury probably ate these for breakfast.” It’s personal yet precise, providing cultural and flavor cues while remaining easy to search for.

5. Write a recipe headnote
A recipe headnote (also called an introduction) provides context before the ingredient list and instructions appear.
It helps readers understand what makes your dish special – whether it’s the flavour, the story, or when to serve it.
Headnotes can share a recipe’s origin, describe the taste and texture, or offer serving and storage suggestions.
They help readers decide if the recipe fits their skills, schedule, or cravings before they start cooking.
A great headnote can include:
- A short story or anecdote about the recipe’s origin or inspiration.
- Details about the flavour, texture, or special techniques used.
- An incentive to keep reading, like a promise of simplicity or a unique twist.
As we’ve seen before, The Holy Cow Vegan blog does this beautifully with the “Freddie Mercury’s Favorite Breakfast” recipe. The author explains its cultural link to the rock star while describing the flavours that make it appealing.
You can also make your headnote more personal by sharing memories that inspired the recipe. For example, mention if a dish came from your grandparents or a favourite trip abroad. Writing in a conversational tone helps readers feel connected and builds loyalty to your blog.
Pair your story with high-quality photos and sensory language to help readers imagine the dish before they even start cooking.
6. Add preparation time and cooking time
Preparation time indicates the minutes spent on activities before cooking, such as chopping ingredients, measuring quantities, or mixing components.
Cook time measures the minutes or hours ingredients spend on heat, including baking, simmering, or frying.
Total time combines both preparation and cook time to show how long the recipe takes from start to finish.
These details help readers plan their meals, manage their schedules, and choose recipes that fit their available time.
Accurate timing also builds trust by setting clear expectations before anyone starts cooking.
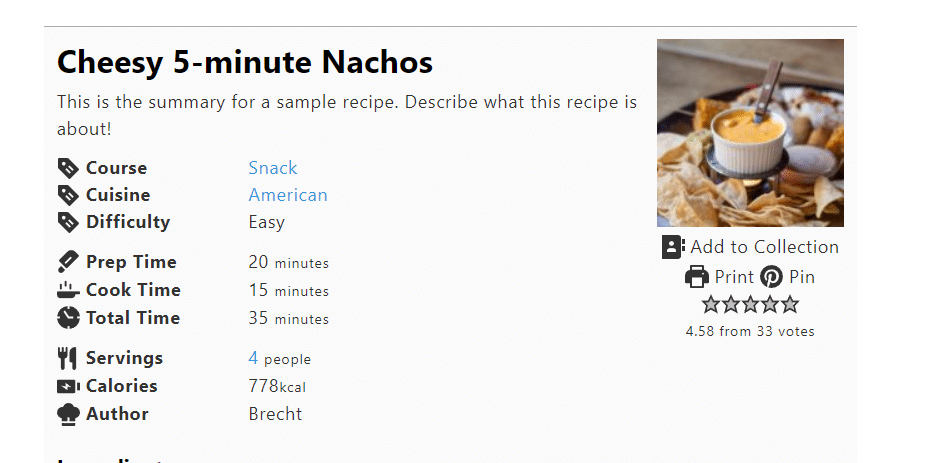
WP Recipe Maker gives you a consistent, professional way to display these times. The example below shows how the plugin presents prep time, cook time, and total time in an easy-to-read layout.
This clear structure helps readers filter for quick dishes or time-specific recipes, such as 30-minute dinners or slow-cooked meals.
You can also add an interactive kitchen timer with WP Recipe Maker. When users click a linked time, the timer starts immediately and rings when finished. Adding it to key steps – such as boiling pasta or baking a cake – keeps readers on your page while helping them cook each stage to perfection.

7. Organize your ingredients list
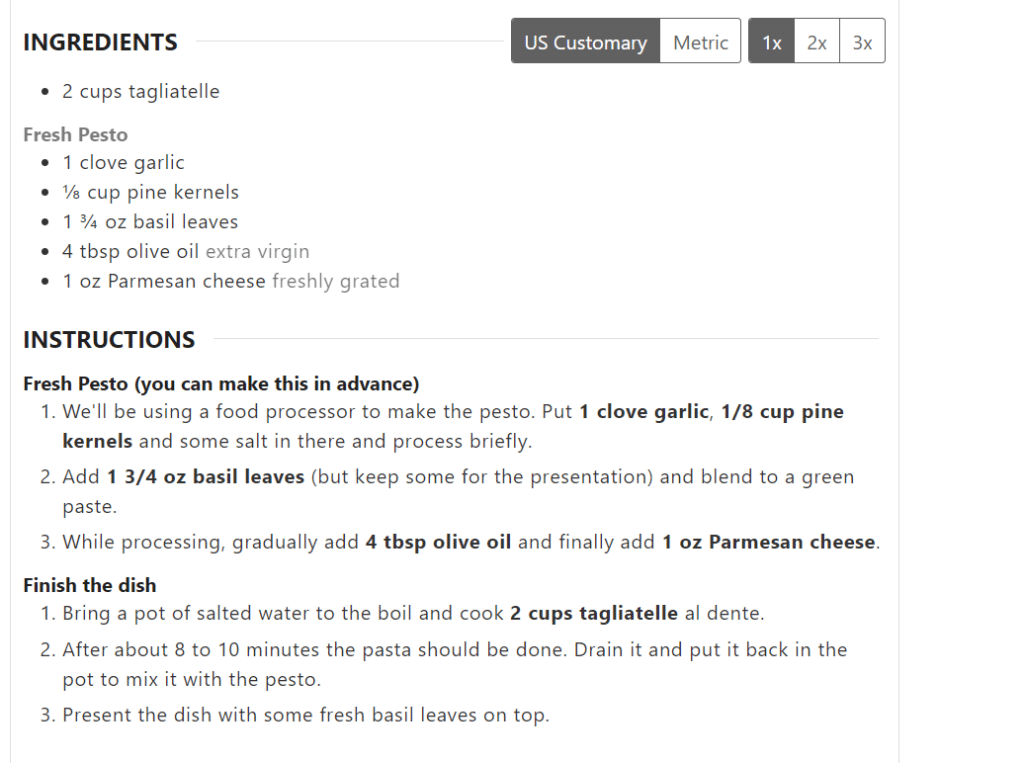
Ingredient lists should appear in chronological order, matching the sequence used in the instructions.
Each ingredient must include precise measurements such as cups, tablespoons, or grams.
Always specify the preparation state clearly – write “1 cup walnuts, chopped” rather than “1 cup chopped walnuts.”
When a recipe includes multiple parts, use clear subheadings like “For the cake” and “For the frosting” to help readers stay organised.
If an ingredient is used more than once, list the total amount followed by “(divided)” to indicate it will be split across steps.
| ❌ Incorrect format | ✅ Correct format | Why it matters? |
| 1 cup chopped walnuts | 1 cup walnuts, chopped. | Measure first, then prep |
| Flour | 2 cups all-purpose flour | Needs quantity and specific type |
| Butter | ½ cup unsalted butter, softened | Needs quantity, type, and state |
Ingredient format affects accuracy. Always list the quantity first, then the ingredient name, followed by the preparation method.
Fortunately, both of these best practices can be handled automatically using the WP Recipe Maker templates, which are designed with accessibility in mind. Adding a checklist to your recipes makes the ingredient section interactive and user-friendly.
With the Inline Ingredient feature, ingredients can appear directly inside the instruction steps. Readers don’t need to scroll up and down while cooking – quantities stay visible where they’re needed most. You can also use the Associated Ingredients feature for the same purpose.
Combining these options with WP Recipe Maker’s Adjustable Servings functionality is a real time-saver. When visitors change the serving size (for example, from 2 to 4 people) the ingredient quantities update automatically inside the instructions.
8. List required equipment and utensils
List required equipment in chronological order, noting specific sizes when they impact results – for example, a 9×13-inch baking dish, a medium saucepan, or a handheld mixer. Clear details help readers prepare properly and gauge the recipe’s difficulty.
Not every home cook owns professional tools, so always suggest practical alternatives for specialised equipment. This helps make your recipe more approachable and inclusive.
Equipment lists can also become a source of income. With WP Recipe Maker, you can turn your list into affiliate links for products like pans, blenders, or measuring tools. Each time a reader purchases through your link, you earn a small commission.

This feature adds value for both you and your audience – readers get easy access to recommended tools, and you gain a simple way to monetise your recipes without extra effort.
9. Add allergen and nutritional information
Approximately 20 million people in the U.S. have food allergies, meaning many of your readers may also deal with sensitivities or dietary restrictions. From a safety perspective, it’s essential to list any potential allergens featured in your recipes.
WP Recipe Maker includes custom recipe taxonomies for organizing recipes by allergens, dietary restrictions, difficulty levels, and cuisine types. These taxonomies allow food bloggers to build filterable recipe archives for categories such as gluten-free, nut-free, or low-FODMAP meals – making content easier to find and more inclusive.
You should also include nutritional information for readers managing their health or tracking macros. For example, you may want to include:
- Calories
- Macronutrients
- Micronutrients
- Serving sizes
The WP Recipe Maker plugin makes this simple by allowing you to add complete nutrition labels and allergen information directly to each recipe card.
10. Add visual elements
Visual elements like photographs and videos make recipes easier to follow and more visually appealing. As such, they can significantly enhance the user experience. For example, an image of the completed dish could encourage the viewer to click on the recipe in the first place – as it provides them with a sense of visual stimulation.
When using the WP Recipe Maker, you can add visuals to your recipes by:
- Adding ingredient and equipment images.
- Adding images and videos of each recipe step.
- Adding a featured image to your recipe.
- Adding taxonomy term images.
As such, in addition to learning to be a better recipe writer, you should also work on your food photography skills.
11. List serving sizes
Yield indicates how many servings a recipe makes, helping readers plan portions and adjust ingredient quantities accurately. It also ensures consistency when scaling recipes for different group sizes.
There are no fixed rules for estimating servings, but you can base your recommendation on:
- The size of the dish.
- The number of main ingredients.
- The intended audience (families, children, or adults).
While you might list a standard yield, such as 2-4 servings, not every reader wants to make the same amount of food. The WP Recipe Maker plugin solves this with its Adjustable Servings feature, which automatically updates ingredient quantities when users change the number of servings.
For bakers, there’s also an Advanced Adjustable Servings option designed specifically for precise scaling in baking recipes.
Readers can make these adjustments manually, but automating the process creates a smoother, more reliable experience – one that keeps them on your site longer and encourages them to explore more of your recipes.
12. Break down your recipe into steps
Recipe instructions should use numbered steps in chronological order, guiding readers from the first action to the final serving.
Each step should include one action or closely related actions to keep instructions clear and easy to follow.
Start every step with a strong action verb such as Preheat, Combine, Whisk, Sauté, or Bake.
Be specific about temperatures, times, and equipment sizes. For example, write “Preheat oven to 375°F,” “Bake for 12–15 minutes,” or “Use a 9×13-inch baking dish.” These details help readers replicate your recipe accurately and avoid common mistakes.
Precision matters because it prevents failure and builds trust. Clear, specific instructions make recipes easier for beginners and faster for experienced cooks.
At the same time, aim for concise, friendly language. Readers appreciate direct steps without unnecessary filler, but don’t sacrifice clarity for brevity.
The WP Recipe Maker plugin makes this process even better. You can present numbered steps with inline ingredient references, timers, and images – all formatted for accessibility and visual consistency.
13. Explain what “done” means
Doneness indicators describe the visual and physical cues that show when a dish has finished cooking successfully.
Effective doneness descriptions include phrases like “golden brown,” “tender when pierced with a fork,” “toothpick inserted in centre comes out clean,” or “internal temperature reaches 165°F.”
These cues work better than time alone because oven temperatures, equipment, and ingredients can vary. Telling readers what to see, feel, or measure gives them a reliable way to check for perfect results, even if cooking times differ slightly.
For example, you might write:
“Simmer until the sauce thickens and coats the back of a spoon.”
Adding sensory detail makes your recipes more approachable and foolproof. It helps beginners understand success visually, and reassures experienced cooks that your instructions are well-tested.
14. Add storage instructions
Including storage instructions at the end of your recipe can help reduce food waste while ensuring that food is stored correctly and safely. This is great for those who may be meal-prepping. When discussing food storage, you should touch upon the following points:
- Suitable storage containers.
- Ideal storage temperature.
- Maximum storage duration.
But there’s more to a great recipe than just the basics. Beyond core components like ingredients and instructions, helpful recipes also include equipment lists with sizes, storage instructions, and substitution suggestions for different diets. Recipe headnotes add context and story, while step-by-step photos make instructions clearer. These extras transform simple recipes into complete, reader-friendly guides.
Write the ultimate recipe with WP Recipe Maker
WP Recipe Maker is a WordPress plugin that functions as a complete recipe-writing application for food bloggers. It provides ready-made and customizable templates, automated schema markup for SEO, and interactive recipe features that make publishing effortless. Your recipe data also stays portable across themes, so you’ll never lose content if you redesign your site.
Our core tools are designed to help you create professional recipes easily – no coding required. The Template Editor lets you match recipe cards to your branding, ensuring consistency across your site.
But that’s just the beginning. Automatic schema markup helps improve your recipe’s search visibility, driving more traffic through rich results that stand out in search engines.
You can also enhance your recipes with affiliate links for monetization, ratings for boosting engagement, and print buttons for reader convenience. Plus, timers and collections add interactive features, making your cooking experience even more engaging for your audience.
You can start for free with WP Recipe Maker and upgrade as your blog grows. The Premium, Pro, and Elite tiers unlock advanced options like nutrition calculation, unit conversion, and Recipe Collections.
Try it today and see how WP Recipe Maker elite bundle turns your recipes into beautifully presented, SEO-optimized content your readers will love!