As a food blogger, high-quality photography and videos are your biggest asset. You may make the yummiest pasta in the world, but how is your audience going to know that unless you capture its essence in a mouth-watering photo?
Many new food bloggers tend to use handheld cameras or ad hoc techniques to capture photos of their dishes or make recipe videos. While that may work initially, handheld photography often produces blurry or shaky content, which does not do justice to the delicacy you’ve prepared.
That’s why a tripod is an essential piece of kit for any food photographer! With a tripod, you can stabilize your camera at different angles and take sharper, more consistent images.
So, if you’re a food blogger who has just started to think about taking high-resolution food photographs, this guide explains all the important things you need to know about tripods and how to grow your food blog. If you’re a more advanced photographer, our list includes a couple of higher-end tripods that you might be interested in!
Read on to learn more about choosing the right tripod and discover our top five tripods for food photography.
Why Do You Need a Tripod for Food Photography?
The first thing your readers will see when looking up a recipe is the photo of your finished dish, likely in the featured image, so it needs to be high-quality. A tripod can help you do this in many ways. Here are some of the reasons why having a tripod can be of great help for your food photography:
It Gives You the Flexibility to Compose a Beautiful Photo
As a food blogger, photographs are another way for you to assert your own identity, and having a good tripod handy makes it easier to explore different ways to compose your shots. Food is all about the art of creating, and sharing stunning photographs of your beautifully-made dishes gives you a strong opportunity to go viral.
Tripods let you have your hands free during still-life photography or static compositions, which allows you to step back and view the scene from a third-person perspective. You can easily rearrange the lighting or the placement of elements if you feel something is not working. Moreover, tripods give you an opportunity to be in the frame too!
It Gives Clearer and Sharper Images
Generally speaking, using a tripod lets you take sharper, noise-free images as compared to handheld photography. This is especially useful while taking macro shots, or if you plan to use longer shutter speeds for better sharpness and clarity.
Bear in mind that things are important for a good photograph – the ISO, aperture, and shutter speed.
With tripods, you can manually manage these settings per your stylistic preferences, to capture clear images that make your food look amazing. This is very important for food photos – for example, if you’re taking photos of a cake you don’t want the grain to interfere with the texture.
It Lets You Experiment With Different Angles
Using a tripod means you can take shots from more angles. The most common angles are 45 degrees and overhead, and these are both easily achieved with the right tripod. This is also helpful when you want to do a recipe video.
With tripods, you can use a variety of camera angles, including close-up shots, medium and long shots, or even an over-the-shoulder shot. This can keep your photos and videos from becoming monotonous.
Moreover, you’ll get much more consistency in the frame lighting and set up with a tripod, which can make it easier to edit videos and ensure that your content comes across as professional.
What Should You Look for in a Tripod for Food Photography?
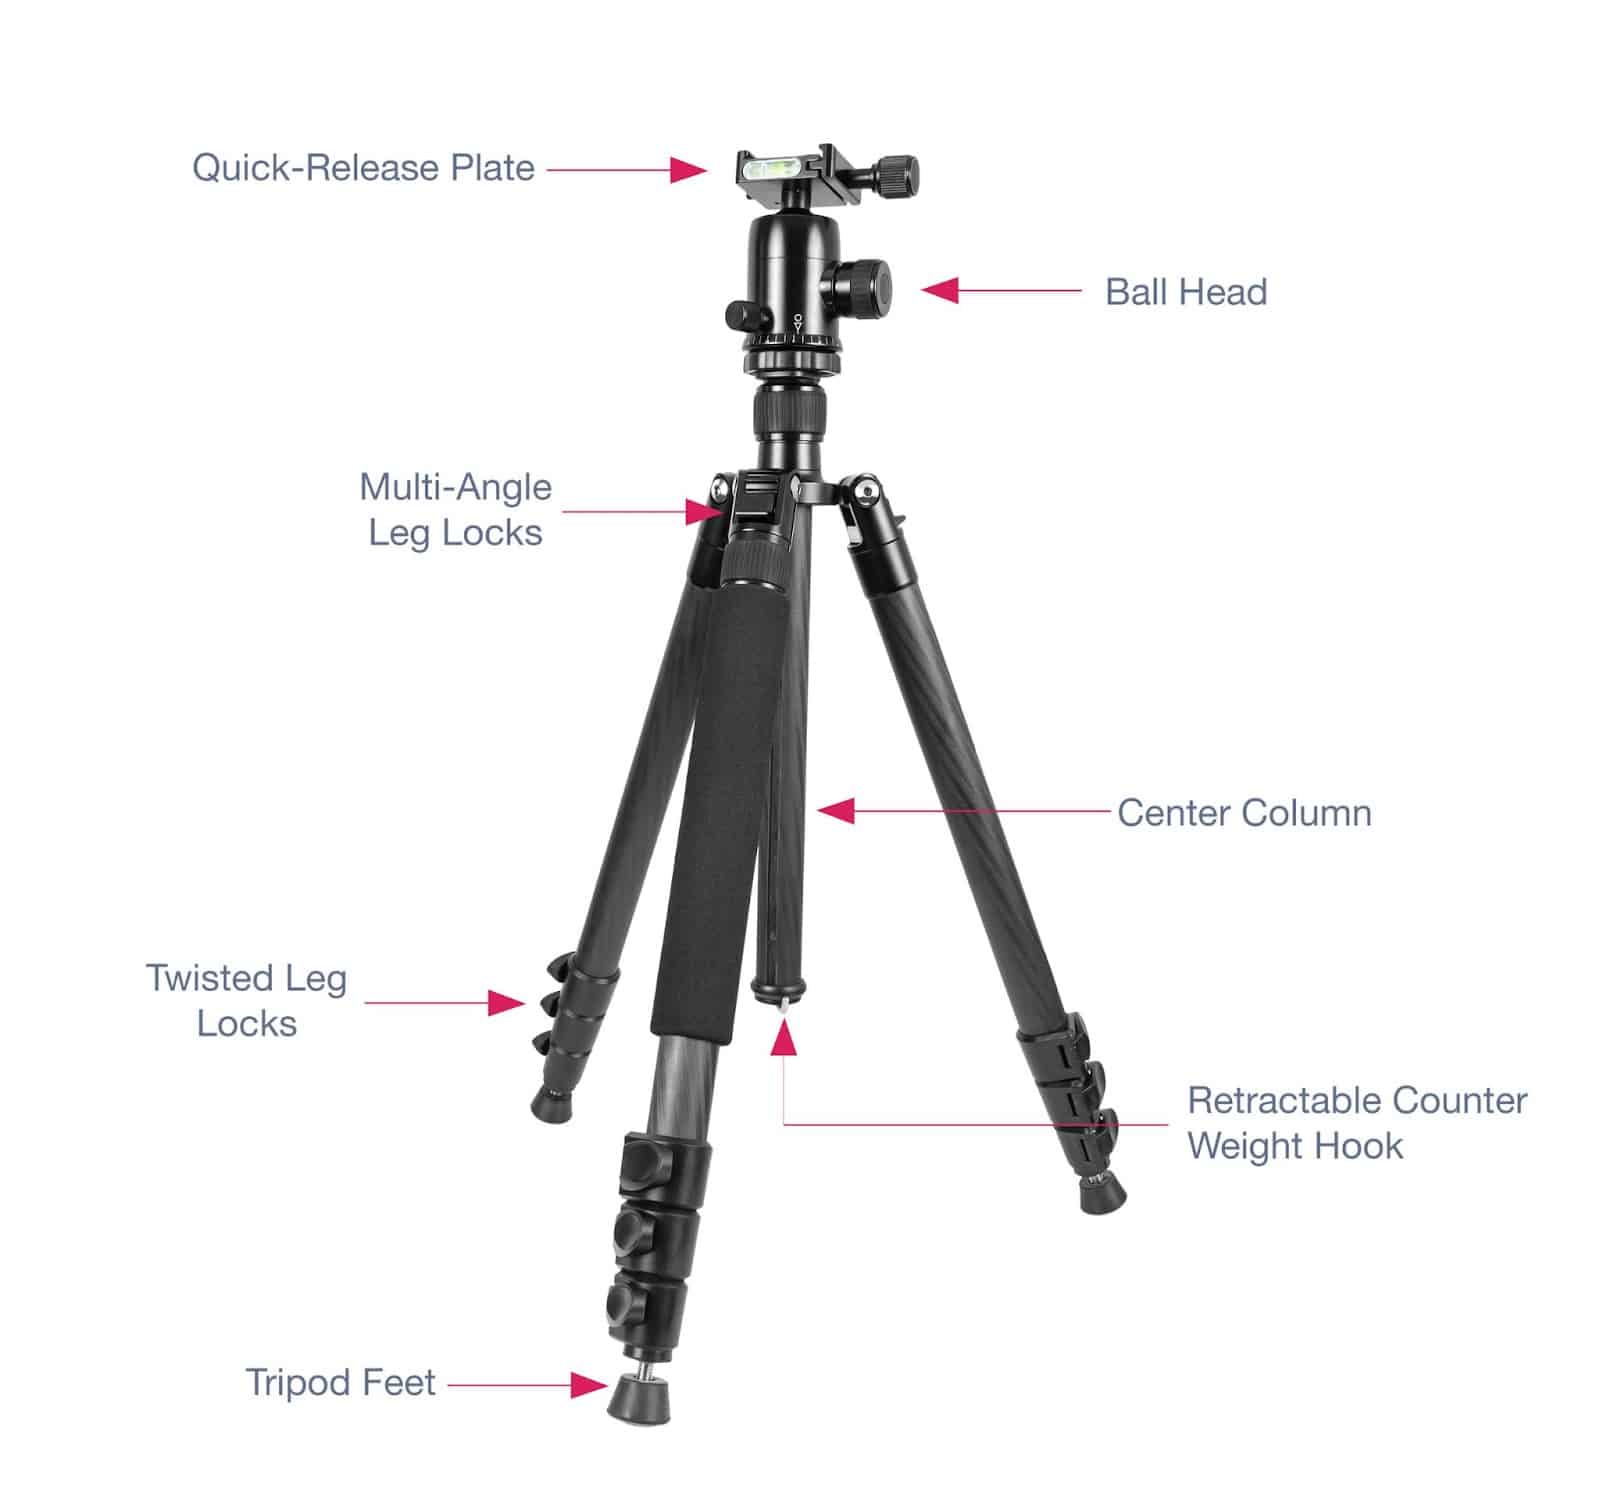
There are hundreds of different varieties of tripods, but as a food blogger, there are seven things to consider while choosing one – orientation, weight, height, type of center column, tripod head, the mounting plate, and extensions. Here are some expert tips on what you need to look for in a tripod.
- Adjustable orientation: Look for a tripod that has adjustable orientation, so you can take overhead as well as 45-degree angle shots.
- Medium weight: A lightweight tripod is more likely to tip over due to the weight of the camera, especially during overhead or a high-angle shot. If you are more likely to shoot in your home or kitchen, a relatively heavyweight tripod can be a good option. If you are planning to shoot outdoors, or from multiple locations, you can choose a medium-weight tripod.
- Good height: Long legs and a good height are essential for those important overhead and high-angle shots. Besides, short legs may accidentally appear in your frame, which can ruin the aesthetic of your frame.
- Geared center column: A geared center column is best for food photographers as you can move your camera up and down slowly to get it right where you need it. Quick-release columns tend to be cheaper but flimsier and less precise. If you’ll be taking a lot of overhead shots, you may want a tripod with a center column that can be extended outward by 90 degrees.
- Pan title head: There are nine types of tripod heads, namely gimbal, pan and tilt, ball, fluid, pistol grip, panoramic, motorized, and three-way head. Of these, ball heads are not ideal for most food photographers as their grips may loosen over time, making it hard to make small adjustments. The pan and tilt head is a better alternative, as it lets you rotate your camera left or right, tilt it up and down, or horizontally.
- Camera-compatible mounting plate: Mounting plates for tripods are not universal. You can choose a mounting plate that is compatible with your camera or smartphone while buying the tripod. You can also get some third-party mounting plates if required.
- Relevant extensions: For professional food photography, you may need some extensions to improve the stability and precision of the tripod. This includes sandbags, counterweights, or an overhead lateral arm for vertical shots. Some tripods include these extensions as part of their package, but if not, you can always purchase them online from a reliable manufacturer.
Now that you are familiar with the key components of a tripod, let’s explore the five best tripod options for food photography.
| Recommended for You: How to Start A Food Blog With WordPress |
Best Tripods for Food Photography
When it comes to food photography, having a stable and versatile tripod is essential. There are several options available on the market, each with their own unique features and benefits. Some food bloggers just need a reliable solution, while others may want to take more professional photos.
So, here we have shortlisted some popular choices for you, such as the Vanguard Alta Pro 263AP Aluminum Tripod Kit, the Manfrotto 190XPRO Aluminium 4-Section camera tripod, the Gitzo tripod Mountaineer Series 2, and the Peak Design Travel Tripod.
These tripods are known for their durability, stability, and adjustable height options, making them ideal for capturing the perfect shot. But before we dive into the ‘why’ behind each of our recommendations, here’s an overview of what we’ll cover:
| Tripod Model | Pros | Cons | Price Range | Min Height | Max Height | Weight | Best for | Ability Level |
| Vanguard Alta Pro 263AP Aluminum | – Versatile angles – Sturdy – Stable | -Heavy -Loose spikes | $159.99 | 28.5″ | 70″ | 11 lb | 360° angles | Beginner |
| Manfrotto 190XPRO Aluminium | – Quick orientation change – Ergonomic | -Less sturdy | $199 | 8 cm | 160 cm | 2.05 kg | Dynamic shooting | Beginner |
| Peak Design Travel Tripod | -Compact-Lightweight – Stable | -Expensive -No panning knob | $329.99 | 14 cm | 152.4 cm | 1.56 kg | Creating food content on the go | Intermediate |
| K&F SA254T1 Lightweight Overhead | – 360-degree rotation – Flexible | -Wobbly -Time-consuming setup | $209.99 | 690 mm | 2385 mm | 2.00 kg | Panoramic shots | Intermediate |
| Gitzo Tripod Mountaineer Series 2 | – Strong and stable – Versatile | -Expensive | $1,317.95 | 15 cm | 165.5 cm | 1.68 kg | Professional outdoor photography | Pro |
P.S. We’re not affiliated with any of the options in our list, so we’re just recommending tripods that would suit the needs of different food photographers!
Let us now take a look at the five best food photography tripods in detail.
1. Vanguard Alta Pro 263AP Aluminum Tripod Kit
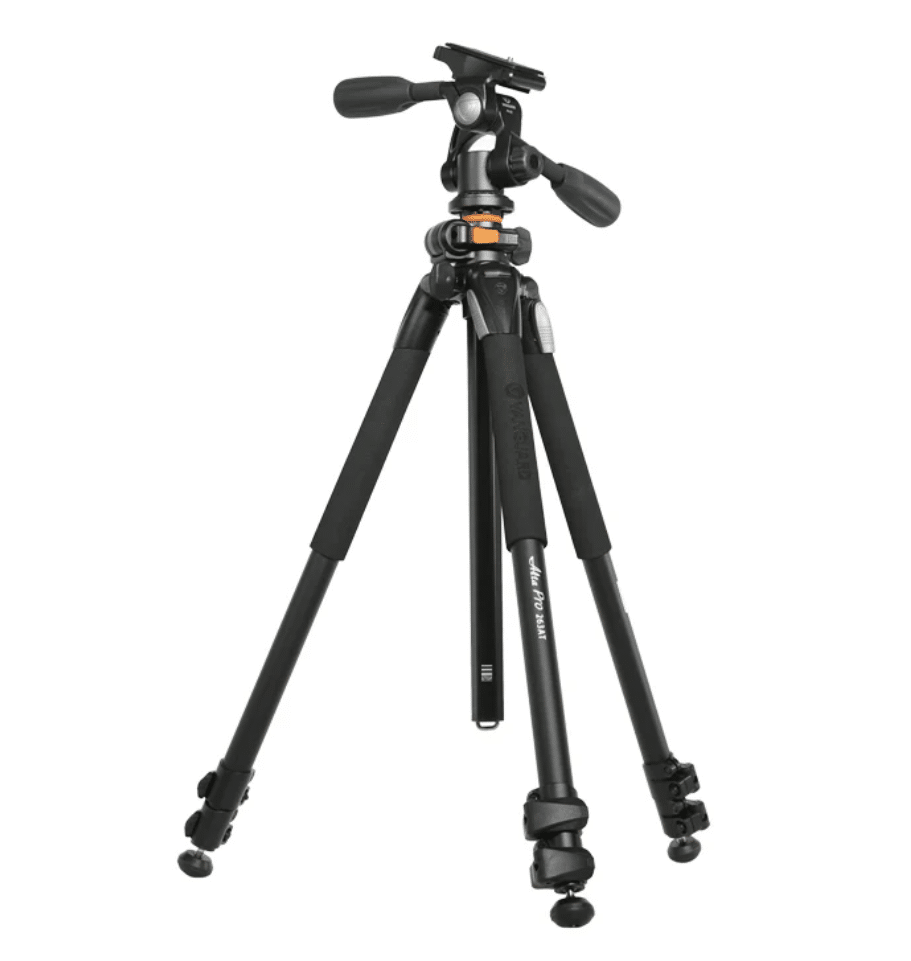
The Vanguard Alta Pro is a budget-friendly, full-sized tripod that has exceptional build quality and offers great value for money. Here are some of its pros and cons.
Pros of Vanguard Alta Pro 263AP Aluminum Tripod Kit
- A Multi-Angle Central Column System that allows for flexibility in various horizontal and vertical positions, making it easy to take macro shots of your food
- Sturdy construction and easy-to-operate functions with intuitive knob placement and a three-way pan head that offer great precision in special-angle shots
- High stability due to premium aluminum alloy construction and durable rubber feet with retractable spikes
- A quick-release plate that is compatible with most smartphone adapters
Cons of Vanguard Alta Pro 263AP Aluminum Tripod Kit
- It’s relatively heavy at 11lbs, so not the most suitable option for outdoor shoots or if you are going to carry it for a long time
- The retractable spikes do not have a positive lock which can cause them to loosen if you move around your tripod a lot.
Product Overview
- Good option for: 360° angles
- Ability: Beginner
- Price: $159.99
2. Manfrotto 190XPRO Aluminium 4-Section camera tripod
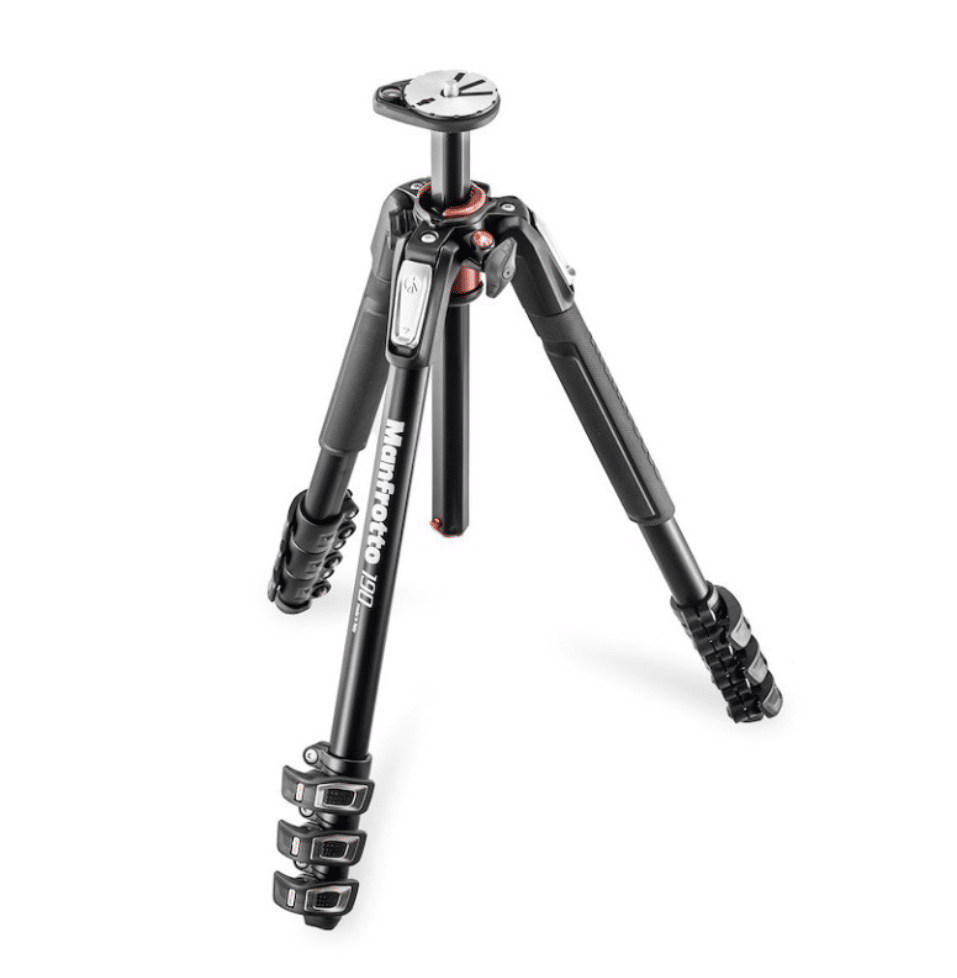
The second tripod on our list is the Manfrotto 19XPRO, with a load capacity of up to 7kg. It has a height of 160cm and a 90° column system that makes food photography a breeze. Here’s an overview of its pros and cons:
Pros of Manfrotto 190XPRO Aluminium 4-Section camera tripod
- It simplifies your effort and saves you time by allowing you to change camera orientation without removing the camera
- It includes ergonomic leg angle selectors that help you move each leg individually and set the tripod position quickly, per your frame
- It has an in-built bubble level on top of the tripod, which enables you to check stability and ensure framing precision
Cons of Manfrotto 190XPRO Aluminium 4-Section camera tripod
- Its construction is not as sturdy as some of the other tripods on this list, which makes it slightly flimsier by comparison.
Product Overview
- Good option for: Dynamic shooting
- Ability: Beginner
- Price: $199
3. Peak Design Travel Tripod
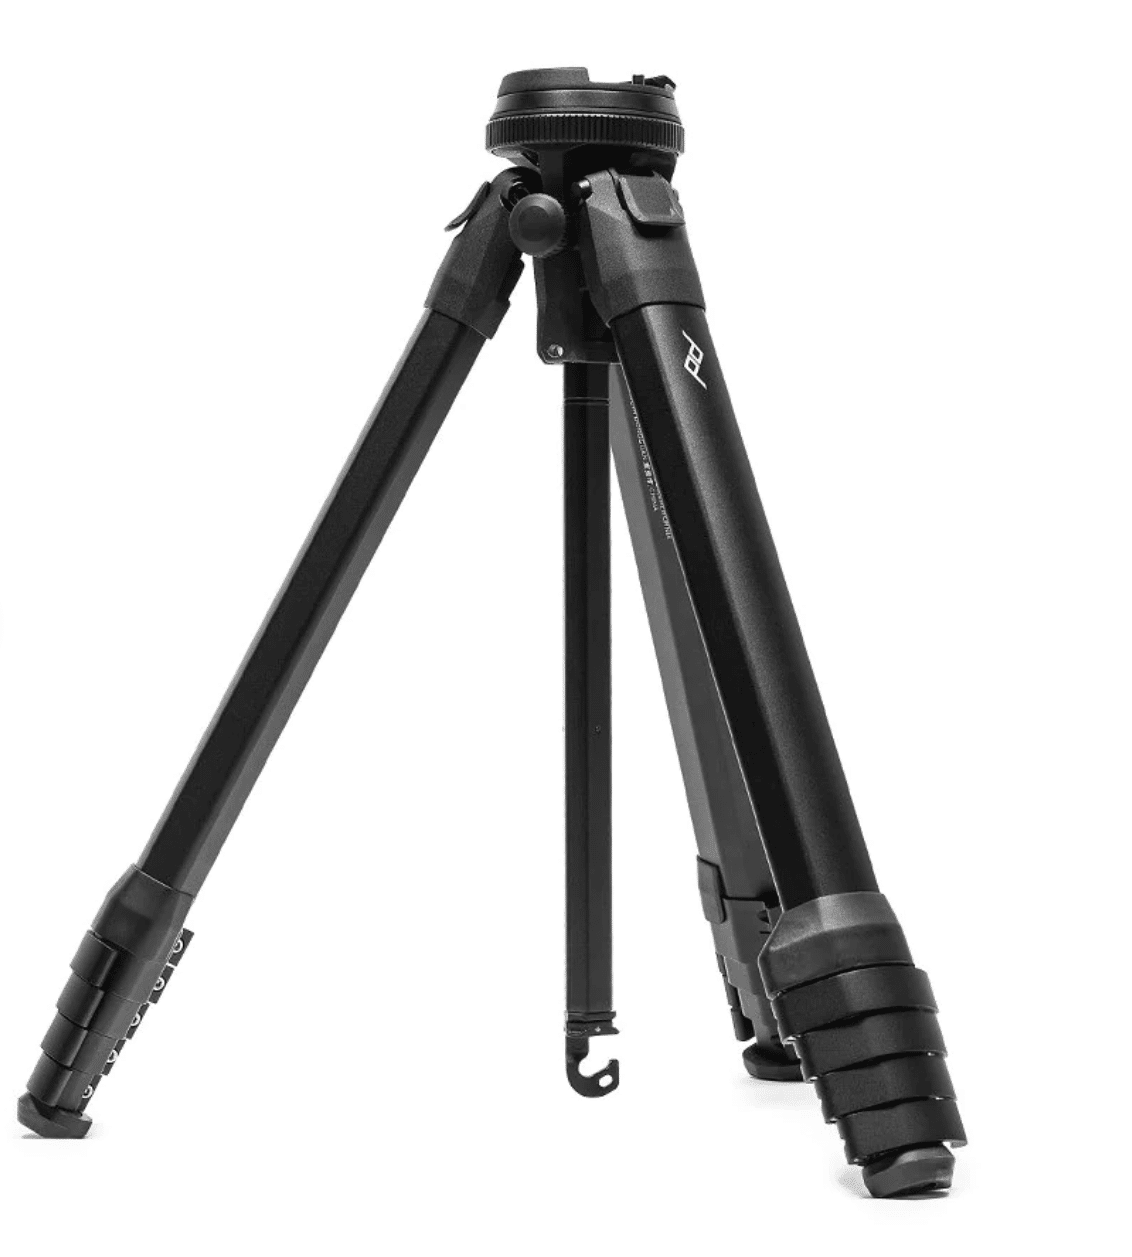
Designed specifically for outdoor photography and travel, the Peak Design Travel Tripod is an excellent choice for food photographers who work at multiple locations or want to create on-the-go content for their food vlog. Here are some of its pros and cons,
Pros of the Peak Design Travel Tripod
- It folds down to the size of a 1-liter water bottle with its space-saving design
- It offers great stability
- It’s lightweight at ~3.5lbs with the head weight included
- It has ergonomic adjustment points that make deployment fast and easy
Cons of the Peak Design Travel Tripod
- At $379.95, it’s slightly expensive for food photographers on a budget
- It doesn’t include a separate panning knob
The tripod kit also includes a ball head, protective case, ARCA-compatible Standard Camera Mounting Plate, hex tool with carrying clip, mobile mount, and bushing removal tool for maintenance.
Product Overview
- Good option for: Creating food content on the go (A great option for traveling food influencers!)
- Ability: Intermediate
- Price: $329.99
4. K&F SA254T1 Lightweight Overhead Travel Tripod
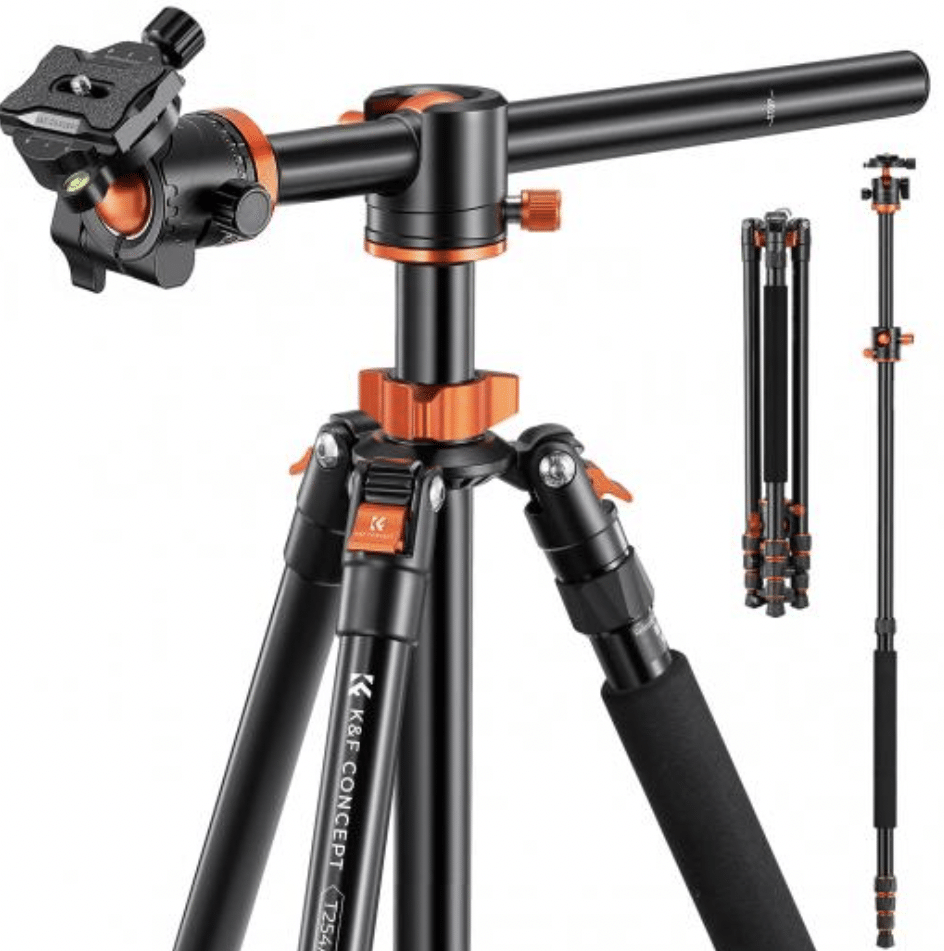
The K&F Lightweight Overhead Travel Tripod clocks in at a weight of 2 lbs and has a transverse center column that helps take panorama shots with ease. Here is an overview of its pros and cons:
Pros of the K&F SA254T1 Lightweight Overhead Travel Tripod
- Made of aluminum alloy, it features a metal ball head and a load capacity of up to 22lbs
- It can rotate 360 degrees and offers a large DSLR camera activity range
- It has a spiral locking knob that makes it easy to adjust in a variety of configurations
- Its inverted central axis facilitates low angle shooting and macro photography
Cons of the K&F SA254T1 Lightweight Overhead Travel Tripod
- It can be wobbly when extended to its full height outdoors
- It’s time-consuming to set up
The K&F also has a detachable leg that can be used with parts from the central stack as a horizontal monopod.
Product Overview
- Good option for: Panoramic food shots (Ideal for showing long dinner table and buffet setups!)
- Ability: Intermediate
- Price: $209.99
5. Gitzo Tripod Mountaineer Series 2
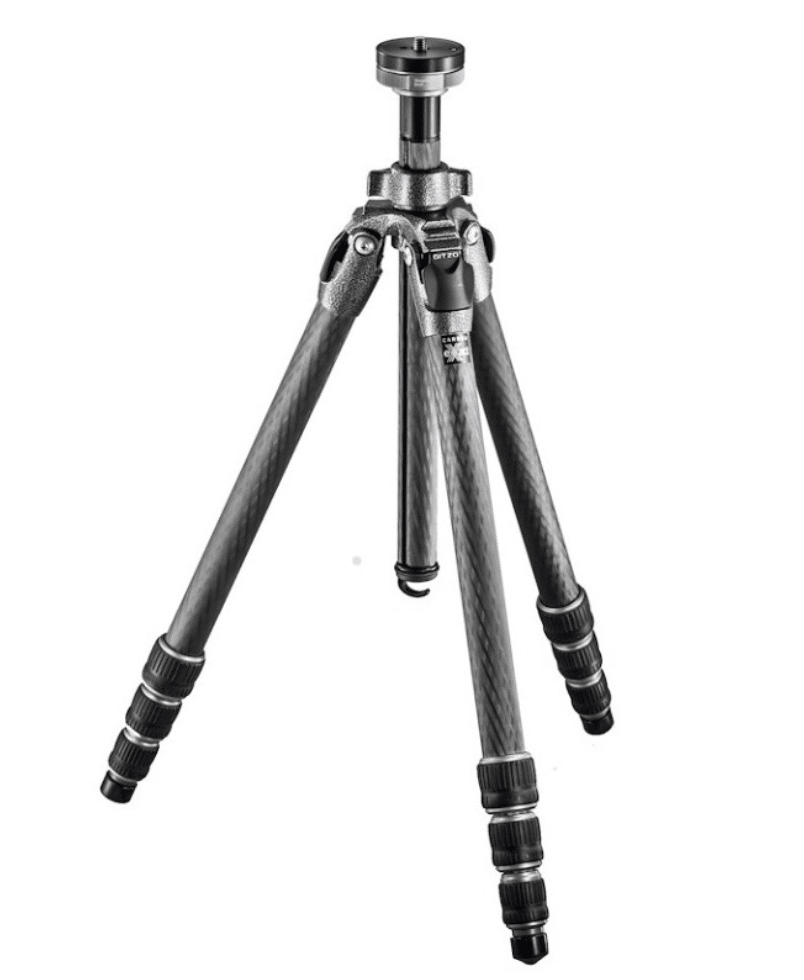
This is by far the most expensive tripod on our list, but a must-have for professional outdoor photographers. Here’s how its pros and cons pan out:
Pros of Gitzo Tripod Mountaineer Series 2
- It has stronger, stiffer legs compared to the other options in our list, with large leg diameters with additional carbon fiber reinforcement in the lower legs for better stability
- Easily removable central column with a reversible column mechanism that offers a broad capture range for photographers
- Has a stabilizer hook on the central column to add weight for more stability when required
- Features a maximum load capacity of ~40lbs
Cons of Gitzo Tripod Mountaineer Series 2
- At well over $1000, it’s expensive in comparison to the other tripods in its category. If this is your first tripod, you’ll likely want a cheaper option.
That covers our list of the best budget tripods for amateur and professional food photographers. The next step is to add these photographs to your WordPress food blog and start engaging with readers.
Product Overview
- Good option for: Another good travel-friednly option for those looking for a super resilient yet lightweight tripod that will stand the test of time.
- Ability: Pro
- Price: $1,317.95
How to Add Photos to Your Food Blog
Adding photos to your food blog can enhance the visual appeal and make your recipes more engaging for readers. One way to do this is by using the WP Recipe Maker plugin, which is one of the most popular WordPress plugins used by food bloggers around the world.
WP Recipe Maker allows you to create recipe cards with various templates and custom layout options. These recipe cards are a great way to showcase the images you take with your camera and tripod set-up. Here are some of its core features that you’ll be interested in as a food photographer:
- The plugin allows you to set a featured image for your final dish, as well as include instruction images for different stages of the cooking process. These images can be made clickable and opened in a lightbox for a better viewing experience.
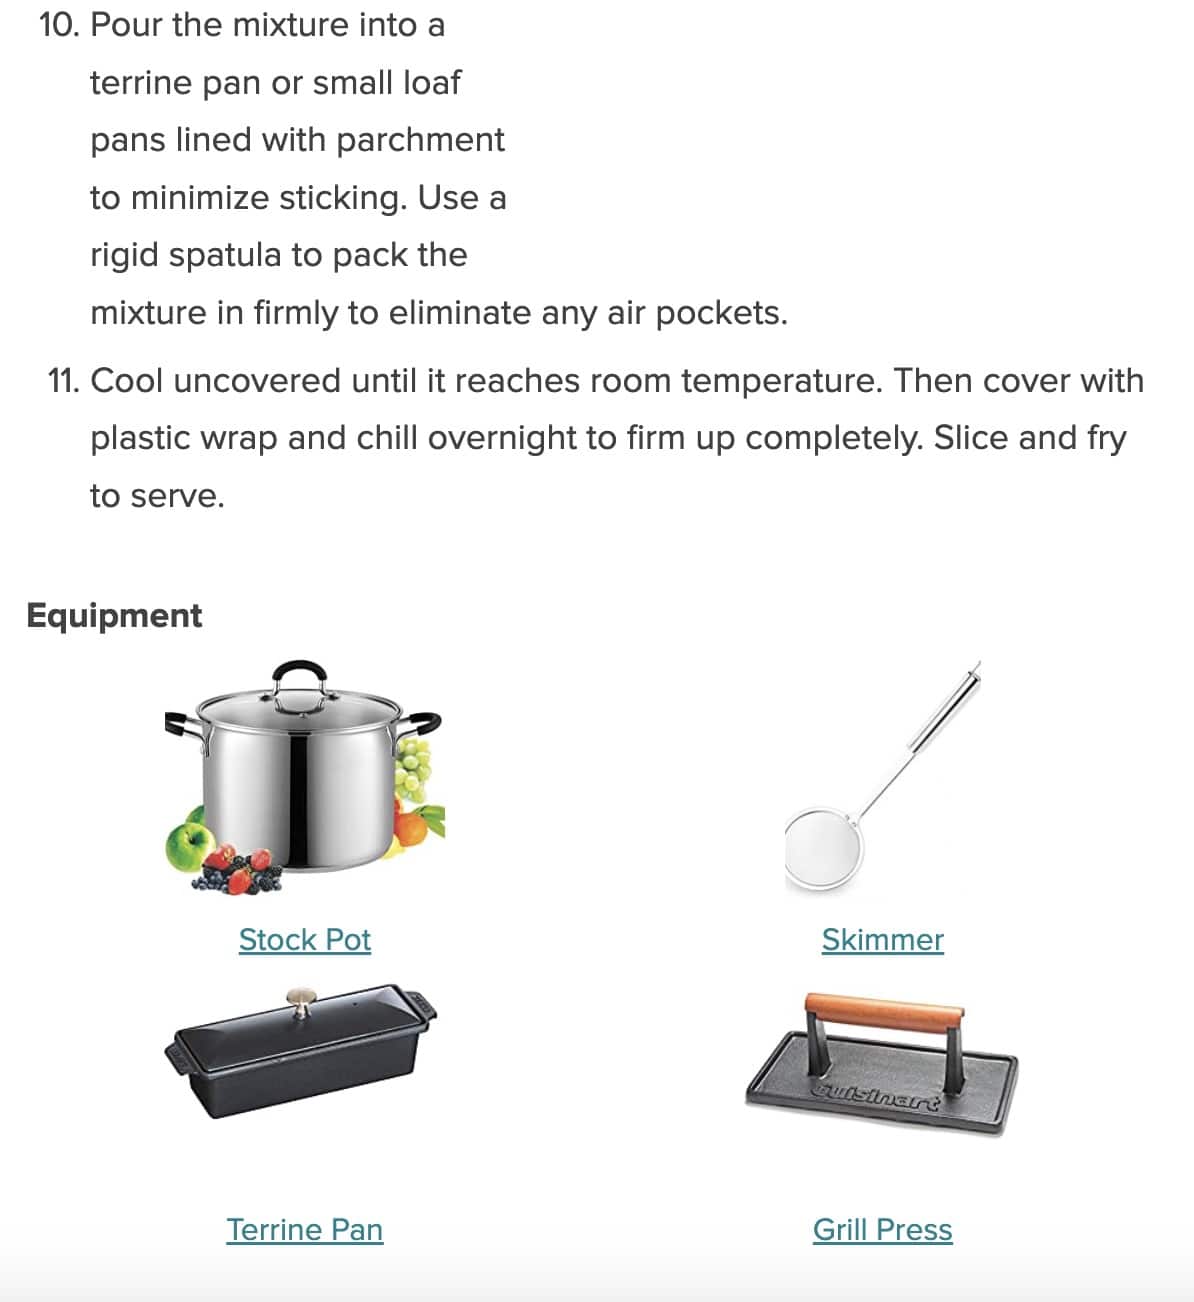
- You can include ingredient and equipment images and set them as links to purchase the items.
- Readers can pin the recipe image or any other custom images you set, making it easy for them to save and share your recipes.
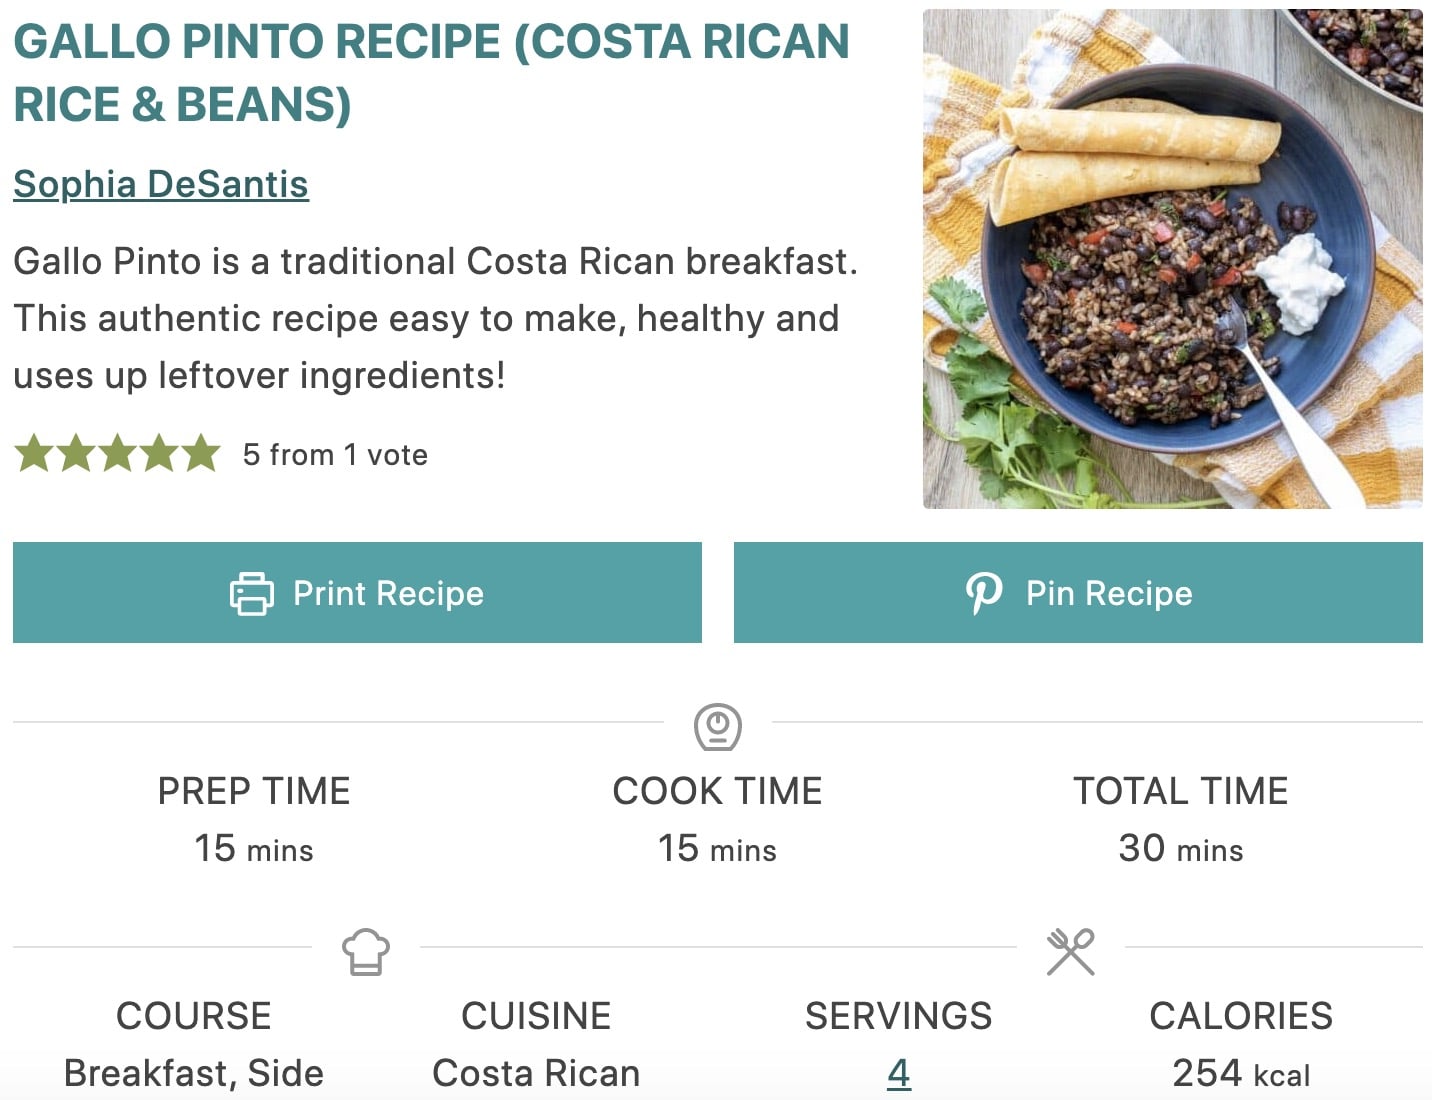
Veggies Don’t Bite is an example of a website that uses WP Recipe Maker and here we can see how they’ve included a beautiful image of the final dish as the featured image for their recipe card:
As another example, here’s how Cindy from TipBuzz uses WP Recipe Maker to add pinnable images in the ingredients section of the recipe on their food blog:
Here is a quick overview of how to add high-quality images to your food blog on WordPress.
Step 1: Install WP Recipe Maker
To create the best-looking and most feature-packed recipe cards, you will need the premium version of WP Recipe Maker, which extends the free version. So first, download the free WP Recipe Maker plugin from the plugins directory in your WP backend. Then, choose the premium WP Recipe Maker bundle of your choice. Once you purchase the plugin you’ll be able to download it as a ZIP file and upload it as a new plugin in WordPress. You’ll then need to insert the license key to activate it.
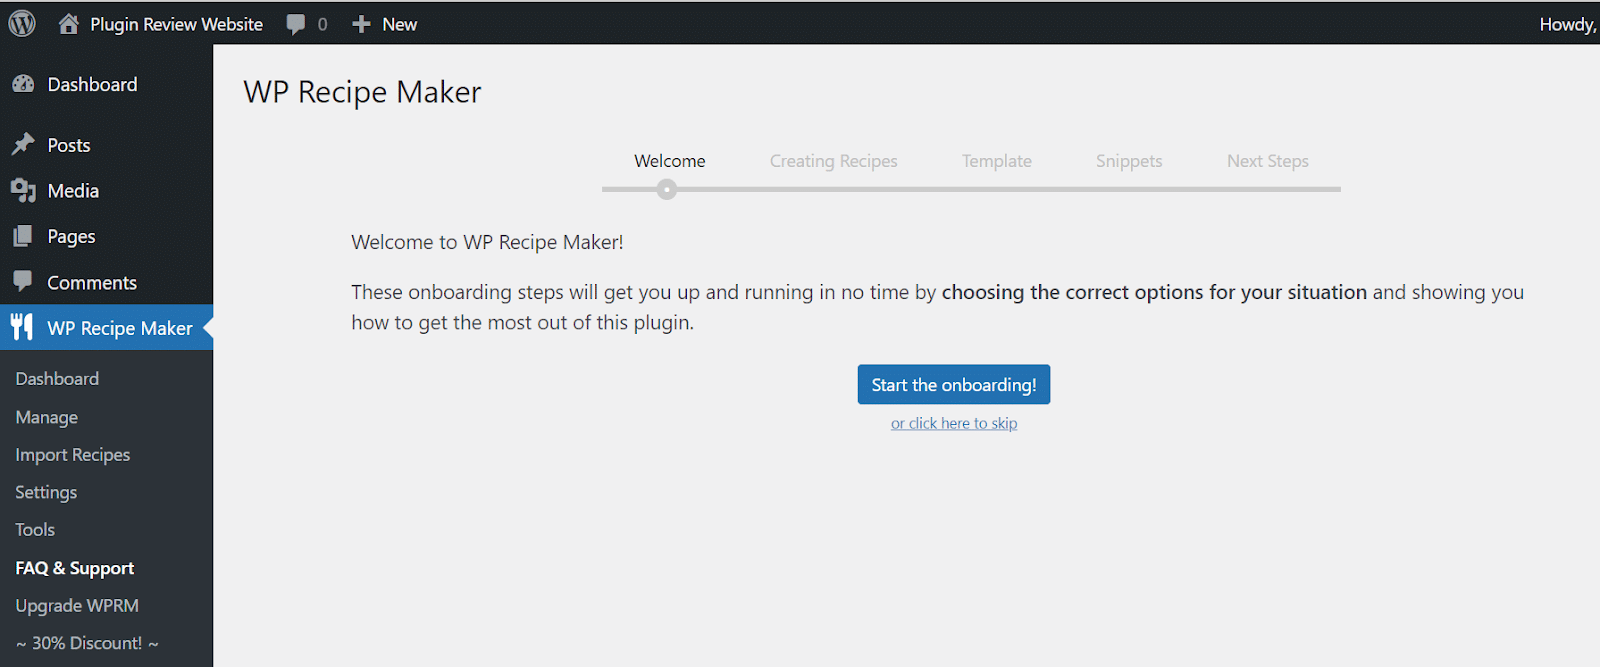
Once everything is set up, you can go through the initial onboarding walkthrough that helps you figure out the best ways in which you can use the plugin.
Step 2: Create a Recipe
Create all your signature recipes using the ‘Create a Recipe’ feature from the WP Recipe Maker dashboard. You can include all details related to the ingredients, prep time, cook time, special tips, serving instructions, and more here.
Step 3: Add Images to Your Recipe
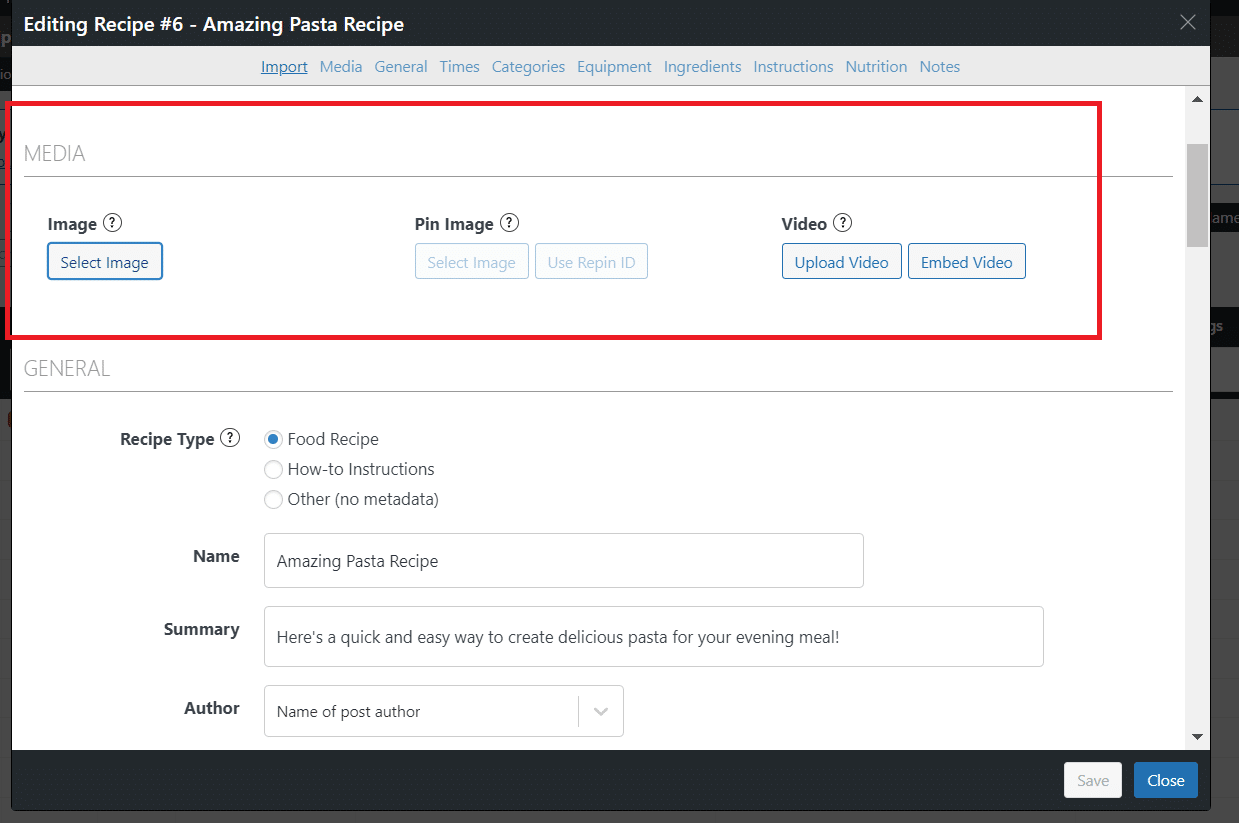
You can add all your food-related images in the ‘Add Media’ section while creating the recipe. You can even include a video tutorial of yourself making the dish for your viewers and upload it here.
For example, take a look at this muffin recipe video that WP Recipe Maker user Bake Play Smile has added to their recipe page.
P.S. Bonus points if you spotted that the video had an overhead perspective, which was shot using…yep, a tripod!
And that’s it! Your recipe is now ready to be published on your blog!
Improve Your Food Photos With a Tripod & WP Recipe Maker
A tripod is an essential tool for any food photographer looking to take their images to the next level. It allows for more consistent, clearer shots at all angles and is a worthwhile investment for anyone looking to improve their food photography.
Using a tripod is a great way to take better photos and with a recipe plugin like WP Recipe Maker, you can further enhance the presentation of your images in recipe cards, making them more visually appealing and engaging for your audience.
Whether you’re a professional food photographer or a hobbyist, investing in a good-quality tripod and recipe plugin can go a long way in improving the overall quality of your food photography.
Explore how WP Recipe Maker can help you add crisp, clear, delicious images to your food blog today!