Even the most well-written paragraph describing a dish has nothing on a well-shot, drool-inducing photograph. But of course, in order for your food photography to be effective, you’ll need to take good photographs. That takes more than just pulling out your iPhone and taking a couple of quick snaps. You’ll need to know about lighting, which can have a huge impact on the outcome of the photograph.
In this post, we’ll run through six pro food photography lighting tips that’ll help to take your food photographs to a whole new level. We’ll include tips on choosing the right light source, modifying your light, and other great techniques that will allow you to create tasty visual stories that grab your audience’s attention.
Ready to begin learning how to take next-level, professional-looking photographs of your dishes? Let’s get started.
Tip 1: Choosing the right light
The type of light you shoot in has a significant impact on the final outcome. As with many photography styles, soft light is the go-to choice for professional food photographers.
You’ll see why once you look at your photographs: soft light produces gentle, diffused shadows, which help to emphasize textures and details in food. In other words, it brings all the glory of your food creations to the forefront. Hard lighting, on the other hand, is more likely to cause unappealing shadows and highlights, so it should only be used in specific scenarios (for example, when you want to create a dramatic effect).


It’s also wise to invest in artificial light equipment. While natural lighting has its merits (for example, during overcast days, it offers soft, diffused illumination with balanced color temperature), artificial lights, like studio strobes or continuous LED lights, provide more control but may require modifiers to achieve a softer effect (that’s our next tip, so read on!). Artificial light sources are constant; they allow you to see the real-time impact of light on the food, making it easier to adjust and compose the shot.
Some of the most popular types of artificial light sources include:
Continuous LED lights
LED lights provide an adjustable and continuous light source, so you’ll find them in the equipment packs of virtually every professional food photographer. There’s a wide range of different options available, including different sizes, shapes, and color temperatures, so they’re a very versatile tool. If you’re a food blogger who works from home, then continuous LED lights will likely be the way to go.
Ring lights
Ring lights are perfect for capturing close-up shots of food. They’re circular attachments that surround the camera lens and are brilliant at providing even lighting on the subject and creating captivating highlights, especially in liquids, glassware, or other reflective surfaces. They’re designed especially with close-up shots in mind, however, making them less suitable for taking shots of larger food setups.
Studio strobes/flash
Studio strobes provide short bursts of intense light. You’ll find them used in professional photography environments because of how well they help cameras handle moving shots, but they can be great for still-life photography as well. The sudden burst of light essentially freezes motion, allowing for great shots of steam rising from hot dishes or action shots of food preparation.
Tungsten lights
Tungsten lights emit a warm, yellowish light. Also known as incandescent lights, they help to evoke a cozy and inviting atmosphere in food photography. They’re great for some shots, but because they produce more heat than other types of lights, they’re generally used sparingly.
Fluorescent lights
Fluorescent lights come in various color temperatures, making them a versatile tool, and they’re also energy efficient, making them good for the planet. They have their place in the food photography world, but you may have to make some white balance adjustments to your photographs since many fluorescent lights have a slight green or blue tint.
Tip 2: Invest in lighting modifiers
Lighting modifiers are essential tools and accessories used in photography to modify, shape, and control the light emitted by a light source, and they should be used in tandem with your artificial light sources described above.
The three most common pieces of lighting equipment you should have in your equipment kit are:
Softboxes
Softboxes are large boxes, usually rectangular or octagonal in shape, lined with diffusion material. They help to soften and spread the light, which helps to create a gentle and flattering illumination on the subject, which in this case is the food. They’re available in a wide range of sizes and typically work in conjunction with continuous LED lights or studio strobes.

Diffusers
Diffusers are placed in between the light source and the food subject. These translucent panels or fabrics help to scatter the light, reducing its intensity. This results in a softer final effect. They’re especially helpful for minimizing hard shadows in food photography.
Reflectors
Reflectors do just what the name implies; they reflect light and are used to bounce light back onto the subject from a different angle. For example, you would place a reflector at the side of the food to create appealing sidelighting.
They’re available in different colors, all of which provide a different quality of reflected light. The most popular colors are white, silver, and gold. White reflectors offer a soft, neutral fill light; silver reflectors provide a stronger, more intense reflection; and gold reflectors help to add a warm, golden glow.
Tip 3: Choosing the right direction of light
The direction of the light on the subject plays a crucial role in the final product. There are multiple ways to direct light at food, each creating its own distinct look and mood. Selecting the right one for your needs will depend on your creative vision and what message you’re hoping to evoke via your food photography.
The most common set-ups for food photography are:
Backlighting
This method, as the name suggests, involves placing the light source behind the food subject, so that the food is illuminated from the back. This method helps to create a halo effect around the edges of the food, helping it to stand out from the background and giving it a vibrant and appetizing appearance.

This is the go-to positioning of choice for translucent or semi-transparent foods, such as dishes with thin sauces, beverages, and fruits with a high water content, which may be obscured by background colors if other lighting positions were used. The effect is a more enticing, visually satisfying depiction of the food.
Depending on what food you’re shooting and the light source you’re using, you may have to account for strong silhouettes, which can cause a loss of detail in food subjects. A reflector or diffuser will bounce some of the light back onto the front-facing side of the food, helping to fill in shadows and retain detail.
Sidelighting
Sidelighting positions the light source at the side of the food subject. This helps to create shadows that can add a sense of depth and dimension to the food, emphasizing its contours and textures.
This positioning is especially recommended for foods that have interesting surface details, such as textured or crispy items. These could include roasted vegetables, meat, or baked goods. The sidelighting shadows will accentuate those details, helping to create food photos that are more inviting and appealing.

It’s important to think of the angle of the light relative to the food subject when using sidelighting. A shallow angle will result in a softer, more illuminated image, while a grazing angle can create longer and more dramatic shadows.
Aspect lighting
This method involves positioning the light at an angle relative to the camera’s perspective. Done correctly, it’ll accentuate the contours and shapes of the food, resulting in a three-dimensional look. It’s a versatile lighting setup that you can use with many different subjects, and it’s especially useful when you want to accentuate the shape, form, and structure of the dish.
You’ll need to experiment with different angles to find the lighting direction that works best with your food subject. You can also adjust the aspect lighting, which will help to highlight specific parts of the food – for example, the toppings or garnishes – to create a great-looking composition.
Other, less commonly used light directions you can use include top lighting, front lighting, under lighting, and cross-lighting. In most cases, it’s all about playing around until you find the one that looks right for your food subject.
Tip 4: Know what time of day to shoot
Unless you’re shooting in a completely enclosed room and have full control over all aspects of lighting, you’ll need to think about natural lighting. Natural lighting will impact the look of the photo even if you’re using artificial lights as the primary light source since the natural light will form part of the ‘ambient lighting’.
Natural light changes throughout the day, so it’s important to understand how the light differs and how it’ll impact your photographs.
Common lighting characteristics at different times of day include:
- Daytime: Mid-morning or mid-afternoon will provide a soft, natural light that helps to enhance the appearance of the subject without harsh shadows.
- Golden hour: This is the magic light that occurs just after sunrise and just before sunset. The warm, golden-toned light adds a touch of romance and magic to all types of photographs, including food photographs.
- Noon and night: Noon brings intense overhead lighting that’s great for flat-lays, but isn’t well suited to most other forms of photography. At night, you lose your natural lighting entirely, meaning you have to go with artificial lighting.
The time at which you shoot will also impact the direction and intensity of light, which you can use to your advantage to create better-looking images. For instance, shots taken during low morning or evening can create long shadows that add depth to the photograph.
Tip 5: Think about lighting color and temperature
The mood and emotion of your food photography will be heavily influenced by the lighting colors you use. For instance, warm-toned lights, such as ones with yellow or orange hues, will help to create a cozy and inviting atmosphere. That lighting color is well-suited to photographing comfort foods, desserts, and dishes with rich, earthy colors.

On the other end of the scale, we have cool light temperatures, such as those with green or blue undertones. These can provide a sense of freshness and modernity to your food images. They’re well-suited for foods where freshness is key, such as seafood and salads, as well as for dishes that have vibrant, cool colors.
Your lighting color selection will influence how the viewer perceives the food, as well as the overall ambiance of the photograph. It’s best to play around with the white balance in your camera settings until you find the lighting color that best complements your food subject and helps to create your desired mood. You can also experiment with lighting gels, a cool tool you can place in front of your light source to change its color temperature.
You can help to neutralize any color casts caused by different light sources via the white balance settings on your camera or during post-processing. With a few adjustments, you can get a white balance that gives your images more accurate colors, making your dishes look fresher and ultimately more appealing.
Tip 6: Change your setup for different food types
Different food types call for different lighting setups. As such, it’s important to learn the skill of adapting your lighting depending on the type of food you’re photographing. Rather than relying on one setup for food photography, if you know how to set up different shots, you’ll be in a good position to showcase the distinct qualities of each of your dishes.
You’d shoot steam rising from a hot bowl of soup differently than how you’d shoot the vibrant colors of fresh produce, after all. If you have a versatile approach to your lighting techniques, you’ll be able to find the perfect setup for each food subject to create compelling and mouth-watering photographs.
Below, we’ll run through some tips for photographing different food types.
Capturing steam and hot dishes
Capturing the steam that’s rising from your soups, freshly cooked meals, and other hot dishes can add a sense of freshness and appeal. Use strategic lighting and a contrasting background for your food photography to capture the steam rising over the dish.
Enhancing vibrant colors
Fresh fruits, vegetables, desserts, and other foods with vibrant colors will benefit from lighting that preserves and enhances the richness of the colors. A softbox or diffuser can help to provide soft and diffused lighting, which in turn will help prevent harsh shadows that may mute the colors. You can also use reflectors to illuminate the darker sides of the food, helping to avoid color discrepancies.
Emphasizing textured surfaces
Crispy fried foods, grilled meats, desserts with intricate toppings, and other dishes that have textured surfaces often respond well to sidelighting, which can help to create depth and dimension and emphasize textures.

Working with reflective surfaces and glassware
Ring lights are recommended when shooting foods on reflective surfaces, such as glasses or glossy dishes. You may also light the subject from above. These approaches will help to minimize reflections and glare, allowing the product to take center stage. In the case of wine glasses and beverages, backlighting will add a beautiful halo effect that evokes a sense of elegance.
Accounting for height and layers
Layer cakes, stacked sandwiches, and other dishes with height and multiple layers often respond well to top lighting or cross lighting, since they help to accentuate the many vertical elements of the dish.
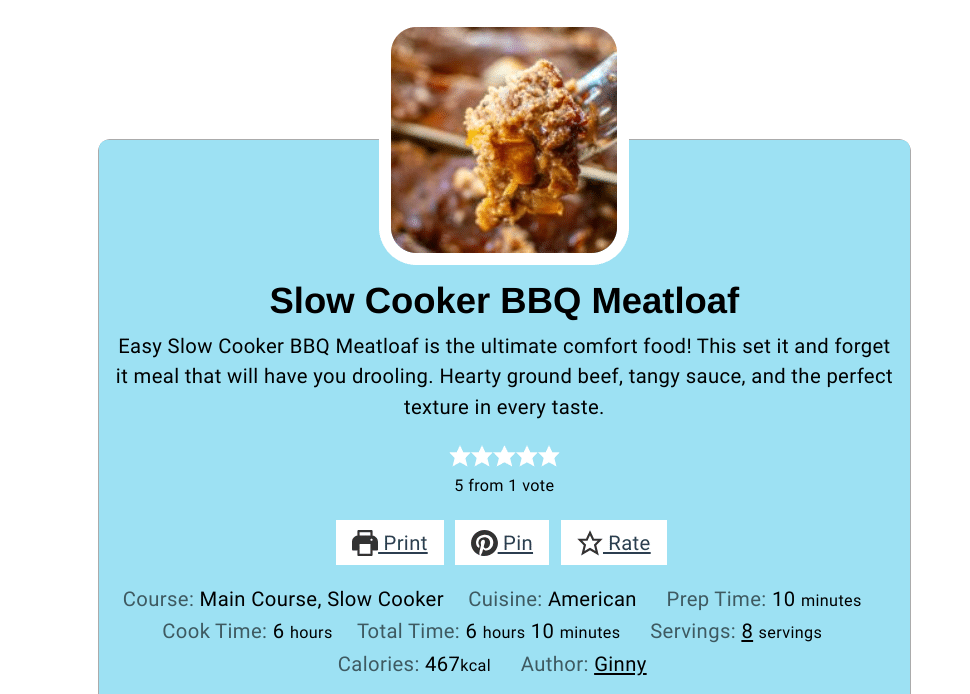
Bonus tip: Display your food photos with WP Recipe Maker
Looking to use your newfound photography skills to enhance the way you display recipes on your food blog? Then WP Recipe Maker, a WordPress plugin created specifically for food bloggers and food photographers, is just what you need.
There’s a free version of the plugin that includes ready-to-use templates for displaying recipes, but upgrade to the paid version and you’ll find a whole host of additional templates that could well be perfect for your blog. There’s also an in-built Template Editor that you can use to create recipe cards that match your food photography styles.
Recipe cards showcase your professional-looking food photographs in an engaging way alongside useful content. It allows you to include a featured image of the final dish at the top of the recipe card, as well as step-by-step images that take your readers on an engaging visual journey. There’s even a handy “Pin Recipe” feature, which allows your viewers to save your photos to Pinterest boards, which can help to grow your readership.
Wondering just how WP Recipe Maker can improve your website’s visual appeal? Just check out some of these examples of real-world websites that use the plugin:


Ready to make the most of your gorgeous food photography? Then check out the different pricing plans available for WP Recipe Maker. We offer a 30-day money-back guarantee, so you can try the plugin risk-free.