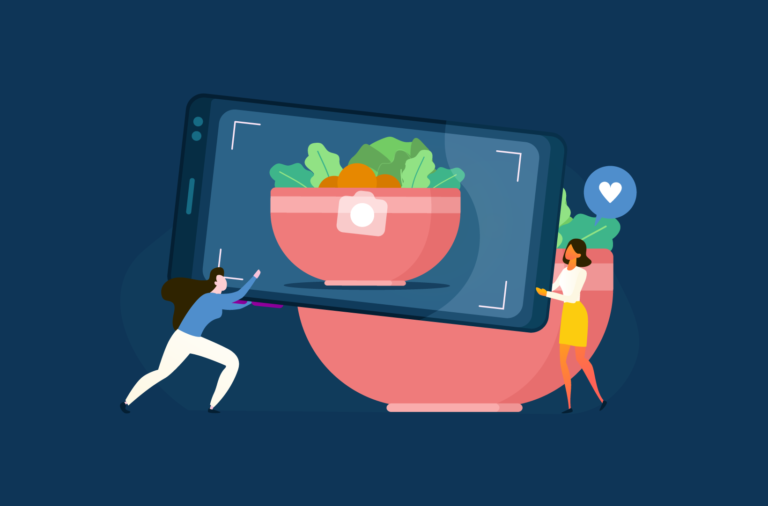
Do you want to make your own cooking videos at home? If you love whipping up mouth-watering meals, cooking videos are a great way to enhance your food blog and share your ideas, recipes, and step-by-step tutorials with other home cooks.
In this article, we’ll guide you through the process of making professional-looking cooking videos at home and share strategies for incorporating them into your food blog and other social media platforms. You’ll learn:
- The equipment and tools you’ll need to create high-quality cooking videos
- Tips and techniques for filming and editing your videos
- How to strategically embed your videos into your food blog’s recipe posts using powerful plugins like WP Recipe Maker
- Ways to leverage your cooking videos across social media platforms to grow your audience and drive traffic back to your blog

Tools You Need to Make a Cooking Video
Before you roll up your sleeves and get in front of the camera, you must ensure you have all the necessary tools to make cooking videos. At this stage, you don’t have to worry about sparing a huge budget for video-making equipment.
In this section, we will tell you what budget and beginner-friendly video-making equipment you need to purchase so you can make high-quality, professional videos without spending too much money.
Video camera
A high-quality video camera is essential for creating professional-looking cooking videos. However, if you’re just starting out, you may not need to invest in a dedicated camera immediately. Many modern smartphones are equipped with capable cameras that can record high-resolution video, making them a suitable option for beginners.
When choosing a camera, whether it’s a smartphone or a dedicated device, ensure that it can record in at least 1080p resolution. This will help you capture clear, detailed footage of your cooking process, making your videos more engaging and visually appealing to your audience.
As you progress and become more serious about your cooking videos, you may want to consider investing in a dedicated video camera that offers advanced features, such as interchangeable lenses, manual controls, and better low-light performance.
Tripod
After you decide on your video camera, you need to get an appropriate tripod for cooking videos. While you might be tempted to improvise and stabilize your camera on the counter using a stack of books, a tripod offers much more flexibility and stability, allowing you to experiment with different video angles and compositions. Luckily, they are typically inexpensive, and even a basic model will be more than enough to support your video-making journey.
Lighting equipment
While natural lighting can be a great option for some videos, it may not always be the best choice for professional cooking videos. The main reason is that natural light can be inconsistent and difficult to control, resulting in subpar footage that lacks the necessary detail and clarity, especially for close-up shots of your dishes.
Therefore, a good-quality lighting kit should be considered a requirement. You can get a simple LED-based lighting kit and learn how to position it to make your videos look mouth-watering.
Video editing tools
Your viewers will expect your food videos to be edited perfectly. Fortunately, you don’t need to be a professional video editor to produce cooking videos, but you’ll need some basic editing skills.
A program like Premiere or iMovie should be more than enough for your purposes as a beginner. These tools will allow you to do all the basic editing you need to make your videos look professional and more enjoyable. If you are using your phone, you could even use a smartphone app like inShot to edit your videos.

How to Make a Cooking Video: Step by Step
Now that you have all your video-making equipment together, let’s move on to our step-by-step instructions for making a cooking video at home.
Step 1: Determine your style
Before you start producing video content, you must determine your video style, which should fit your food blog niche. What is the intention of your videos? Are they short video clips covering the basics and quickly reaching the final product? Or do you want to talk viewers through the recipe?
Tasty-style videos: These are short, fast-paced videos that condense the cooking process into a minute or less, often using quick cuts and overhead shots. They focus on the visuals and rarely feature a host or voiceover.
Instructional videos: These videos are in-depth and often feature a host guiding viewers through the recipe step-by-step. Examples include Binging with Babish and Bon Appétit’s Test Kitchen videos, where the hosts share tips, techniques, and personal anecdotes while cooking.
Personality-driven videos: Some cooking videos focus more on the host’s personality, using humor, storytelling, or unique perspectives to engage viewers. Examples include Hannah Hart’s “My Drunk Kitchen” series or Maangchi’s Korean cooking videos, where her warm personality shines through.
It’s a good idea to watch lots of other recipe videos on different social media platforms to see different styles and get an idea of how you want to develop your own style.
Remember that there is no right or wrong, but consistency is good. Style will develop over time, but it doesn’t hurt to have a clear idea of what you’re aiming for when you start.
Step 2: Choose your recipe
Start by choosing the right recipe. This means finding a recipe that is simple enough for the average home cook to prepare and one that doesn’t take hours of work. The longer it takes to cook, the more editing you’ll need to do (and the harder it is to cover up mistakes or start over).
Ensure your recipe is also seasonally appropriate, uses colorful ingredients, and fits your target audience’s budgets and capabilities. For example, you might not want to publish an ice cream cake recipe in January or describe how to make a complex recipe like Beef Wellington if your target audience is college students.
If this is your first cooking video, choose a recipe you are very familiar with so that you can approach it with confidence. This first video will also set the tone for your online brand, so consider the impact of your chosen recipe. For this first video, you can opt for a recipe that’s your signature dish or in your signature style (e.g., salads, vegan, Paleo).
Step 3: Script and plan your shots
You need to plan the flow of your video in advance to prevent any awkward pauses and capture that spontaneous flow.
Spend some time creating a storyboard for your video. This does not have to be too elaborate. A quick template of what you want the video to show, the intro, the transitions, the ingredients you will need, pots and pans, and the shots you want to use should be enough to keep you focused.
Will you present the finished dish after you’ve filmed? How will you present it? How many angles will you need to film? Do you want to add a voiceover later or narrate as you cook? All of this will impact the way you film and edit your video, so preparing a script is a great way to prepare a framework you can use to guide your requirements before you film.
When planning your shots, decide whether you want to use close-ups to showcase the ingredients you’re using or mention them in your bio or video description.
If you plan to talk during your videos, keep it relevant. Remember, people will probably land on your website after a search for a specific recipe. They are less interested in your online persona and more interested in finding out how to prepare the food.

Step 4: Prep ingredients and cooking space
After you decide on what to cook and how to cook it, you can move into setting the stage before starting to record. Ensure your cooking space is clean and well-lit, free from distracting clutter. You should also be in a good mood to perform at your best for your video.
Preparing the ingredients beforehand might also be a good idea. This may include preheating the oven, chopping or parboiling vegetables, or asking your butcher to debone your meat. This will save you the trouble of editing these sections once you are done recording your cooking video.
Step 5: Shoot the video
When it comes to shooting your video, there are a few things you need to keep in mind:
- Make sure you film every step of your recipe. It’s better to have more footage than less and not be afraid of messing up. You can always edit the parts you don’t like later. You can even share these mistakes in a blooper reel or cooking “fail” compilation later! Your viewers might appreciate your content more if you don’t take yourself too seriously.
- Use a range of shots, including base coverage, close-ups, and overhead shots. Think about what shots will work best for each scene – overhead shots can be great if you’re demonstrating how to make the video, while close-ups are great to show off the final product.
- Mentally run through the steps before shooting your video – or practice if possible. This will help you identify any points where you might get stuck, stumble over words, or need an item that isn’t readily available.
- If you will be talking while cooking, don’t forget to share a few tips about your recipe. Showcase your expertise or what makes the ingredients unique. You could mention where you source your products from, what your favorite brands are, or cooking and baking hacks you’ve picked up along the way.
Pro-tip: Close off your video by plating your dish in an appealing manner with the right garnish. Take shots of the dish in motion, e.g., cutting a slice of cake, drizzling sauce over a piece of meat, or decanting your soup into a bowl. Study cooking shows and magazines for inspiration.
You can also showcase yourself (or your family) by taking a bite at the end. The shots should be relevant to the dish, so if you have made something crispy, capture the crackling sound it makes when someone is cutting into it. If you want to show off the texture, zoom in with a close-up shot.
Step 6: Edit your video
Video editing is probably the most crucial aspect of creating a video because it stitches everything together.
Here are a few video editing tips to keep in mind:
- Add text and narration wherever you need to to make the video easier to understand (e.g., displaying the quantities and ingredients used, the steps to follow, etc). Since viewers don’t always watch videos in quiet environments, adding brief notes can help them follow the stages.
- When creating the main version of your video, consider creating a shorter version too. This could be a 15-second version that is highly edited and shows just the main steps. Such short clips can easily be popular on social media platforms and are great for sharing with appropriate hashtags. They can also lead viewers back to the full video on your blog.
- Add background music if your video doesn’t have any narration. It keeps text-based videos upbeat and engaging.
Step 7: Post the video on the intended platform
Once you’ve recorded and edited your video, it’s time to choose where to publish your recipe. Several platforms can help you maximize your reach, and you don’t have to limit yourself to just using one.
If you are publishing your cooking videos on YouTube, make sure that your bio contains all of the relevant information, including ingredients, links to your social media pages, website, etc. For Instagram, make sure that your caption contains the same information mentioned above so foodies know where to find you and your content and to help establish yourself as a food influencer.
It might be a good idea to use scheduling software like Buffer or Hootsuite so you can post your cooking video at a specific time. You might need this feature to target popular time zones of each social media platform or simply to schedule a backlog of videos.
You also need to promote your videos on your own website. Showcase the recipe clearly, with a good introductory description, a list of ingredients, detailed written instructions, pictures, portions, and nutritional information.
How to add videos to your recipes with WP Recipe Maker
The easiest way for you to promote your videos on your own WordPress website is to use a recipe plugin like WP Recipe Maker. With these videos, you can connect with your audience on a different level and expand your online presence by sharing them on your social media accounts. You can even generate extra income by using certain kitchen tools in your videos and placing affiliate marketing links.
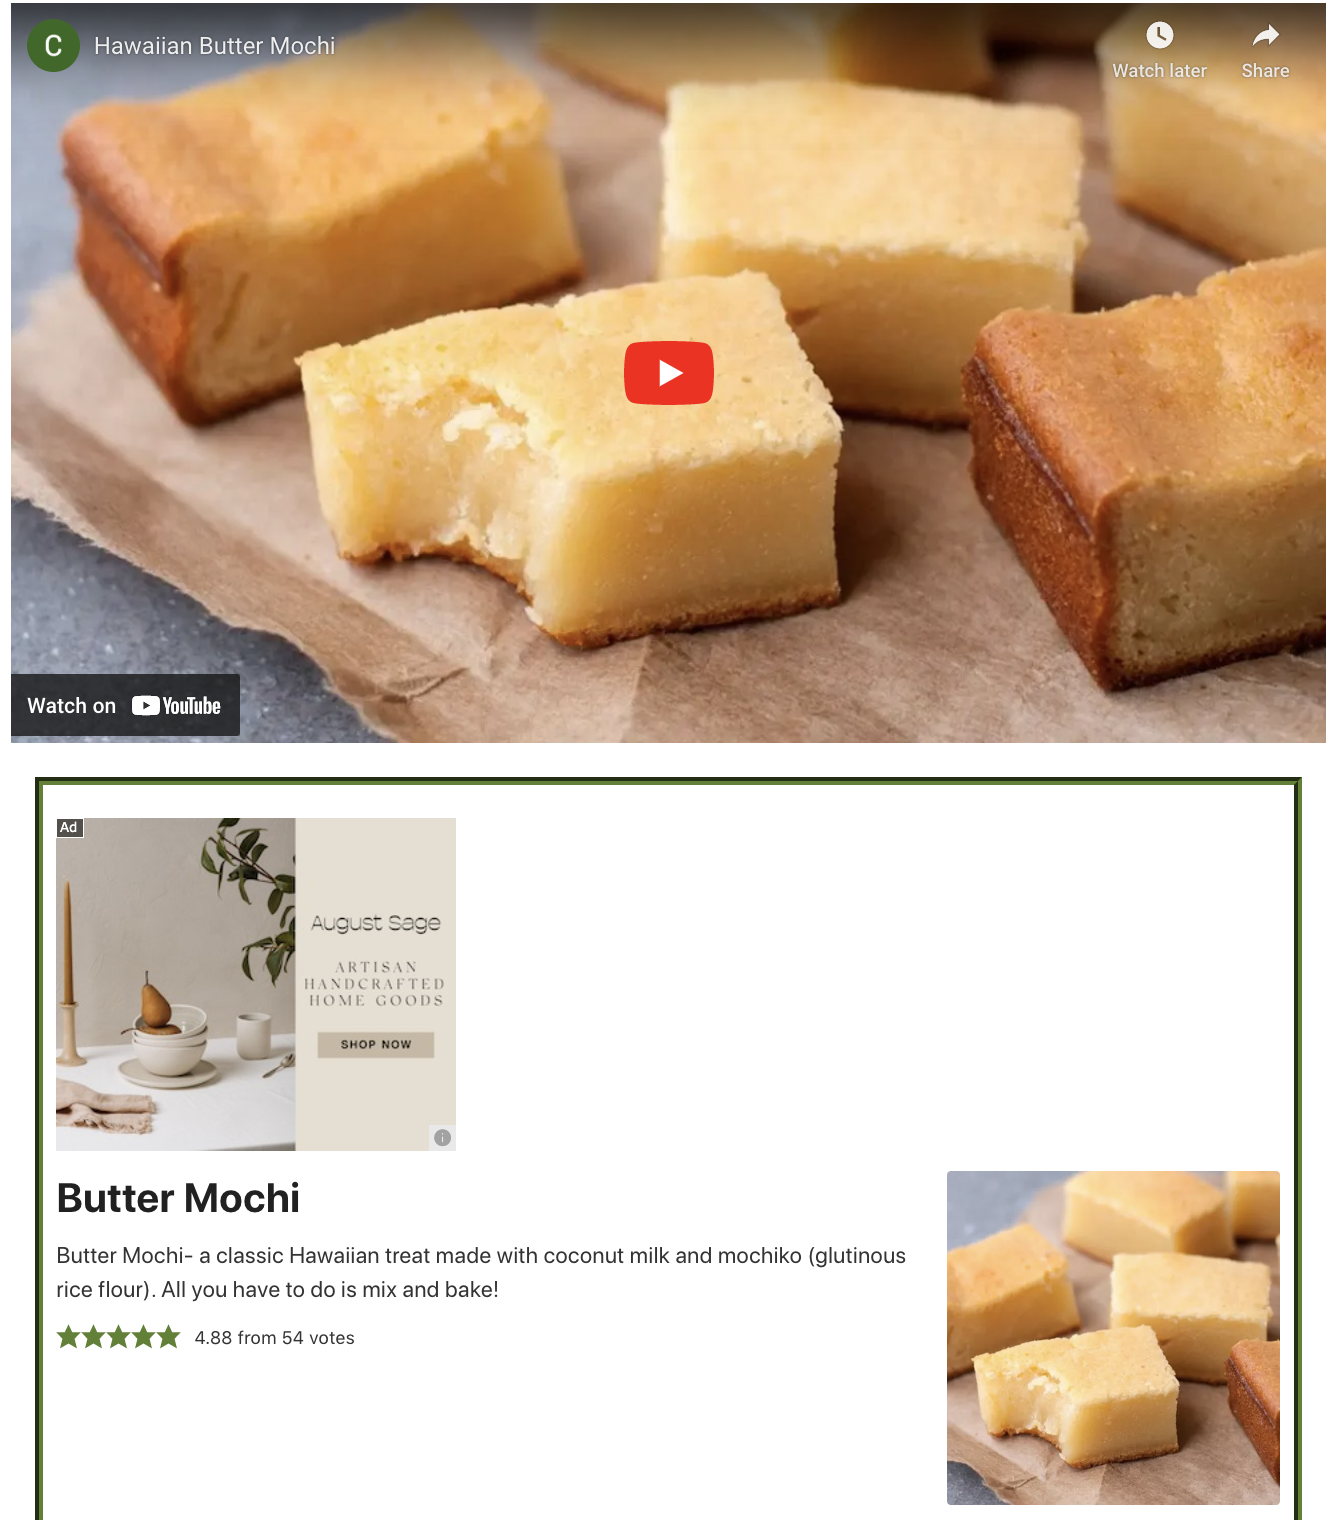
You can use WP Recipe Maker to create stylish recipe cards to share with your fans and site visitors. These cards contain all of the recipe steps, ingredients, nutritional information, and prep work – and you can add your videos and a rating as well. This makes your cooking content more engaging and helps you gather feedback from your visitors.
Here’s how you can easily add videos to your recipes:
1. Upload from your computer: To upload a video to your recipe, go to “edit recipe” and click on the “upload video” button. Then, navigate to the “replace video” option on the left menu. To upload a video, simply drag the files into the Media section or click Select Files. You can insert your video file into the post later.

2. Embed a video from a link: You can use video embed codes from sites like Vimeo, Mediavine, or AdThrive. Click Add Media in the post, and then choose Video. Choose Insert from URL and paste your link into the field in the popup.
WP Recipe Maker will retrieve the video markup and add it to the recipe. We recommend embedding a video, but if you use the option to upload the video, add a description and poster image to complete your metadata and optimize your posts. Click on Edit File and type your description and caption into the provided text boxes. On the left side of the menu, simply click Select Post Image to set your metadata thumbnail image.
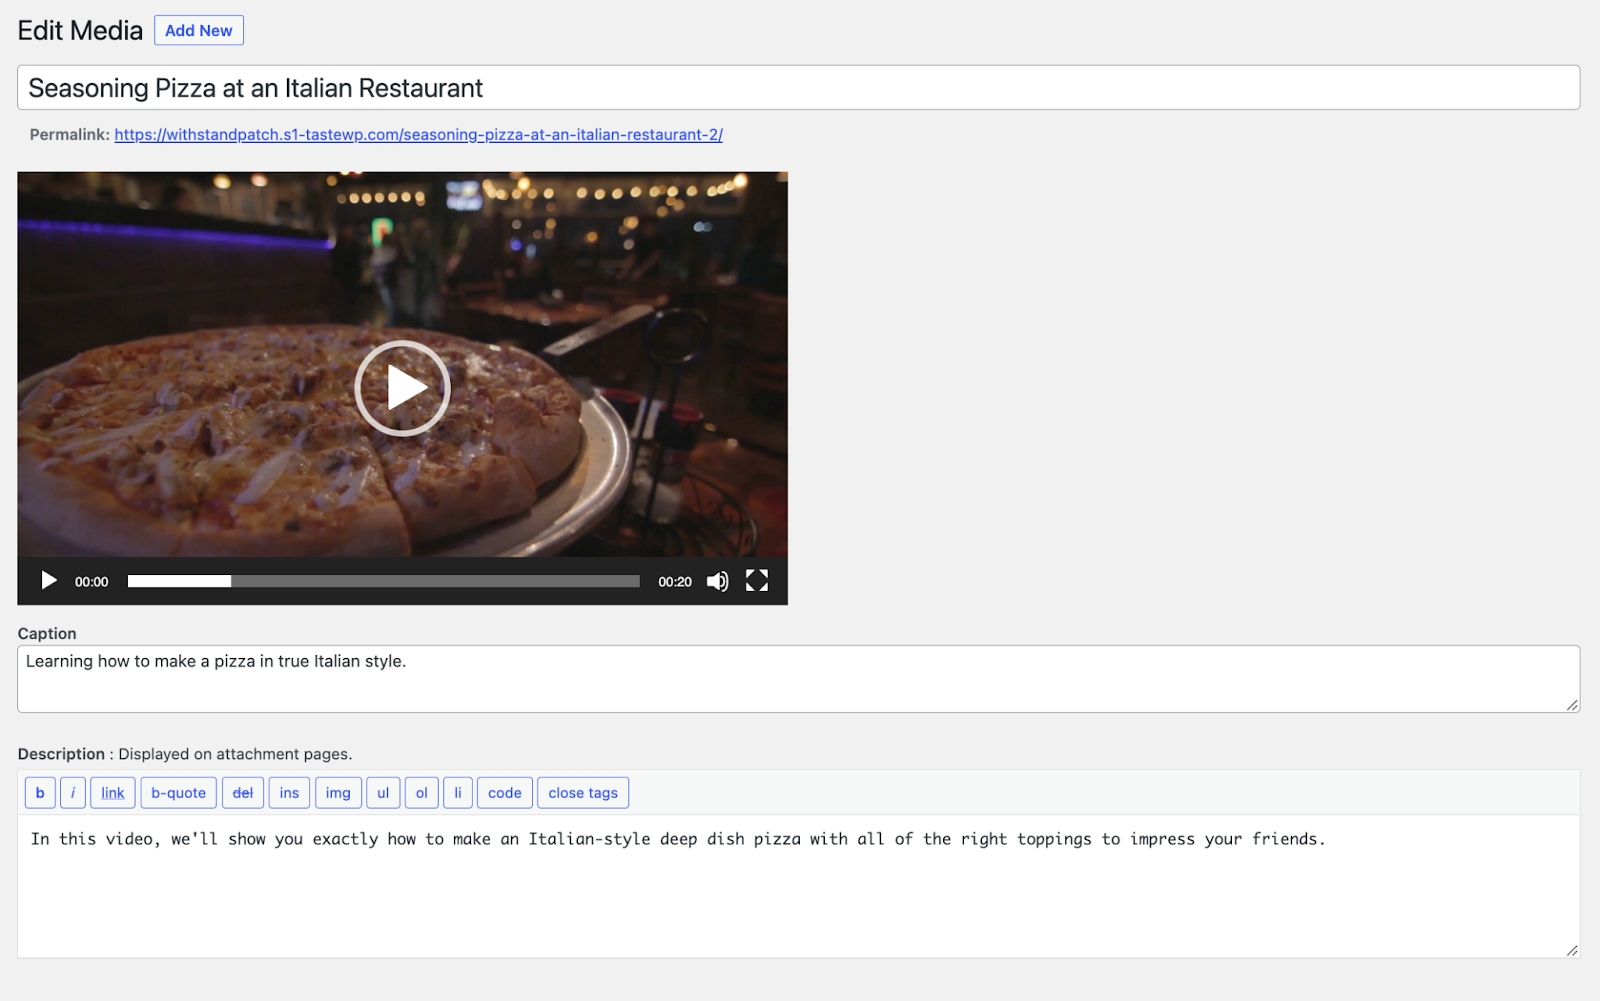
3. Edit: Use the template editor to ensure the video appears exactly where you want it to. Videos that you upload will be shown in the recipe box by default, but you can remove the video field from the recipe template in the Template Editor. Then add the [wprm-recipe-video] shortcode where you would like the video to appear.
Next step: Start creating cooking videos today
Video recipes are a great way to increase traffic to your website, promote your blog, and engage your audience. If you keep some things in mind when filming (such as choosing the right angle, having good lighting, and preparing a storyboard and all ingredients beforehand), you can get a professional-looking video in almost no time to improve your blog!
While making a professional cooking video might be a breeze for talented home chefs, incorporating them into your blog and recipes might be tricky. If you are looking for a tool that can make adding videos to your recipes as easy as making them, WP Recipe Maker is the best option!
In addition to setting up attractive and easy-to-manage recipe cards, WP Recipe Maker can help you showcase your recipe videos on your pages. Give WP Recipe Maker a try today and see how easily you can elevate your recipes and better capture your audience’s attention.