That moment right before you publish a recipe can feel strangely harder than developing it in the first place. The dish works, and the pictures look great. But now you’re staring at the blank space above your recipe card, wondering what goes there. Is this the “headnote”? Is that the same thing as the Summary field? Should substitutions live in the Notes section instead? And how long is too long before readers start scrolling straight past your story to find the ingredients?
Food bloggers are constantly walking that line between connection and convenience. You want to share the memory behind the dish, explain why you tweaked it three times, and help readers avoid the mistake you made on your first test. At the same time, you don’t want to frustrate the cook who just wants dinner on the table.
Let’s take a closer look at it all. We’ll give you clear answers on what a recipe headnoteis, where it belongs on a modern food blog, what to include, and how to write one that earns both trust and clicks.
What is a recipe headnote, and where is it located?
A recipe headnote is the introductory text above the ingredients and instructions that bridges the author and the cook. It gives context, sets expectations, and highlights anything the reader should know before they start.
In traditional cookbooks, the headnote appears directly before the ingredient list. It’s usually a short paragraph that explains the origin of the dish, offers a tip, or describes what makes the recipe special. On a food blog, things look slightly different. The longer introduction you write in your post – the story, testing notes, and helpful context – often functions as the headnote in spirit.
However, technically speaking, the closest equivalent to a cookbook headnote on a WordPress site is the short description inside the recipe card itself. With plugins like WP Recipe Maker, that concise Summary field is separate from your narrative post content. Your storytelling is in the blog post above the recipe card. The Summary field is a brief, one-to-three-sentence description. WP Recipe Maker uses it as the recipe description within the JSON-LD structured data it generates from your recipe fields.
What does a recipe headnote include?
A good headnote earns its keep by doing two jobs at once: it helps readers decide if they want to make the recipe, and it stops them from getting surprised halfway through. You don’t need to cram everything in every time, but most great headnotes pull from the same small set of building blocks.
- Story or origin: A quick bit of context that explains where the recipe came from – a family habit, a holiday meal, a trip, or the problem the recipe was meant to solve. Keep it relevant to the dish so it feels like an invitation, not a detour.
- Important information: The things a cook would want to know before starting, like a technique that can go wrong, a step that takes longer than it sounds, or a piece of equipment that really does matter.
- Substitutions and sourcing: Ingredient swaps for allergies or pantry gaps, plus where to find anything unusual. Headnotes often include substitutions, especially when the swap changes texture, cook time, or spice level.
- Pairings: A simple “serve it with…” that helps readers turn one recipe into a full meal, or use up what they already have.
- Attribution: A clear credit line when the recipe is adapted, inspired by, or passed down from someone else. This builds trust and keeps your work ethically tidy.
Use the pieces that help the cook most, then keep the rest for Notes or later sections. If you want to tighten the rest of your recipe writing too, check out our recipe writing guide and the recipe writing checklist included.
Why recipe headnotes matter
Professional cooks read the headnote for the same reason they scan a recipe twice: it’s where the useful “heads-up” information usually lives. A good headnote can save someone from the classic mistakes that don’t show up in an ingredient list – the sauce that needs an extra five minutes to reduce, the dough that feels too sticky until it rests, or the spice that blooms quickly and burns if the heat is too high.
Headnotes also build trust. When you point out the exact moment a recipe can go wrong – and how you fixed it during testing – readers can see that you’ve already worked through the tricky parts. That reassurance makes the recipe feel more reliable before they even start cooking.
Sensory detail helps readers decide if the recipe fits their mood or taste. “Fragrant with toasted cumin and a squeeze of lime” tells you something real about the dish. Words like “delicious” or “amazing” don’t give the cook much to work with.
On food blogs, the introduction above the recipe card often includes many of the elements you’d traditionally see in a cookbook headnote. Because there’s no print page limit, writers have space to add context, troubleshooting notes, and variations that help readers succeed with the recipe.
Those longer introductions can also support search visibility and reader engagement, which matters because many free recipes are supported by ads, affiliates, or sponsorships. The trick is balancing both audiences: people who enjoy the story and people who want to cook right now.
Different headnote styles and tones
Headnotes can sound very different from one another, and that’s a good thing! The tone should match your overall blog voice and the kind of recipe you’re sharing. Here are three examples we love:
Personal and warm
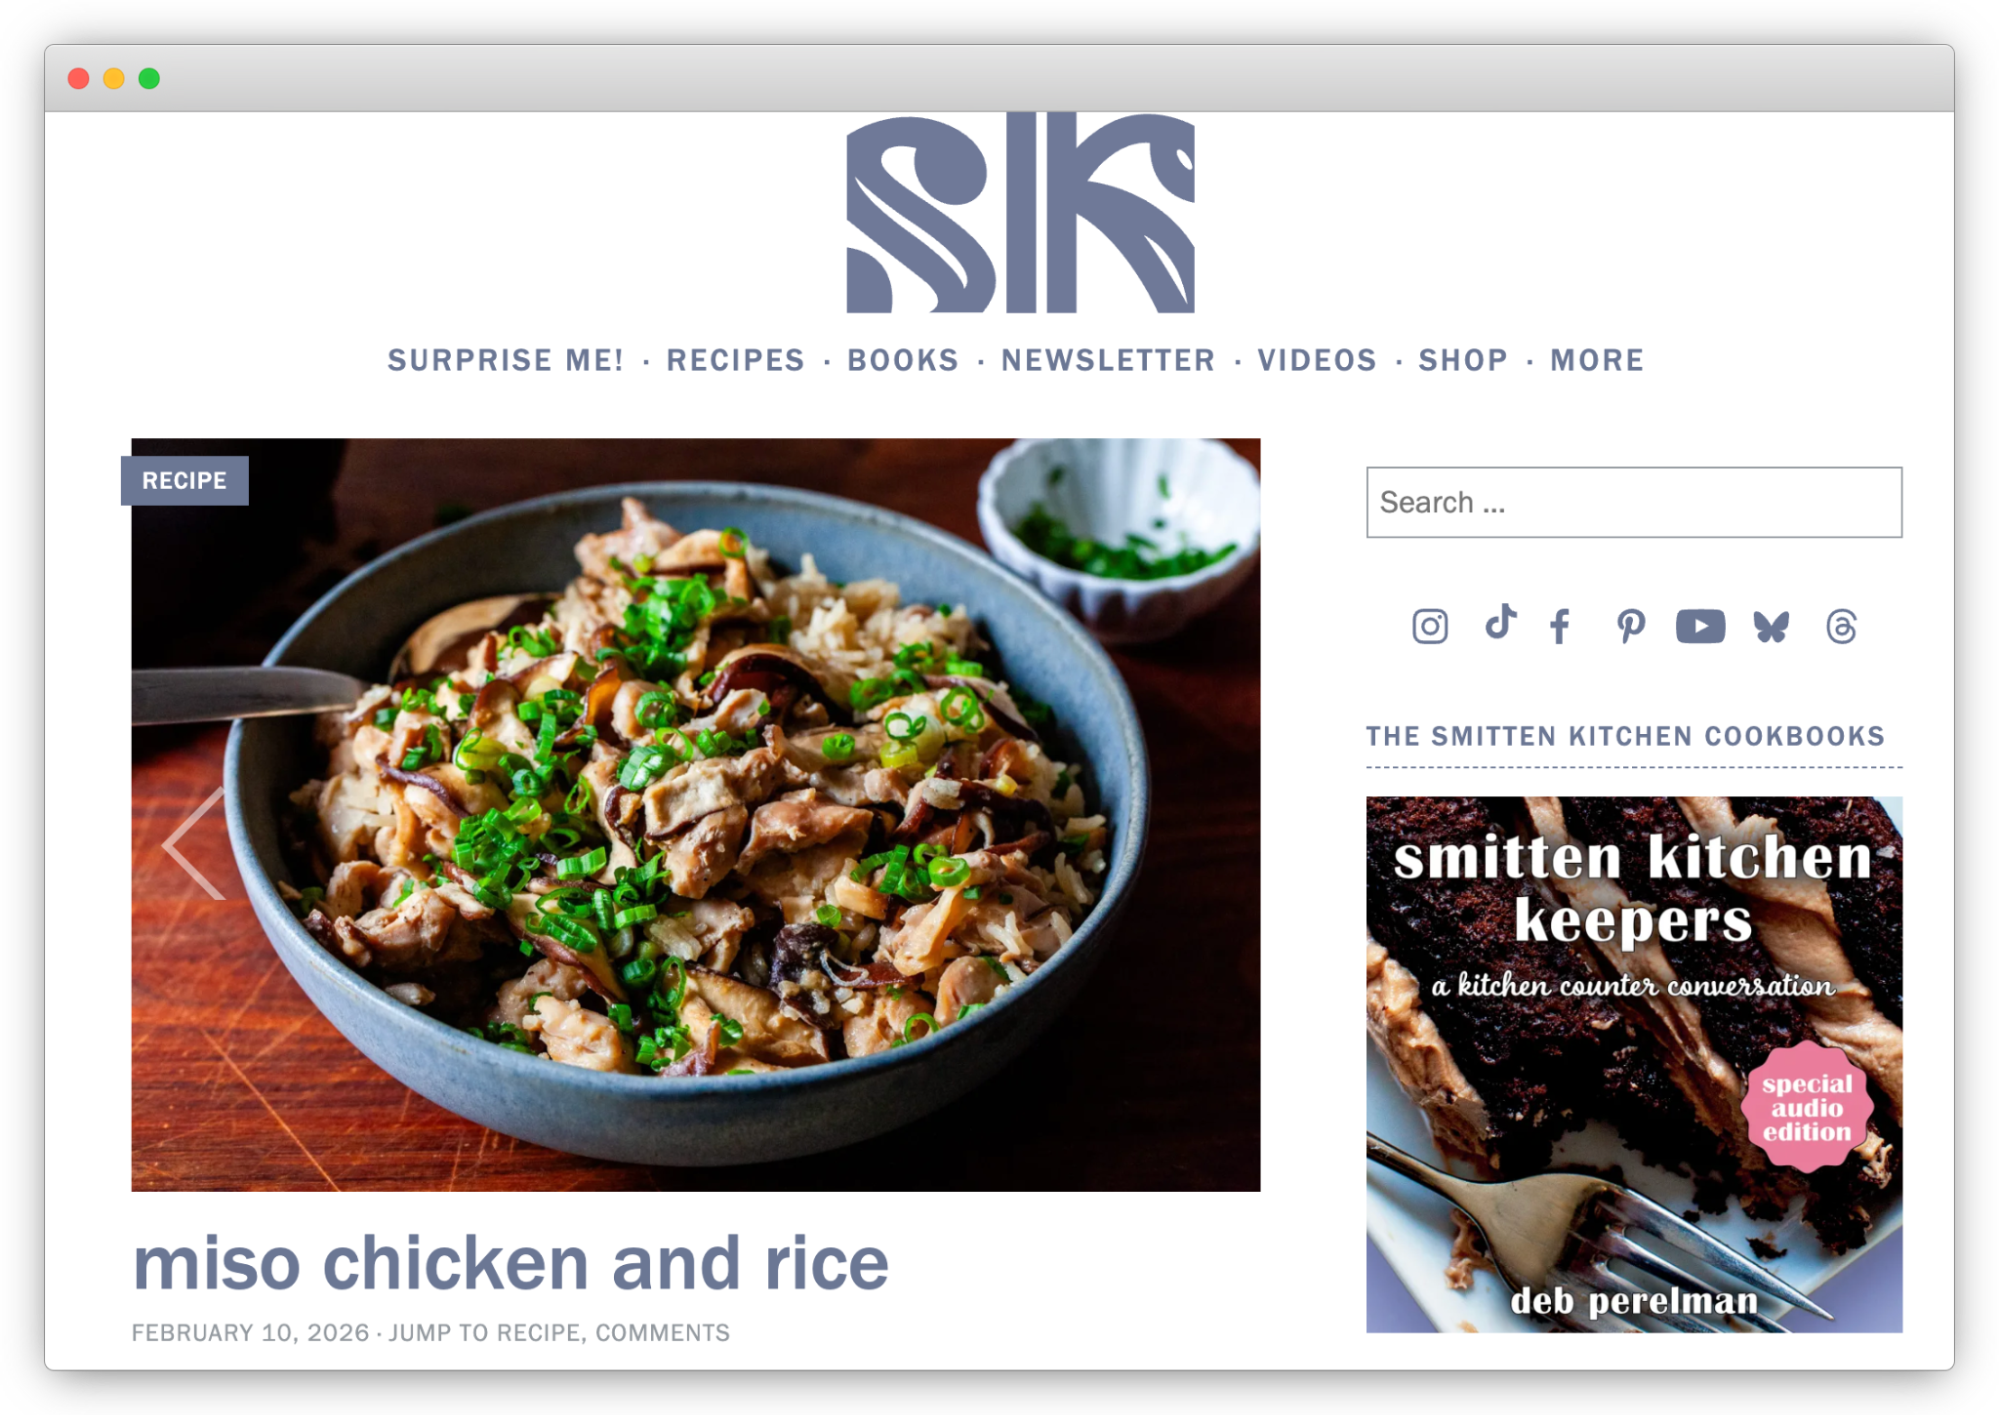
In the Smitten Kitchen Miso Chicken and Rice recipe Deb Perelman writes:
“And what did I use that rice cooker for? Obsessively, this. I made miso chicken and rice (and variations) almost every week, and 10 months later, we’re not even a little sick of it.”
You get real-life context (gas leak life, rice cooker era), repetition (“obsessively”), and a clear promise: big flavor, easy weeknight cooking. Story and usefulness are tightly linked to the dish.
Practical and brisk
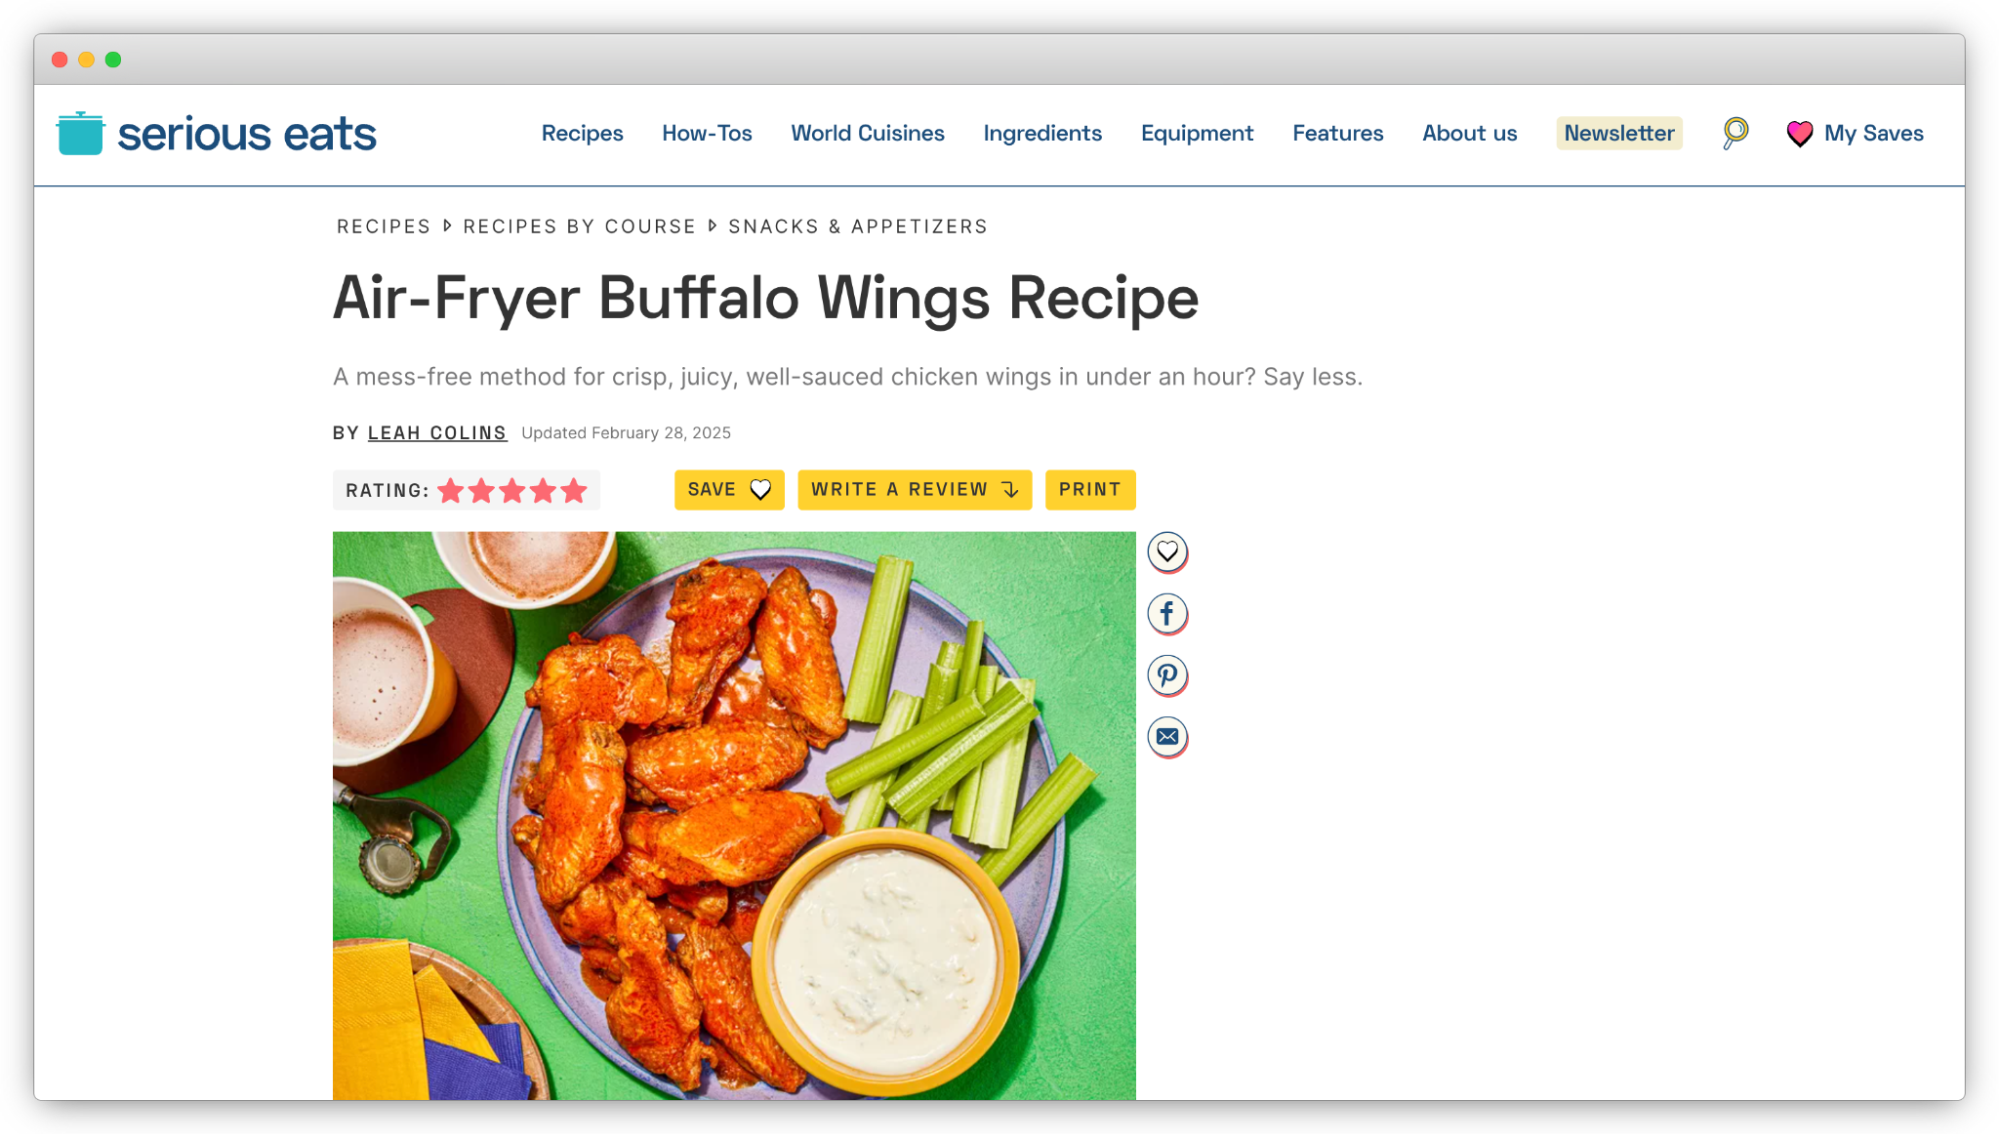
On Serious Eats, many headnotes lean into efficiency and technique. For their air-fryer wings, the tone is straight to the point:
“A mess-free method for crisp, juicy, well-sauced chicken wings in under an hour? Say less.”
The focus stays on method and payoff: minimal effort, crisp skin, clear timing. The value is in the reassurance that the technique has been tested and optimised.
Authoritative and historical
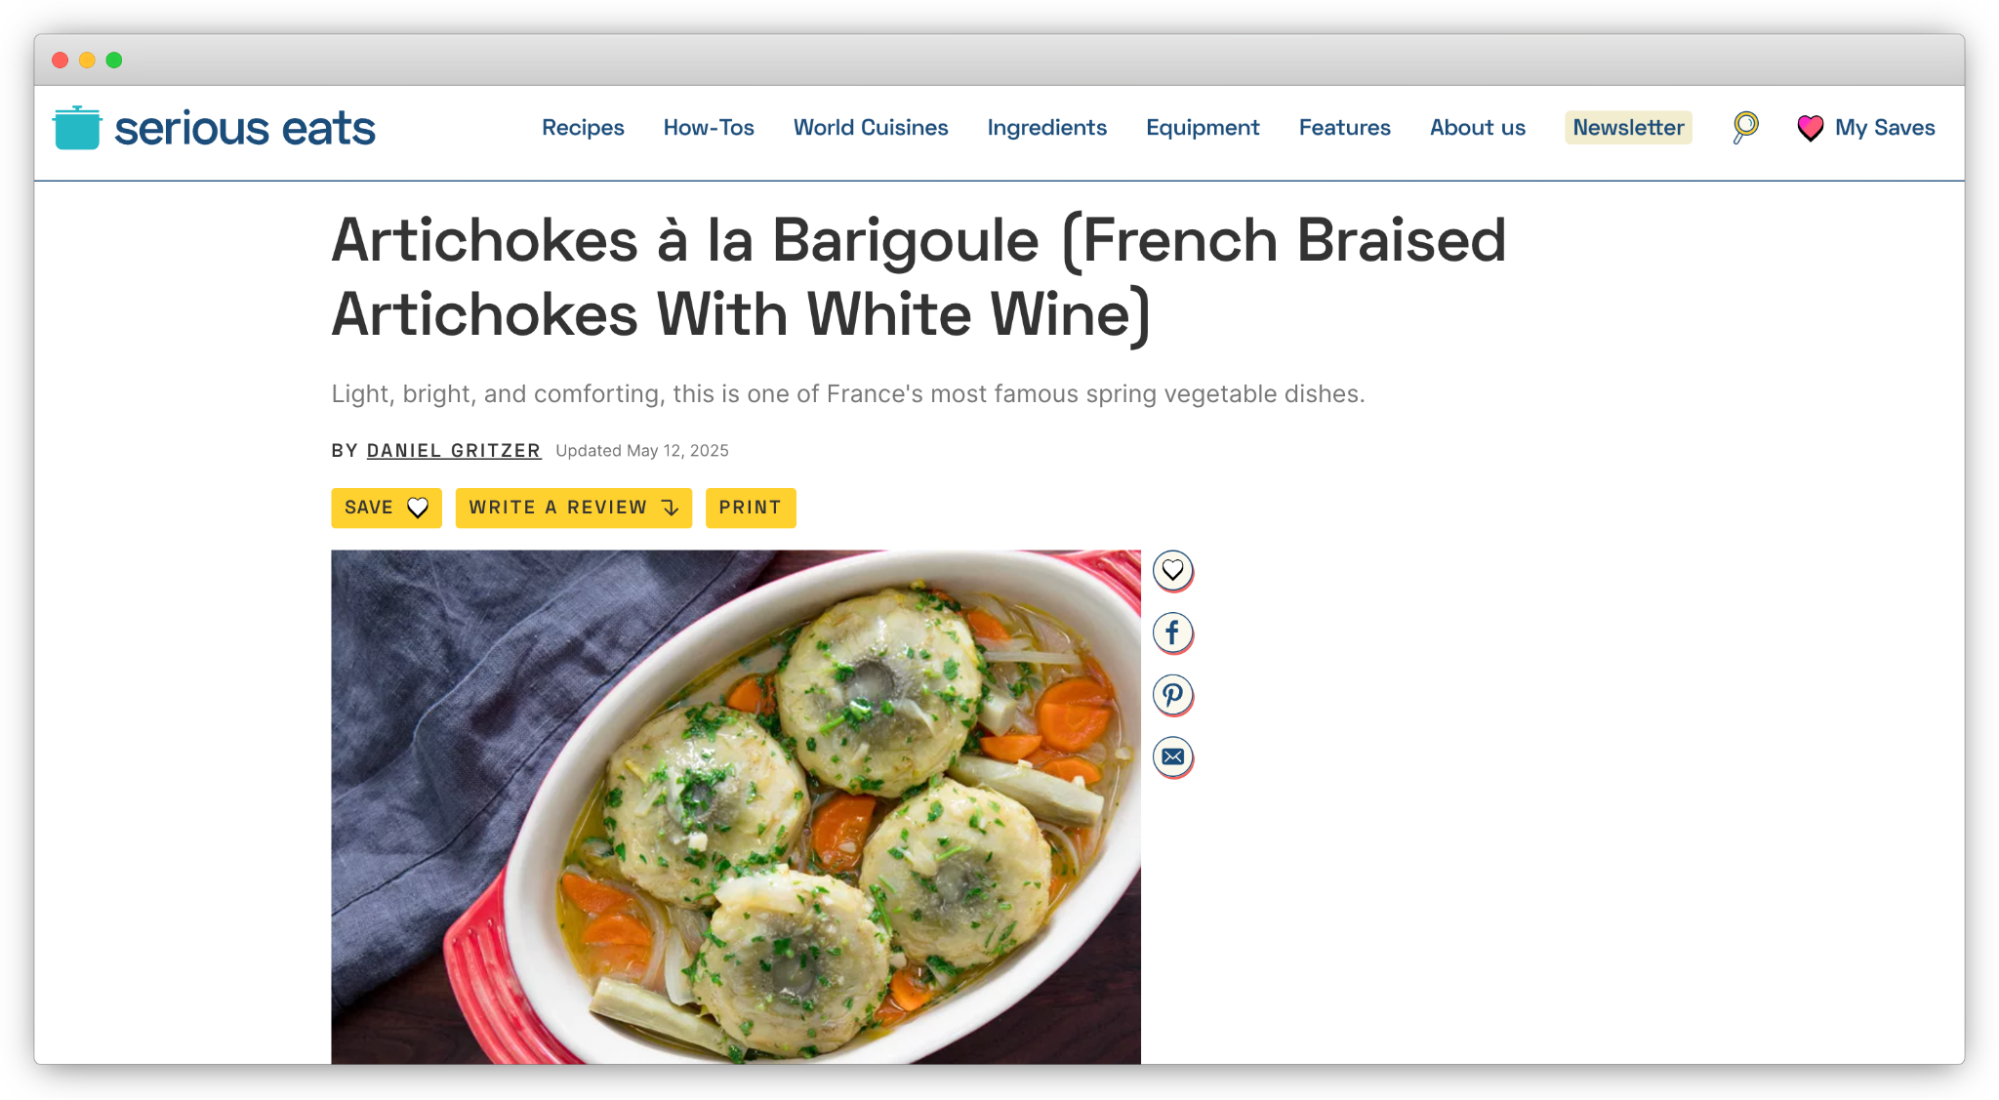
For French Artichokes à la Barigoule, Daniel Gritzer opens like a mini essay on culinary history:
“In my English translation of La Bonne Cuisine, a 1927 French cookbook, the recipe headnote for artichokes à la barigoule is explicit about the mushroom requirement.”
He compares multiple classic cookbooks and traces how the dish evolved, then explains which version his recipe follows. The tone feels like a cooking teacher or food historian guiding you through why this method matters, which builds a lot of trust for traditional or technical recipes.
Across all three, the tone matches the brand: Smitten Kitchen’s chatty intimacy, Serious Eats’ test-kitchen focus, and the more scholarly deep dive for a classic French dish.
How to write effective recipe headnotes
Start by swapping vague praise for concrete detail. Instead of “a delicious chicken dinner,” try “charred lemon skin over juicy thighs, piled on peppery arugula.” Instead of “an amazing chocolate cake,” try “a fudgy center with a crackled top that stays moist for days.” Sensory language helps readers decide quickly if this fits their taste, effort level, and mood.
Use the headnote to preempt questions you know will land in your comments:
- Diet tweaks (gluten-free option, dairy swap, vegan variation).
- Equipment realities (works in a basic pan, needs a stand mixer, fits a 3-cup rice cooker).
- Time sinks (30 minutes hands-on, long chill time, best made ahead).
- Spice level or strong flavors (bitter greens, funky cheeses, smoky heat).
Be honest when something might divide people: “The radicchio stays a little bitter,” or “the texture is softly set, not sliceable.” That honesty builds long-term trust.
Common things to avoid:
- Leaning on generic words like delicious, amazing, and mouthwatering without saying why.
- Stuffing your whole life story into the recipe card Summary field – keep narrative in the post content and use the Summary for a tight 1-3 sentence description.
- Overselling a recipe with overexcited language that creates expectations the finished dish can’t match.
For attribution, keep it short and clear:
- “Adapted from [Recipe Name] by [Author/Source].”
- “Inspired by [Chef Name]’s approach to [technique].”
- “Loosely based on [Cookbook Title].”
- “My grandmother’s method, passed down from [origin].”
Attribution shows you respect other creators’ work and signals to readers that you take recipe testing and recipe ethics seriously!
Display recipe headnotes with WP Recipe Maker
Once you understand what a headnote should say, the next question is, where does it actually live on your site?
In WP Recipe Maker, the structure is intentionally split so each type of content does its job properly.
Your full headnote (the story, context, testing notes, flavor expectations) belongs in your regular post content above the recipe card. That’s where you have room to build connections and explain things naturally. It also keeps your writing readable instead of cramming everything into a small recipe field.
Inside the recipe card, the Summary field is for a short, focused description. Think one to three sentences that clearly state what the dish is and why someone should make it. That Summary automatically feeds into the recipe’s JSON-LD structured data, which means search engines can understand and display your recipe correctly without you having to code anything manually.
Many food blogs using WP Recipe Maker follow this structure. For example:
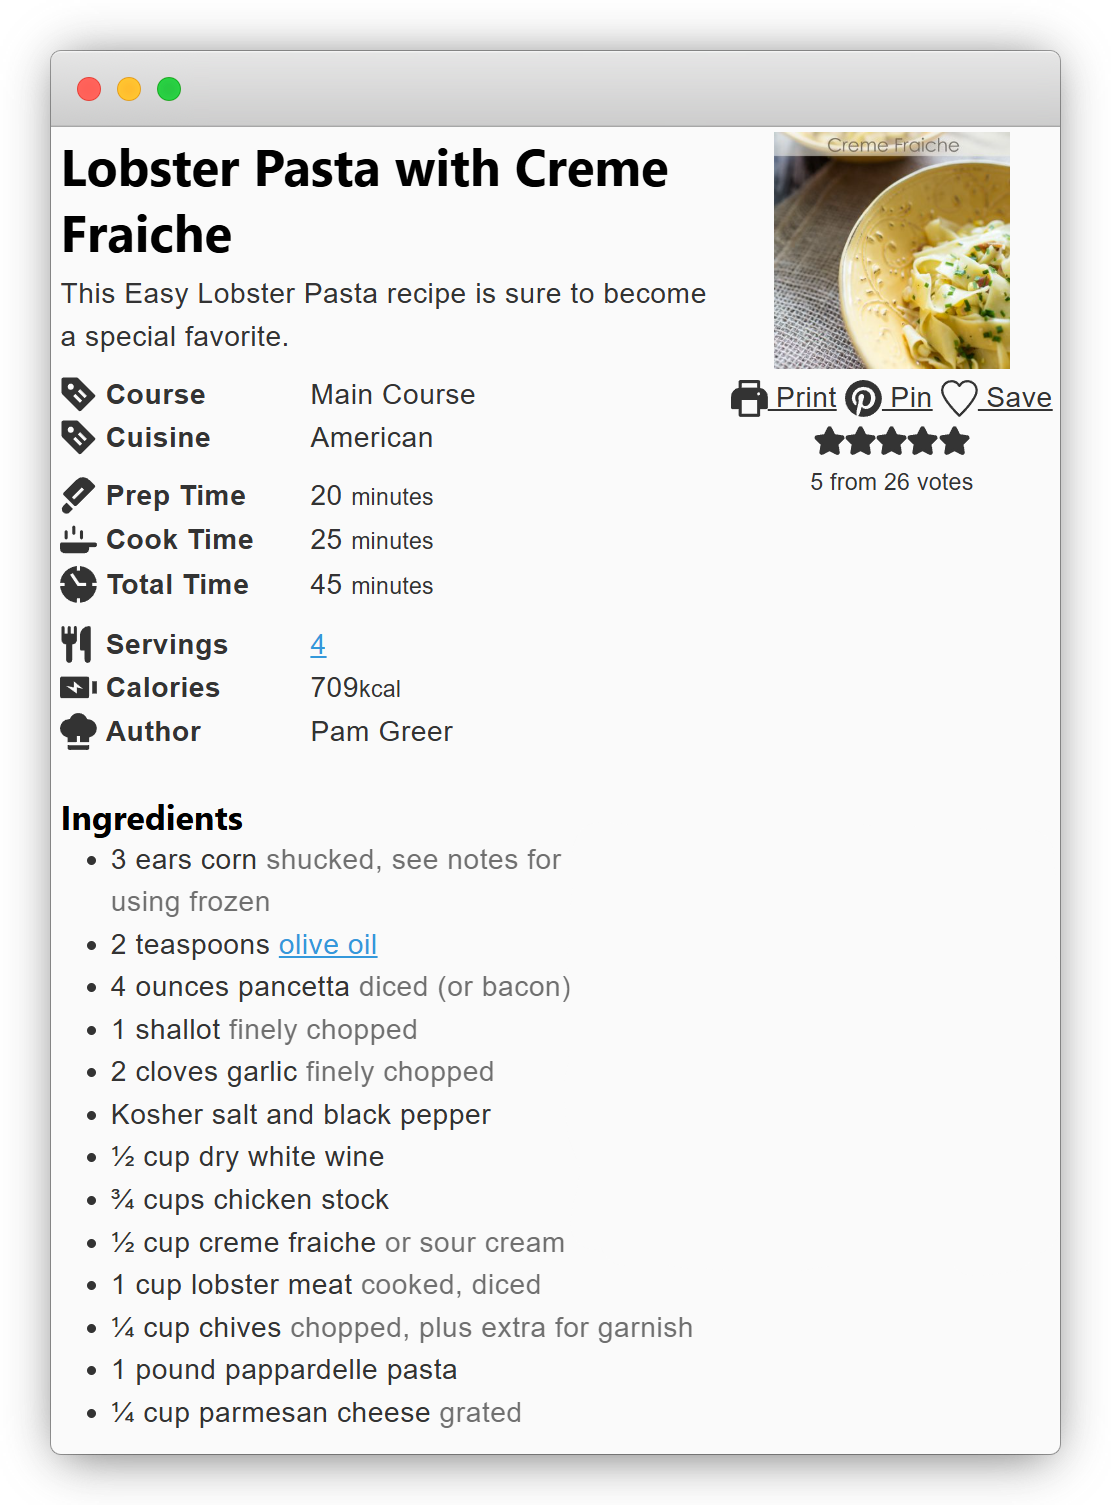
On Sidewalk Shoes, the introduction carries the story and context, while the recipe card Summary gives a focused one-liner – “This Easy Lobster Pasta recipe is sure to become a special favorite” – right before the ingredients list.
More practical guidance – substitutions, storage tips, make-ahead notes – fits best in the Notes field. Sidewalk Shoes does this well, keeping ingredient swaps like corn, pancetta, and cheese alternatives in Notes so the cooking steps stay clean and uninterrupted.
You can control where the Summary and Notes appear using the Template Editor. For example, many bloggers place the Summary directly under the recipe title so readers immediately understand what the dish is before scanning the ingredients. Notes are often placed at the end of the recipe card so substitutions, storage tips, or extra guidance don’t interrupt the cooking steps.
WP Recipe Maker also lets you add a Recipe Snippet at the top of your post – a mini preview that’s output automatically and fully editable in the same Template Editor. The snippet template can include whatever serves your readers best at that point in the post: a Jump to Recipe button, the recipe Summary, cook time, or a combination of all three. This is especially useful on longer posts and on mobile, where reaching the full recipe card means scrolling past your entire headnote.
This results in your story staying human, your recipe card staying structured, and everything appearing where it should – for both readers and search!
Start writing headnotes that connect with cooks
When writing a recipe headnote, focus on clear, specific details about flavor and texture instead of vague praise. Highlight any surprising elements for the reader, such as an extended resting time, intense spices, an unexpected texture, or the requirement for specialized equipment.
Reserve your longer context for the main post. Use the dedicated Summary field for a brief, precise description, and place practical advice and suggestions in the Notes section of the recipe.
When you approach headnotes this way, your recipes feel more reliable. Readers know what to expect before they start cooking, and that consistency builds trust over time. Apply this to your next recipe post and see how it changes the tone!
Try WP Recipe Maker to handle the structured data and recipe layout automatically, so you can focus on writing clearly and honestly.