Affiliate marketing for food bloggers is a great way to earn commission when readers purchase products through your affiliate links. However, the secret to success is in where and how you place these links within your recipe posts. Strategic link placement can determine whether your affiliate links generate income or go unnoticed.
By focusing on important moments when readers are most likely to make purchasing decisions, and using tools like WP Recipe Maker for integration, you can turn your recipe content into a revenue-generating asset while staying FTC-compliant!
Why your affiliate links don’t convert
When people search for a recipe, they’re looking to cook, not shop. They’re focused on how to make that perfect banana bread, not which mixer to buy. This is why affiliate links in recipe posts often don’t work as well as we’d hope. While affiliate links can be nice, ads tend to bring in more money from recipe traffic. But don’t worry – affiliate links do work, but they need to be placed at the right moments!
Ads will likely earn more than affiliate links
When it comes to monetization, food blogger income reports show that display ads usually outperform affiliate commissions on recipe traffic. For example, The Conscientious Eater boosted monthly income from $100 to $600 by switching to Mediavine with a $10 RPM (Revenue Per Mille), and Rich and Delish earned over $10,000 in January 2024, primarily through ads at a $24 RPM. Meanwhile, Amazon Associates rates vary, and affiliate links depend on readers actually clicking and purchasing. Ad networks, on the other hand, generate revenue from pageviews, regardless of clicks. To put it simply, ads often earn more when you have recipe traffic, so treat affiliate links as bonus income while you work toward qualifying for ad networks like Mediavine, which typically require 50,000 sessions (around 1,700 daily visitors) in the past 30 days.
Place affiliate links at these three intent moments
Now that you know why affiliate links often don’t work as well as they could, let’s talk about where to place them so they actually work. Successful affiliate links align with your readers’ intent at vital moments: when they first discover the recipe, when they’re planning what they need to make it, and when they’re researching products after they’ve cooked. These are the moments when your recommendations feel relevant and helpful, not intrusive, and are more likely to convert.
Use your headnote to capture casual discovery
The headnote is a great place to mention one or two tools that make your recipe work. For example, “This skillet cookie needs a 12-inch cast-iron pan” naturally leads to an affiliate link while setting expectations early on. Readers appreciate knowing what tools they’ll need before diving into the recipe, and this upfront mention helps them decide whether to keep reading. Just don’t overload the introduction – leave the full equipment list to your recipe card. Keep it simple in the headnote to focus on what’s truly essential for the recipe to succeed.
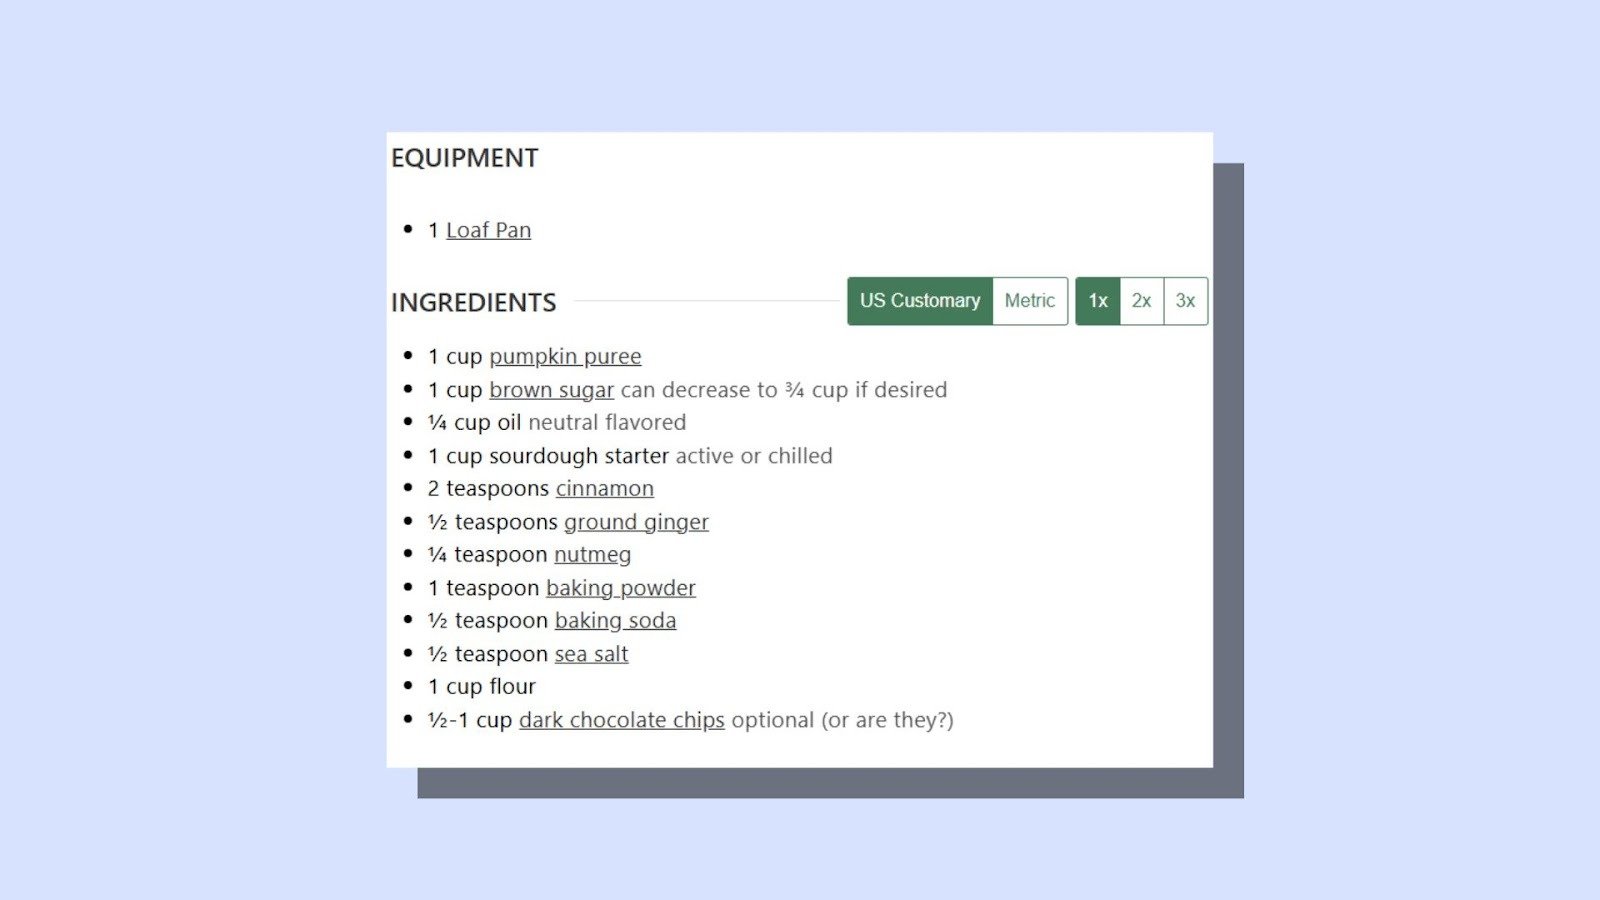
Link specialized equipment in your recipe card
Your equipment list is where readers are already checking what they need to cook the recipe. This is the perfect place to link specialized tools like Dutch ovens or immersion blenders – things readers might not have in their kitchen yet. Avoid linking to common items like mixing bowls, as they’re less likely to encourage a purchase because people probably already have one. This works because readers are planning what they need right now. If you mention tools in the instructions, do it only when that specific step calls for them.
Create gear guides that capture research intent
Think about building standalone gear guides, like “Best Stand Mixers” or “Essential Bread Tools,” with affiliate links to each recommended product. Link to these guides from your individual recipes when readers are looking for deeper product comparisons. These dedicated pages give you space to explore the details of each item, which doesn’t always fit in a recipe post. Gear guides are perfect for capturing the post-cooking intent – when readers decide it’s time to upgrade their kitchen tools after making your recipe a success!
Stay FTC compliant and protect your traffic
These affiliate link placements will work wonders, but only if you stay compliant with FTC rules. It’s simpler than it sounds – just make sure you’re placing clear disclosures near your links, so readers know they’re affiliate recommendations. Also, use the right link attributes like rel=”nofollow” or rel=”sponsored” to keep things transparent and trustworthy.
Write clear disclosures and place them near your links
Put your affiliate disclosure close to the links, not in the footer. A quick line near the top of the post and another near your equipment links keeps things clear for readers before they click. For Amazon, the wording needs to be exact: “As an Amazon Associate, I earn from qualifying purchases.” To be compliant, place one disclosure at the top of your post and another near your recipe card’s equipment section. This means the disclosure is in the proper proximity to the affiliate link and is easily seen by your readers. Use plain language like, “This equipment list below contains affiliate links,” to communicate honestly with your audience and build trust.
Tag every affiliate link with rel=”sponsored nofollow”
To stay compliant with Google’s guidelines, make sure all paid links are tagged with rel=”sponsored”. This tells Google the link is an advertisement or paid placement and prevents search ranking credit from passing through these commercial relationships. It’s also smart to add rel=”nofollow” for compatibility with other search engines and older guidelines. Leaving affiliate links untagged can put you out of step with Google’s paid link guidelines. Tagging them properly helps you stay compliant and keeps things transparent for readers.
Stay compliant and maintain reader trust
When linking to equipment, focus on specialty items readers might not already own, like specific pans, appliances, or tools required for certain recipes. Skip common items like mixing bowls or measuring spoons – every kitchen already has those. The trick here is making your recommendations feel helpful, not promotional. Links to specialized tools solve immediate needs, which makes them more likely to convert. On the flip side, overloading your post with affiliate links can make it feel more like a product catalog than a cooking resource, and readers will notice. Keep it balanced to maintain trust and keep your content valuable!
Use WP Recipe Maker to manage affiliate links across hundreds of recipes
Managing affiliate links manually across tons of recipes? That’s a lot of work! WP Recipe Maker makes it easy by letting you set up global links for ingredients and equipment. It keeps everything compliant without the extra hassle, and as your site grows, it grows with you.
Define equipment links once and apply them everywhere
You only need to set the link for something like a “cast-iron skillet” once, and WP Recipe Maker automatically applies it to every recipe that uses it. If a product gets discontinued, just update the link in one place, and it updates across your entire site instantly. This saves you time and hassle, especially when you consider that manually updating links across hundreds of recipes can cost per recipe if you hire help!
Use Amazon API integration to stay compliant automatically
Managing your Amazon affiliate links just got easier. With the Amazon Product Advertising API integration, you can automatically keep product images and information updated every 24 hours without worrying about compliance. This integration replaces the old SiteStripe method Amazon phased out in 2023, and it lets you search for products by name or ASIN right from your WordPress dashboard while creating recipes. It’s a simple, set-it-and-forget-it way to keep everything up to date and avoid common issues like outdated images or broken links that could risk your Amazon account!
Build compliance into your recipe template permanently
With the Template Editor and Custom Recipe Fields, you can automatically position disclosure text above your equipment sections, saving you from having to manually add it to each post. By creating one custom disclosure field in your template, you ensure that every recipe on your site displays it without any extra work. Plus, global settings enforce rel=”sponsored nofollow” attributes for all equipment and ingredient links across your site.
Start with core equipment and scale systematically
To avoid feeling overwhelmed, start by defining affiliate links for the ten most-mentioned tools in your recipes. Set these up in the central management system, then apply them across your existing recipes in bulk. You don’t need to go into each post individually – this saves time and keeps things consistent. As your site grows, use your affiliate reporting to see which equipment links perform best. WP Recipe Maker helps you manage links at scale, and if you want click tracking, Easy Affiliate Links can add that. This makes it easier to prioritise adding links for tools your readers actually care about. With this approach, you can scale affiliate links across hundreds of recipes without the workload ramping up, keeping everything consistent as you publish more.
Add affiliate links to your highest-traffic recipes
Now that you understand why recipe traffic doesn’t always lead to immediate sales, how to place affiliate links at the right moments, and how to stay compliant without drowning in manual work, it’s time to put it into practice. Start small by testing this system with your three highest-traffic recipes. Add affiliate links in the headnote, populate the recipe card equipment links, and set up a few ingredient links for items you mention all the time. Create one supporting gear guide, then track your click-through rates and commissions for 30 days to see what resonates most with your audience.
Once you’ve validated your approach with 5-10 high-traffic recipes, it’s time to take it up a notch. Upgrade to WP Recipe Maker Premium to centralize your affiliate links and automate disclosures and link attributes across every recipe!